# Skill: iOS ASO Generator A Claude Code skill that scans your Swift/SwiftUI codebase and emits paste-ready App Store metadata — App Name, Subtitle, Keywords, Description, and more. category: Skill date: Sat May 02 2026 00:00:00 GMT+0000 (Coordinated Universal Time) reading-time: 6 min read url: https://conor.fyi/writing/ios-aso-skill --- # iOS App Store Optimization (ASO) Generator This skill scans an iOS Swift/SwiftUI codebase and emits a single English-only `ASO.md` at the repo root containing paste-ready App Store metadata plus a research-notes appendix. It encodes Apple's 2025–2026 metadata rules, WWDC25 changes (App Store Tags, CPP organic keywords, SAP collapse), and a codebase-signal extraction taxonomy. The whole searchable surface on the App Store is **160 characters total**: App Name (30) + Subtitle (30) + Keywords (100). Everything else exists for conversion or browse — not search ranking. Get those 160 right and the rest follows. ## Install ```bash /plugin marketplace add https://github.com/conorluddy/ASOMarketplace /plugin install ios-aso-plugin ``` Then in any iOS project: ``` /ios-aso ``` ## When this skill applies Trigger when you want to: - Generate ASO metadata for a new iOS app - Audit or improve an existing App Store listing - Pick keywords from your codebase - Choose a category, write a subtitle, draft a description, or prepare for submission - Check metadata for rejection risk (2.3.7) The skill assumes English (U.S.) primary locale. Cross-localization expansion (en-GB, en-AU, en-CA, es-MX) is offered as an optional appendix in the output. ## Workflow ### Step 1 — Confirm iOS project and find the brand Confirm the working directory is an iOS project: look for `*.xcodeproj`, `*.xcworkspace`, or a `Package.swift` declaring an iOS platform. Find the brand name in this precedence order: 1. `fastlane/metadata/en-US/name.txt` (if present, treat existing files as the source of truth and propose refinements rather than rewrites) 2. `CFBundleDisplayName` in the primary target's `Info.plist` 3. `CFBundleName` 4. The Xcode target name 5. The repo's README first heading ### Step 2 — Scan the codebase for signals Build a feature inventory by union-ing signals across Tier 1–4 sources: - **Tier 1**: `Info.plist` (`NS*UsageDescription` strings), `Localizable.strings` / `.xcstrings`, `fastlane/metadata`, README - **Tier 2**: `*.entitlements`, `PrivacyInfo.xcprivacy`, Xcode capabilities (widgets, Live Activities, App Clips, Background Modes) - **Tier 3**: App Intents (`AppIntent`, `AppShortcut`), StoreKit IAPs, SwiftUI/UIKit view + module names, Core Data / SwiftData entities, `Package.swift` / Podfile dependencies - **Tier 4**: Snapshot test names, accessibility identifiers Tokenize all user-facing strings, frequency-rank after stop-word filtering, and produce a candidate keyword pool of 30–50 single words. ### Step 3 — Synthesize the metadata **Pick the keyword set, not phrases.** Choose 10–20 single-word tokens that *recombine* across Title + Subtitle + Keywords into the highest-relevance 2- and 3-word phrases. Apple combines words across those three fields within a locale to form search phrases. Tokens multiply; phrases don't. Draft fields in this order: 1. **App Name (≤30 chars):** `Brand: Keyword Phrase` (colon is the most efficient separator). For new/indie apps put 1–2 of your strongest keywords here. 2. **Subtitle (≤30 chars):** A readable mini-sentence with 2–3 keyword tokens *not* used in the Name. Leave 1–2 chars headroom — the last word of a fully-packed subtitle occasionally fails to index. 3. **Keywords field (≤100 chars):** Comma-separated, **no spaces after commas**. Single words only. Exclude every word already in Name, Subtitle, primary category, and Apple's stop-word list. 4. **Primary category:** Drives browse placement AND is a text-relevance signal in search. 5. **Secondary category:** Browse only. 6. **Promotional Text (≤170):** Updatable anytime without a build — use for promos, new features, social proof. 7. **Description:** First 170 chars are the hook (above the "more" fold). Then 5–10 benefit-led bullets. 8. **What's New:** Template only. 9. **IAP names (≤30) and descriptions (≤45)** for each detected StoreKit product. 10. **Screenshot caption suggestions** — per WWDC25, captions feed Apple's AI tagging. ### Step 4 — Validate against the rules **Hard rules:** - App Name ≤30 chars; Subtitle ≤30; Keywords ≤100 - Keywords field has **no spaces after commas** — Apple counts them - **No word appears in more than one of Name/Subtitle/Keywords** (or in the primary category) - **No plurals** of singular forms used elsewhere (Apple stems English; `climb` and `climbs` are duplicates) - Single words only in the Keywords field **Apple Review 2.3.7 rejection triggers (default-exclude):** - Trademarks the developer doesn't own - Competitor brand names in the Keywords field - Superlatives without proof: `#1`, `Best`, `Top`, `World's Best` - Pricing language: `Free`, `50% Off`, `$0.99` - Generic catch-alls: `app`, `the`, `for`, `of`, `game`, `best`, `top` - "AI" claims without genuine AI integration ### Step 5 — Write `ASO.md` The skill writes a 16-section output file: | Section | Purpose | |---------|---------| | TL;DR | One-line summary of the strategy | | App Name | Final with char count | | Subtitle | Final with char count | | Keywords | Final comma-separated string | | Promotional Text | Updatable copy | | Description | Full with fold-break marked | | What's New | Template | | IAPs | Names + descriptions per product | | Categories | Primary + secondary | | Screenshot Captions | Per-screen suggestions | | Cross-Localization | Optional en-GB/AU/CA/MX appendix | | Custom Product Pages | CPP keyword targets | | ASA Seed | Apple Search Ads seed terms | | Pre-Submission Checklist | 2.3.7 and hard-rule verification | | Research Notes | Why each choice was made, citing codebase evidence | | Candidate Pool | Every considered keyword with evidence, for iteration | The **Research Notes** section is what you read to iterate — concrete evidence like "Picked `workout` because it appears 47× across `Localizable.strings` and the project depends on HealthKit." ## Notes on the post-September-2025 keyword research landscape The legacy Apple Search Ads "Search Popularity" score collapsed on Sept 29, 2025 — ~77% of U.S. keywords now floor to "5". Don't rely on it. Free signals that still work: - App Store autocomplete (Apple-direct) - App Store search results count + which apps rank for a term - Apple Ads' beta Monthly Search Term Rank Report (limited to legacy SAP ≥ 35 terms) If you have access to AppTweak / Sensor Tower / MobileAction / Appfigures / App Radar — cross-validate the skill's picks. The skill itself doesn't assume any paid tool. ## Iteration ASO is iterative. The skill produces a v1. Submit, wait ~4 weeks, track keyword rankings in App Store Connect Analytics, and replace bottom-quartile keywords with alternates from the Candidate Pool. Promotional Text refreshes every 30–90 days. Re-run the skill after major feature ships. --- # Skill: Team Work A Claude Code skill that turns a session's jobs-to-be-done into a parallelizable plan for an agent team — tiered models, specialist subagents, and dependency waves that don't merge-conflict with themselves. category: Skill date: Sat Apr 18 2026 00:00:00 GMT+0000 (Coordinated Universal Time) reading-time: 7 min read url: https://conor.fyi/writing/team-work-skill --- # Team Work — Fan Out a Session Without Breaking It Most working sessions end with a pile of loosely-related things the user wants done. Do them serially and you wait. Fan them out naively and you get merge conflicts, wasted opus runs on trivial work, and parallel agents stepping on the same files. This skill reads the conversation, decomposes it into atomic tasks, assigns each a model tier and the right specialist subagent, and groups them into waves that can actually run in parallel. ## When to Use Use this skill when you have a backlog of loosely-related work from the current session and want to fan it out across agents. Trigger phrases include "team this up", "use a team", "use agent teams", "delegate this", "split this work", "parallelize this", "fan this out", "divide and conquer", or an explicit `/team-work`. Also useful when a task is big and you want help farming it out. ## Why This Exists Parallel fan-out looks like free speed until the second run writes to the same file as the first, or the architecture task gets a haiku, or four independent workers all decide they need to read CLAUDE.md from scratch. The skill exists to eliminate the three failure modes that happen when an enthusiastic orchestrator spawns agents without thinking: 1. **Model mismatch.** Opus on a rename is waste; haiku on architecture is theatre. 2. **Shared-file collisions.** Two agents editing `SomeFile.swift` in parallel is a merge conflict waiting for you to clean up. 3. **Ignored specialists.** A generic agent re-deriving domain context another subagent already carries is expensive and worse. The skill's job is to turn "here's a bunch of stuff" into a small, honest plan — small enough to scan in ten seconds, honest about dependencies, and explicit about which agent handles what. ## Workflow ### Phase 1: Extract JTBD Read the conversation. List every concrete deliverable the user has expressed wanting. Be specific — each item names a file, a feature, a deliverable. Not a theme. Bad: "Improve the dashboard" Good: "Add empty-state card to the Base tab streak section" If the session is genuinely ambiguous, ask one clarifying question. Never interrogate. ### Phase 2: Decompose into atomic tasks A task is atomic when: - A single agent can own it start-to-finish - It has a clear "done" signal — file saved, test passes, answer returned - It doesn't need coordination with another in-flight task Split anything bigger. Merge tiny tasks that touch the same area — the overhead of spawning an agent isn't free. The cost of a cold-start matters. ### Phase 3: Assign tier and model | Tier | Model | Thinking | Shape of work | |------|-------|----------|---------------| | **S** | haiku | low | Lookups, single-file reads, mechanical renames, formatting, running a known command and reporting, summarising a file | | **M** | sonnet | medium | Typical feature work, multi-file edits, focused refactors, writing tests, implementing a specified component, fixing a known bug | | **L** | opus | high | Architecture decisions, cross-cutting refactors, ambiguous/novel problems, tricky debugging, system design, security review | Bias cheaper when uncertain — haiku failing fast beats opus doing trivial work. But don't send opus-shaped problems to sonnet. The tiers exist because the work is actually different. ### Phase 4: Pick the right subagent Before defaulting to `general-purpose`, check the available subagent types. Specialists carry domain context a generic agent would have to re-derive from zero. 1. Scan the `Agent` tool's `subagent_type` list. 2. Match on domain — BJJ content to the `bjj-*` family, iOS/SwiftUI to `ios-swift-expert`, data pipelines to `bjj-data-engineer-*`, UI reviews to `grapla-ui-reviewer`, broad exploration to `Explore`, planning to `Plan`. 3. Simple tasks don't need specialists. A haiku-tier lookup runs fine on `general-purpose`. Specialists earn their seat when domain nuance actually matters. 4. Respect the agent's own pinned model preference unless the task clearly warrants an override. If nothing fits, use `general-purpose` with the chosen tier. ### Phase 5: Build dependency waves Group tasks into waves. Inside a wave: 1. **No task depends on another in the same wave.** 2. **No two tasks edit the same file.** If they do — even if logically independent — split them across waves. Merge conflicts from parallel agents are painful to unpick. 3. **Read-only tasks are always safe to parallelize** with each other and with writes, as long as they don't need the writes' output. A single-task wave is fine when one thing has to land before everything else. ### Phase 6: Present the plan ```markdown # Team plan: ## Tasks - **T1** — . Tier: S/M/L. Model: haiku/sonnet/opus. Agent: . Files: . Deps: none | T?, T? - **T2** — ... ## Waves - **Wave 1** (parallel): T1, T3, T5 - **Wave 2** (after W1): T2, T4 - **Wave 3** (after W2): T6 ## Notes ``` Tight. A briefing, not a dissertation. ### Phase 7: Spawn Three modes based on how confident the plan is: | Situation | Mode | |---|---| | Obvious, small, low-risk (≤3 tasks, no shared files, clear scope) | **Act** — build, show briefly, spawn | | Ambiguous, >3 tasks, shared files, or destructive steps | **Confirm** — present, get sign-off, spawn | | User said "just plan it" | **Plan only** — write the plan, stop | When in doubt, confirm. The cost of pausing is a sentence. The cost of a bad fan-out is wasted runs and broken state. When spawning: - All tasks in a wave in **one message**, parallel `Agent` calls. - Wait for the wave to finish before the next. Foreground is fine for most; background only when tasks are genuinely independent and long. - Each agent's prompt is **self-contained** — it won't see the conversation. Include what to do, why it matters, file paths with line numbers, constraints from `CLAUDE.md` / `CODESTYLE.md` that apply, expected output shape, and a length cap when useful. - Don't write "based on your research, implement it." Push concrete instructions, not synthesis onto the agent. Between waves, report what landed and any surprises before launching the next. ## Guardrails - **Never spawn destructive actions in parallel without confirmation.** DB migrations, `git push`, force-pushes, deletions, external API calls with side effects. Those get their own wave and explicit sign-off. - **Respect the project's git flow.** Most projects don't allow direct pushes to main. Fan-outs land on feature branches. - **If agents need to write to overlapping areas, serialize them.** Parallel edits to the same file end in tears. - **Don't spawn agents for trivial work you can do inline faster.** A single-file edit doesn't need a subagent — the cold-start cost outweighs the parallelism. - **Stay inside available agent types.** The `Agent` tool lists them; don't invent names. ## Example A session has discussed three things: adding an empty-state to the Base tab streak card, renaming `StreakService` to `StreakTracker` across the iOS code, and writing a validator for a new position data field. ```markdown # Team plan: Base tab streak + data validator ## Tasks - **T1** — Rename StreakService → StreakTracker across grapla/. Tier: S. Model: haiku. Agent: general-purpose. Files: grapla/**/*.swift. Deps: none. - **T2** — Add EmptyStateCard to Base tab streak section when no sessions logged. Tier: M. Model: sonnet. Agent: bjj-ios-engineer-inherit. Files: grapla/Features/App/Views/BaseTab*.swift. Deps: T1. - **T3** — Add Zod validator for new `lever_points` field in position schema. Tier: M. Model: sonnet. Agent: bjj-data-engineer-inherit. Files: data/schemas/seed-models/position/enrichment-fields.ts. Deps: none. ## Waves - **Wave 1** (parallel): T1, T3 - **Wave 2** (after W1): T2 ## Notes T2 waits on T1 because the streak view references the renamed type. T3 is independent of the iOS work. ``` Wave 1 goes out as two parallel `Agent` calls in one message. Wave 2 spawns after both come back clean. ## Tone You're the team lead who's been around long enough to know that naive parallelism costs more than it saves. You write plans people can actually read. You push back on sending opus to do haiku work and on sending haiku to do opus work. You'd rather spend thirty seconds writing a dependency note than an hour unpicking a merge conflict from two agents that should never have run in the same wave. You're biased toward action, but you're honest about the cases where serializing is faster than parallelizing — and when a problem shouldn't be fanned out at all. --- # Claude Code Token Cheat Sheet Every env flag that affects token spend, grouped by impact. category: Engineering date: Tue Apr 14 2026 00:00:00 GMT+0000 (Coordinated Universal Time) reading-time: 4 min read url: https://conor.fyi/writing/ClaudeCodeTokenCheatSheet --- # Claude Code Cost Cheat Sheet Only the flags that affect token spend. Set via `env` in `settings.json` or export in your shell. > **Snapshot from v2.1.83 (14 Apr 2026).** Flags are internal — verify against your version with `strings $(which claude) | grep -oE 'CLAUDE_CODE_[A-Z_]+'`. --- ## Big Wins These target the largest token pools: thinking, system prompt size, and model selection. | Flag | Value | What it does | |------|-------|--------------| | `CLAUDE_CODE_DISABLE_THINKING` | `1` | Eliminates all extended thinking tokens. The single biggest cost lever on complex tasks. | | `CLAUDE_CODE_EFFORT_LEVEL` | `low` / `medium` | Shrinks the thinking budget without fully disabling it. `max` is Opus-only. Overrides user settings. | | `CLAUDE_CODE_DISABLE_ADAPTIVE_THINKING` | `1` | Switches from dynamic per-task thinking budgets to fixed ones. More predictable spend. | | `CLAUDE_CODE_DISABLE_CLAUDE_MDS` | `1` | Drops **all** CLAUDE.md files from the system prompt. Nuclear option — big savings if your CLAUDE.md files are large. | | `CLAUDE_CODE_DISABLE_GIT_INSTRUCTIONS` | `1` | Strips git status, branch info, recent commits, and the git workflow guide from the system prompt. | | `CLAUDE_CODE_SUBAGENT_MODEL` | `sonnet` / `haiku` | Routes all subagent (Agent tool) calls to a cheaper model. | | `ANTHROPIC_SMALL_FAST_MODEL` | e.g. `claude-haiku-4-5-20251001` | Cheaper model for internal lightweight tasks: hook evaluation, classification, utility ops. | --- ## Moderate Savings Context window management, file reads, and feature toggles. | Flag | Value | What it does | |------|-------|--------------| | `CLAUDE_CODE_SM_COMPACT` | `1` | Enables Session Memory compaction — auto-summarises conversation history (10k–40k token window). Major savings on long sessions. | | `CLAUDE_CODE_AUTO_COMPACT_WINDOW` | integer (tokens) | Overrides the compaction window size. Lower = earlier compaction = less context carried forward. | | `CLAUDE_CODE_FILE_READ_MAX_OUTPUT_TOKENS` | integer (default ~25000) | Caps tokens per file read. Lowering this forces targeted reads instead of loading whole files. | | `CLAUDE_CODE_MAX_OUTPUT_TOKENS` | integer | Hard cap on output tokens per response. | | `CLAUDE_CODE_DISABLE_AUTO_MEMORY` | `1` | Stops auto-memory reads/writes. Removes memory content from the context window. | | `CLAUDE_CODE_DISABLE_ATTACHMENTS` | `1` | Disables file attachment generation (references, diagnostics). Reduces per-turn context. | | `CLAUDE_CODE_DISABLE_ADVISOR_TOOL` | `1` | Removes the Advisor tool schema from the system prompt. One fewer tool definition. | | `CLAUDE_CODE_DISABLE_BACKGROUND_TASKS` | `1` | Prevents background tasks from making additional API calls. | --- ## Minor Savings Small per-session or per-turn reductions that add up over time. | Flag | Value | What it does | |------|-------|--------------| | `CLAUDE_CODE_BRIEF` | `1` | Encourages terser responses across all output. | | `CLAUDE_CODE_SKIP_PROMPT_HISTORY` | `1` | Skips loading previous prompt history at session start. | | `CLAUDE_CODE_MCP_INSTR_DELTA` | `1` | Sends only MCP instruction additions/removals instead of full sets. Saves tokens when MCP servers change. | | `CLAUDE_CODE_DISABLE_EXPERIMENTAL_BETAS` | `1` | Disables beta features that may carry token overhead. | | `CLAUDE_CODE_MAX_RETRIES` | integer (default varies) | Fewer retries = fewer wasted tokens on re-sent requests after failures. | --- ## Model Selection (cost, not tokens) These don't change token counts but directly affect price per token. | Flag | Value | What it does | |------|-------|--------------| | `ANTHROPIC_MODEL` | model ID | Override the primary model entirely. Cheaper model = lower cost. | | `ANTHROPIC_DEFAULT_SONNET_MODEL` | model ID | Override which model maps to the "sonnet" tier. | | `ANTHROPIC_DEFAULT_HAIKU_MODEL` | model ID | Override which model maps to the "haiku" tier. | | `ANTHROPIC_DEFAULT_OPUS_MODEL` | model ID | Override which model maps to the "opus" tier. | --- ## Ready-to-Paste Config A sensible cost-optimised `settings.json`. Keeps Opus as the main model but trims context aggressively and offloads lightweight work to cheaper models. ```json { "effortLevel": "medium", "env": { "CLAUDE_CODE_DISABLE_ADAPTIVE_THINKING": "1", "CLAUDE_CODE_DISABLE_AUTO_MEMORY": "1", "CLAUDE_CODE_DISABLE_GIT_INSTRUCTIONS": "1", "CLAUDE_CODE_SUBAGENT_MODEL": "sonnet", "CLAUDE_CODE_FILE_READ_MAX_OUTPUT_TOKENS": "10000", "CLAUDE_CODE_MAX_OUTPUT_TOKENS": "16000", "CLAUDE_CODE_BRIEF": "1", "ANTHROPIC_SMALL_FAST_MODEL": "claude-haiku-4-5-20251001" } } ``` **Aggressive variant** — add these for maximum savings (at the cost of capability): ```json { "effortLevel": "low", "env": { "CLAUDE_CODE_DISABLE_THINKING": "1", "CLAUDE_CODE_DISABLE_CLAUDE_MDS": "1", "CLAUDE_CODE_DISABLE_GIT_INSTRUCTIONS": "1", "CLAUDE_CODE_DISABLE_AUTO_MEMORY": "1", "CLAUDE_CODE_DISABLE_ATTACHMENTS": "1", "CLAUDE_CODE_DISABLE_ADVISOR_TOOL": "1", "CLAUDE_CODE_DISABLE_BACKGROUND_TASKS": "1", "CLAUDE_CODE_SUBAGENT_MODEL": "haiku", "CLAUDE_CODE_FILE_READ_MAX_OUTPUT_TOKENS": "5000", "CLAUDE_CODE_MAX_OUTPUT_TOKENS": "8000", "CLAUDE_CODE_BRIEF": "1", "CLAUDE_CODE_SKIP_PROMPT_HISTORY": "1", "ANTHROPIC_SMALL_FAST_MODEL": "claude-haiku-4-5-20251001" } } ``` --- ## Applying Changes You can edit `settings.json` directly, or use `/update-config` inside Claude Code. That command can be used to discuss config as well as updating it. ``` /update-config set effort level to low /update-config add CLAUDE_CODE_BRIEF=1 to my env vars /update-config use sonnet for subagents /update-config disable auto memory and git instructions /update-config {"env": {...}} ``` Three scopes: `~/.claude/settings.json` (global), `.claude/settings.json` (project), `.claude/settings.local.json` (local override, gitignored). --- # The Unofficial Guide to Every Claude Code Environment Flag Claude Code has over 150 undocumented environment variables hiding in the binary. We extracted them all, traced their usage, and grouped them so you can tune your setup for cost, speed, or capability. category: Engineering date: Tue Apr 14 2026 00:00:00 GMT+0000 (Coordinated Universal Time) reading-time: 33 min read url: https://conor.fyi/writing/claudeflags --- # The Unofficial Guide to Every Claude Code Environment Flag Claude Code exposes over 150 environment variables that control everything from model selection and token budgets to sandbox behaviour and telemetry. Most are undocumented. We extracted the full list from the binary using `strings` and traced each one back to its usage in the minified source. This post catalogues every flag we found, grouped by domain, so you can tune Claude Code to fit your workflow. > **Version notice:** This reference was generated on **14 April 2026** from **Claude Code v2.1.83**. Environment flags are internal and subject to change — flags may be added, removed, or renamed in any release. If you're running a different version, verify against your own binary with `strings $(which claude) | grep -oE 'CLAUDE_CODE_[A-Z_]+'`. Treat this as a point-in-time snapshot, not a stable API contract. Set any of these via `env` in your `settings.json` or export them in your shell before launching Claude Code. --- ## Table of Contents - [Authentication and Identity](#authentication-and-identity) - [Account Tagged Id](#account-tagged-id) - [Account Uuid](#account-uuid) - [Api Base Url](#api-base-url) - [Api Key File Descriptor](#api-key-file-descriptor) - [Api Key Helper Ttl Ms](#api-key-helper-ttl-ms) - [Attribution Header](#attribution-header) - [Custom Oauth Url](#custom-oauth-url) - [Oauth Client Id](#oauth-client-id) - [Oauth Refresh Token](#oauth-refresh-token) - [Oauth Scopes](#oauth-scopes) - [Oauth Token](#oauth-token) - [Oauth Token File Descriptor](#oauth-token-file-descriptor) - [Organization Uuid](#organization-uuid) - [Session Access Token](#session-access-token) - [User Email](#user-email) - [Websocket Auth File Descriptor](#websocket-auth-file-descriptor) - [Api Key (Anthropic)](#api-key-anthropic) - [Auth Token (Anthropic)](#auth-token-anthropic) - [Base Url (Anthropic)](#base-url-anthropic) - [Unix Socket (Anthropic)](#unix-socket-anthropic) - [Context and Memory](#context-and-memory) - [Additional Directories Claude Md](#additional-directories-claude-md) - [Auto Compact Window](#auto-compact-window) - [Disable Auto Memory](#disable-auto-memory) - [Disable Claude Mds](#disable-claude-mds) - [Disable Git Instructions](#disable-git-instructions) - [Disable Precompact Skip](#disable-precompact-skip) - [Include Partial Messages](#include-partial-messages) - [Mcp Instr Delta](#mcp-instr-delta) - [Remote Memory Dir](#remote-memory-dir) - [Resume Interrupted Turn](#resume-interrupted-turn) - [Save Hook Additional Context](#save-hook-additional-context) - [Skip Prompt History](#skip-prompt-history) - [Sm Compact](#sm-compact) - [Debugging and Diagnostics](#debugging-and-diagnostics) - [Debug Log Level](#debug-log-level) - [Debug Logs Dir](#debug-logs-dir) - [Debug Repaints](#debug-repaints) - [Diagnostics File](#diagnostics-file) - [Frame Timing Log](#frame-timing-log) - [Perfetto Trace](#perfetto-trace) - [Profile Query](#profile-query) - [Profile Startup](#profile-startup) - [Slow Operation Threshold Ms](#slow-operation-threshold-ms) - [Stall Timeout Ms For Testing](#stall-timeout-ms-for-testing) - [IDE and Editor Integration](#ide-and-editor-integration) - [Auto Connect Ide](#auto-connect-ide) - [Ide Host Override](#ide-host-override) - [Ide Skip Auto Install](#ide-skip-auto-install) - [Ide Skip Valid Check](#ide-skip-valid-check) - [Model and Effort](#model-and-effort) - [Always Enable Effort](#always-enable-effort) - [Disable Adaptive Thinking](#disable-adaptive-thinking) - [Disable Fast Mode](#disable-fast-mode) - [Disable Legacy Model Remap](#disable-legacy-model-remap) - [Disable Nonstreaming Fallback](#disable-nonstreaming-fallback) - [Disable Thinking](#disable-thinking) - [Effort Level](#effort-level) - [Max Output Tokens](#max-output-tokens) - [Subagent Model](#subagent-model) - [Betas (Anthropic)](#betas-anthropic) - [Custom Headers (Anthropic)](#custom-headers-anthropic) - [Custom Model Option (Anthropic)](#custom-model-option-anthropic) - [Default Haiku Model (Anthropic)](#default-haiku-model-anthropic) - [Default Opus Model (Anthropic)](#default-opus-model-anthropic) - [Default Sonnet Model (Anthropic)](#default-sonnet-model-anthropic) - [Log (Anthropic)](#log-anthropic) - [Model (Anthropic)](#model-anthropic) - [Small Fast Model (Anthropic)](#small-fast-model-anthropic) - [Small Fast Model Aws Region (Anthropic)](#small-fast-model-aws-region-anthropic) - [MCP, Plugins, and Features](#mcp-plugins-and-features) - [Disable Advisor Tool](#disable-advisor-tool) - [Disable Attachments](#disable-attachments) - [Disable Background Tasks](#disable-background-tasks) - [Disable Cron](#disable-cron) - [Disable Experimental Betas](#disable-experimental-betas) - [Disable Feedback Survey](#disable-feedback-survey) - [Disable File Checkpointing](#disable-file-checkpointing) - [Disable Official Marketplace Autoinstall](#disable-official-marketplace-autoinstall) - [Enable Cfc](#enable-cfc) - [Enable Fine Grained Tool Streaming](#enable-fine-grained-tool-streaming) - [Enable Prompt Suggestion](#enable-prompt-suggestion) - [Enable Sdk File Checkpointing](#enable-sdk-file-checkpointing) - [Enable Token Usage Attachment](#enable-token-usage-attachment) - [Enable Xaa](#enable-xaa) - [Extra Body](#extra-body) - [Extra Metadata](#extra-metadata) - [Force Global Cache](#force-global-cache) - [Max Tool Use Concurrency](#max-tool-use-concurrency) - [Plugin Cache Dir](#plugin-cache-dir) - [Plugin Git Timeout Ms](#plugin-git-timeout-ms) - [Plugin Seed Dir](#plugin-seed-dir) - [Plugin Use Zip Cache](#plugin-use-zip-cache) - [Post For Session Ingress V](#post-for-session-ingress-v) - [Subprocess Env Scrub](#subprocess-env-scrub) - [Sync Plugin Install](#sync-plugin-install) - [Sync Plugin Install Timeout Ms](#sync-plugin-install-timeout-ms) - [Networking and Proxy](#networking-and-proxy) - [Client Cert](#client-cert) - [Client Key](#client-key) - [Client Key Passphrase](#client-key-passphrase) - [Host Http Proxy Port](#host-http-proxy-port) - [Host Socks Proxy Port](#host-socks-proxy-port) - [Proxy Resolves Hosts](#proxy-resolves-hosts) - [Skip Bedrock Auth](#skip-bedrock-auth) - [Skip Fast Mode Network Errors](#skip-fast-mode-network-errors) - [Skip Foundry Auth](#skip-foundry-auth) - [Skip Vertex Auth](#skip-vertex-auth) - [Output and Display](#output-and-display) - [Accessibility](#accessibility) - [Brief](#brief) - [Brief Upload](#brief-upload) - [Disable Terminal Title](#disable-terminal-title) - [Disable Virtual Scroll](#disable-virtual-scroll) - [Eager Flush](#eager-flush) - [Exit After First Render](#exit-after-first-render) - [Exit After Stop Delay](#exit-after-stop-delay) - [Force Full Logo](#force-full-logo) - [Question Preview Format](#question-preview-format) - [Simple](#simple) - [Syntax Highlight](#syntax-highlight) - [Syntax Highlight Bat Theme](#syntax-highlight-bat-theme) - [Planning and Tasks](#planning-and-tasks) - [Agent Name](#agent-name) - [Agent Rule Disabled](#agent-rule-disabled) - [Blocking Limit Override](#blocking-limit-override) - [Enable Tasks](#enable-tasks) - [Experimental Agent Teams](#experimental-agent-teams) - [Plan Mode Interview Phase](#plan-mode-interview-phase) - [Plan Mode Required](#plan-mode-required) - [Plan V](#plan-v) - [Task List Id](#task-list-id) - [Provider Routing](#provider-routing) - [Provider Managed By Host](#provider-managed-by-host) - [Use Bedrock](#use-bedrock) - [Use Ccr V](#use-ccr-v) - [Use Foundry](#use-foundry) - [Use Vertex](#use-vertex) - [Bedrock Base Url (Anthropic)](#bedrock-base-url-anthropic) - [Foundry Api Key (Anthropic)](#foundry-api-key-anthropic) - [Foundry Auth Token (Anthropic)](#foundry-auth-token-anthropic) - [Foundry Base Url (Anthropic)](#foundry-base-url-anthropic) - [Foundry Resource (Anthropic)](#foundry-resource-anthropic) - [Vertex Base Url (Anthropic)](#vertex-base-url-anthropic) - [Vertex Project Id (Anthropic)](#vertex-project-id-anthropic) - [Remote and Containers](#remote-and-containers) - [Container Id](#container-id) - [Environment Kind](#environment-kind) - [Environment Runner Version](#environment-runner-version) - [Host Platform](#host-platform) - [Remote](#remote) - [Remote Environment Type](#remote-environment-type) - [Remote Send Keepalives](#remote-send-keepalives) - [Remote Session Id](#remote-session-id) - [Workspace Host Paths](#workspace-host-paths) - [Sandbox and Security](#sandbox-and-security) - [Additional Protection](#additional-protection) - [Bash Sandbox Show Indicator](#bash-sandbox-show-indicator) - [Bubblewrap](#bubblewrap) - [Disable Command Injection Check](#disable-command-injection-check) - [Force Sandbox](#force-sandbox) - [Search and File System](#search-and-file-system) - [File Read Max Output Tokens](#file-read-max-output-tokens) - [Glob Hidden](#glob-hidden) - [Glob No Ignore](#glob-no-ignore) - [Glob Timeout Seconds](#glob-timeout-seconds) - [Session and Lifecycle](#session-and-lifecycle) - [Action](#action) - [Dont Inherit Env](#dont-inherit-env) - [Entrypoint](#entrypoint) - [Git Bash Path](#git-bash-path) - [Max Retries](#max-retries) - [New Init](#new-init) - [Sessionend Hooks Timeout Ms](#sessionend-hooks-timeout-ms) - [Shell](#shell) - [Shell Prefix](#shell-prefix) - [Tmpdir](#tmpdir) - [Teams and Collaboration](#teams-and-collaboration) - [Base Ref](#base-ref) - [Is Cowork](#is-cowork) - [Sse Port](#sse-port) - [Team Name](#team-name) - [Teammate Command](#teammate-command) - [Use Cowork Plugins](#use-cowork-plugins) - [Worker Epoch](#worker-epoch) - [Telemetry and Observability](#telemetry-and-observability) - [Datadog Flush Interval Ms](#datadog-flush-interval-ms) - [Disable Nonessential Traffic](#disable-nonessential-traffic) - [Emit Session State Events](#emit-session-state-events) - [Emit Tool Use Summaries](#emit-tool-use-summaries) - [Enable Telemetry](#enable-telemetry) - [Enable Token Usage Attachment](#enable-token-usage-attachment-1) - [Enhanced Telemetry Beta](#enhanced-telemetry-beta) - [Otel Flush Timeout Ms](#otel-flush-timeout-ms) - [Otel Headers Helper Debounce Ms](#otel-headers-helper-debounce-ms) - [Otel Shutdown Timeout Ms](#otel-shutdown-timeout-ms) - [Tags](#tags) - [Terminal Multiplexer](#terminal-multiplexer) - [Tmux Prefix](#tmux-prefix) - [Tmux Prefix Conflicts](#tmux-prefix-conflicts) - [Tmux Session](#tmux-session) - [Tmux Truecolor](#tmux-truecolor) - [Uncategorised](#uncategorised) - [Search Hints In List](#search-hints-in-list) - [Test Fixtures Root](#test-fixtures-root) - [Use Powershell Tool](#use-powershell-tool) - [Tuning for Cost and Token Savings](#tuning-for-cost-and-token-savings) - [The Big Wins](#the-big-wins) - [Moderate Savings](#moderate-savings) - [Minor Savings](#minor-savings) - [Example: Cost-Optimised Configuration](#example-cost-optimised-configuration) - [Applying Changes with /update-config](#applying-changes-with-update-config) --- ## Authentication and Identity These flags control how Claude Code authenticates with the API and identifies your account. None of them directly affect token usage. ### Account Tagged Id `CLAUDE_CODE_ACCOUNT_TAGGED_ID` — Sets the account tagged ID used for internal tagging and telemetry. Part of the OAuth account structure used for user identification. ### Account Uuid `CLAUDE_CODE_ACCOUNT_UUID` — Sets the account UUID for authentication. Used in the `oauthAccount.accountUuid` structure for identifying your account. ### Api Base Url `CLAUDE_CODE_API_BASE_URL` — Overrides the default Anthropic API base URL. Useful for custom deployments, enterprise proxies, or testing environments. Routing to a different endpoint could affect billing, but the flag itself does not change token consumption. ### Api Key File Descriptor `CLAUDE_CODE_API_KEY_FILE_DESCRIPTOR` — Reads the API key from an integer file descriptor instead of directly from the environment or config file. Designed for secure credential passing to subprocesses without exposing keys in the process environment. ### Api Key Helper Ttl Ms `CLAUDE_CODE_API_KEY_HELPER_TTL_MS` — Sets the time-to-live in milliseconds for the API key helper cache. Determines how long cached credentials from an API key helper script remain valid before being refreshed. ### Attribution Header `CLAUDE_CODE_ATTRIBUTION_HEADER` — Controls whether attribution headers are sent with API requests. When enabled (the default), sends version and entrypoint info in an `x-anthropic-billing-header` like `cc_version=2.1.83; cc_entrypoint=`. ### Custom Oauth Url `CLAUDE_CODE_CUSTOM_OAUTH_URL` — Overrides the default OAuth endpoint URL. Must be an approved endpoint — the system will error if the URL is not on the approved list. Used for custom or enterprise OAuth providers. ### Oauth Client Id `CLAUDE_CODE_OAUTH_CLIENT_ID` — Sets the OAuth client ID used during the authentication handshake. ### Oauth Refresh Token `CLAUDE_CODE_OAUTH_REFRESH_TOKEN` — Provides an OAuth refresh token for obtaining new access tokens when the current one expires. ### Oauth Scopes `CLAUDE_CODE_OAUTH_SCOPES` — Sets the OAuth scopes requested during authentication, defining what permissions the token carries. Required when using `CLAUDE_CODE_OAUTH_REFRESH_TOKEN`. Values are space-separated, e.g. `user:profile user:inference user:sessions:claude_code user:mcp_servers`. ### Oauth Token `CLAUDE_CODE_OAUTH_TOKEN` — Sets the OAuth access token directly, used as the bearer token for API authentication. ### Oauth Token File Descriptor `CLAUDE_CODE_OAUTH_TOKEN_FILE_DESCRIPTOR` — Reads the OAuth token from a file descriptor. Same secure-passing pattern as `API_KEY_FILE_DESCRIPTOR` but for OAuth tokens. ### Organization Uuid `CLAUDE_CODE_ORGANIZATION_UUID` — Sets the organization UUID for multi-org accounts. Sent in the `X-Organization-Uuid` header when the session token starts with `sk-ant-sid`. Used for organization-level billing and permissions routing. ### Session Access Token `CLAUDE_CODE_SESSION_ACCESS_TOKEN` — Sets a session-specific access token. Handles `sk-ant-sid` tokens specially (uses a Cookie header with `sessionKey`), otherwise uses standard Bearer auth. Can also read from `CLAUDE_CODE_WEBSOCKET_AUTH_FILE_DESCRIPTOR`. ### User Email `CLAUDE_CODE_USER_EMAIL` — Sets the user email for identification, attribution, and analytics logging. ### Websocket Auth File Descriptor `CLAUDE_CODE_WEBSOCKET_AUTH_FILE_DESCRIPTOR` — Reads WebSocket authentication credentials from a file descriptor. Used for real-time communication features like IDE connections and MCP servers. ### Api Key (Anthropic) `ANTHROPIC_API_KEY` — The standard Anthropic API key for direct API access. Either this or `CLAUDE_CODE_OAUTH_TOKEN` is required for authentication. ### Auth Token (Anthropic) `ANTHROPIC_AUTH_TOKEN` — An alternative authentication token format used in some authentication flows. ### Base Url (Anthropic) `ANTHROPIC_BASE_URL` — Overrides the Anthropic API base URL (default: `https://api.anthropic.com`). Used for proxies or custom deployments. ### Unix Socket (Anthropic) `ANTHROPIC_UNIX_SOCKET` — Unix socket path for local API connections. Useful for local testing or custom setups where TCP is not desired. --- ## Context and Memory These flags control what gets loaded into the conversation context — CLAUDE.md files, auto-memory, git instructions, compaction behaviour, and prompt history. Many of these are among the highest-impact levers for token usage. ### Additional Directories Claude Md `CLAUDE_CODE_ADDITIONAL_DIRECTORIES_CLAUDE_MD` — Adds extra directories to scan for CLAUDE.md files beyond the standard locations (Managed, User, Project, Local). When set, the system iterates through each directory and loads `CLAUDE.md`, `.claude/CLAUDE.md`, and `.claude/rules` from each. **Affects token usage.** More directories means more CLAUDE.md content loaded into the system prompt. ### Auto Compact Window `CLAUDE_CODE_AUTO_COMPACT_WINDOW` — Overrides the effective context window size used for auto-compaction calculations. When set to a positive integer, limits the compaction window to the minimum of the configured window and the parsed value. A smaller value triggers compaction earlier. **Affects token usage.** Lower values mean more aggressive compaction, reducing how many tokens are carried forward in context. ### Disable Auto Memory `CLAUDE_CODE_DISABLE_AUTO_MEMORY` — Disables the auto-memory system when set to a truthy value (e.g. `"1"`). Claude will not automatically read from or write to the project's `memory/` directory. Your manual memory DB and CLAUDE.md files remain unaffected. **Affects token usage.** Removes auto-memory content from the context window. ### Disable Claude Mds `CLAUDE_CODE_DISABLE_CLAUDE_MDS` — Completely disables loading of all CLAUDE.md files. Sets a `claudemd_disabled` flag and returns null instead of loading content. This is the nuclear option for system prompt reduction. **Affects token usage.** Can massively reduce system prompt size depending on how many and how large your CLAUDE.md files are. ### Disable Git Instructions `CLAUDE_CODE_DISABLE_GIT_INSTRUCTIONS` — Strips built-in git and PR workflow instructions from the system prompt. When truthy, excludes git status, branch info, recent commits, and the git workflow guide. Falls back to the `includeGitInstructions` setting when not set. **Affects token usage.** Removes a significant chunk of system prompt tokens related to git workflows. ### Disable Precompact Skip `CLAUDE_CODE_DISABLE_PRECOMPACT_SKIP` — Disables the optimization that skips pre-compaction in certain cases. When set, compaction always runs the full pipeline rather than short-circuiting. **Affects token usage.** May change compaction behaviour, affecting how much context is retained. ### Include Partial Messages `CLAUDE_CODE_INCLUDE_PARTIAL_MESSAGES` — Controls whether partial messages are included in the conversation. In SDK mode, automatically sets certain stream formats to `stream-json` when enabled. **Affects token usage.** May increase context size by including incomplete message fragments. ### Mcp Instr Delta `CLAUDE_CODE_MCP_INSTR_DELTA` — Enables delta-based MCP instruction updates. Instead of sending full instruction sets each time MCP server instructions change, sends only the additions and removals. Tracks added/removed server names using `mcp_instructions_delta` attachments. Falls back to the `tengu_basalt_3kr` experiment flag when not set. **Affects token usage.** Optimizes token usage by avoiding redundant instruction text when MCP servers change. ### Remote Memory Dir `CLAUDE_CODE_REMOTE_MEMORY_DIR` — Specifies an alternative directory for storing memory and session data in remote mode. Affects storage location only. ### Resume Interrupted Turn `CLAUDE_CODE_RESUME_INTERRUPTED_TURN` — Enables auto-resuming of interrupted turns. When set and the interrupted turn is not `none`, automatically re-queues the interrupted message for processing. ### Save Hook Additional Context `CLAUDE_CODE_SAVE_HOOK_ADDITIONAL_CONTEXT` — Persists additional context generated by hooks. When enabled, hook output tagged as `additionalContext` is injected back into the conversation. **Affects token usage.** Extra context from hooks adds to the conversation window. ### Skip Prompt History `CLAUDE_CODE_SKIP_PROMPT_HISTORY` — Skips loading prompt history at session start. Reduces the initial context load. **Affects token usage.** Less history loaded means fewer tokens consumed at the start of a session. ### Sm Compact `CLAUDE_CODE_SM_COMPACT` — Controls Session Memory compaction. When enabled, automatically compacts conversation history using session memory summaries with configurable thresholds (minTokens: 10k, minTextBlockMessages: 5, maxTokens: 40k). Can also be toggled via `ENABLE_CLAUDE_CODE_SM_COMPACT` / `DISABLE_CLAUDE_CODE_SM_COMPACT` variants, or falls back to the `tengu_session_memory` and `tengu_sm_compact` experiment flags. **Affects token usage.** Major impact — automatically summarises and compresses conversation history, significantly reducing token consumption while maintaining context continuity. --- ## Debugging and Diagnostics Instrumentation and profiling flags. None of these affect token usage — they observe existing behaviour without changing it. ### Debug Log Level `CLAUDE_CODE_DEBUG_LOG_LEVEL` — Sets the minimum log level for debug output. Valid values: `verbose` (0), `debug` (1), `info` (2), `warn` (3), `error` (4). Defaults to `debug` if not set or invalid. ### Debug Logs Dir `CLAUDE_CODE_DEBUG_LOGS_DIR` — Specifies the directory for debug log files. Falls back to `~/.claude/debug/.txt`. A `latest` symlink points to the current session's log file. ### Debug Repaints `CLAUDE_CODE_DEBUG_REPAINTS` — Intended to debug UI repaint cycles. Not found in the v2.1.83 binary — may be unused or removed. ### Diagnostics File `CLAUDE_CODE_DIAGNOSTICS_FILE` — Specifies a file path for writing diagnostic information including operation timings and results. ### Frame Timing Log `CLAUDE_CODE_FRAME_TIMING_LOG` — Intended for logging UI frame timing. Not found in the v2.1.83 binary — may be unused or removed. ### Perfetto Trace `CLAUDE_CODE_PERFETTO_TRACE` — Enables Perfetto performance tracing. Initializes trace collection with metadata (process names, thread names, parent agent IDs) and instruments API calls, tool executions, and timing spans. ### Profile Query `CLAUDE_CODE_PROFILE_QUERY` — Intended for query profiling. Not clearly implemented in the v2.1.83 binary. ### Profile Startup `CLAUDE_CODE_PROFILE_STARTUP` — When set to `"1"`, enables detailed startup profiling. Records performance marks at checkpoints (`cli_entry`, `imports_loaded`, `init_start`, `settings_load`, etc.) and writes a report to `~/.claude/startup-perf/.txt` with timing deltas and memory usage (RSS, heap). Also enables 0.5% statistical sampling for telemetry. ### Slow Operation Threshold Ms `CLAUDE_CODE_SLOW_OPERATION_THRESHOLD_MS` — Intended to set a threshold for slow operation warnings. Not clearly implemented in the v2.1.83 binary. ### Stall Timeout Ms For Testing `CLAUDE_CODE_STALL_TIMEOUT_MS_FOR_TESTING` — A testing-only flag for stall detection timeout. Likely not compiled into production builds. --- ## IDE and Editor Integration Flags for connecting Claude Code to VS Code, Cursor, Windsurf, and JetBrains. None affect token usage. ### Auto Connect Ide `CLAUDE_CODE_AUTO_CONNECT_IDE` — When truthy, Claude Code automatically attempts to connect to supported IDEs and install the Claude Code extension if not already present. Checks multiple conditions including SSE port presence and validates workspace folders before establishing the connection. ### Ide Host Override `CLAUDE_CODE_IDE_HOST_OVERRIDE` — Overrides the default host address for IDE connections (defaults to `127.0.0.1`, or auto-detected Windows host IP in WSL environments). Bypasses automatic host detection logic when set. Useful for WSL or custom network configurations. ### Ide Skip Auto Install `CLAUDE_CODE_IDE_SKIP_AUTO_INSTALL` — When truthy, skips automatic installation of the Claude Code IDE extension for VS Code-based editors and JetBrains IDEs. The auto-installation branch is skipped entirely. ### Ide Skip Valid Check `CLAUDE_CODE_IDE_SKIP_VALID_CHECK` — Bypasses workspace folder validation when connecting to IDEs. Normally, Claude Code confirms the current working directory matches one of the IDE's workspace folders. This flag marks the connection as valid regardless, useful for testing or non-standard setups. --- ## Model and Effort These flags control which models are used, how hard they think, and how much output they produce. Most of them directly affect token usage and cost. ### Always Enable Effort `CLAUDE_CODE_ALWAYS_ENABLE_EFFORT` — Forces the effort feature to be enabled regardless of model. By default, effort levels are only available for Opus 4.6, Sonnet 4.6, and first-party deployments. This flag bypasses that check. **Affects token usage.** Enables effort-level control on models that wouldn't normally support it, which determines how much reasoning the model performs. ### Disable Adaptive Thinking `CLAUDE_CODE_DISABLE_ADAPTIVE_THINKING` — Disables adaptive thinking mode. The system falls back to fixed thinking budgets based on effort level instead of dynamically adjusting. Only affects models that support thinking (Sonnet 4 and Opus 4 series). **Affects token usage.** Adaptive thinking dynamically scales the token budget per task. Disabling it uses a fixed budget which may be higher or lower depending on the task. ### Disable Fast Mode `CLAUDE_CODE_DISABLE_FAST_MODE` — Prevents fast mode from being enabled even when available. When not disabled, fast mode can be toggled on to add a beta header and set `speed: "fast"` in API requests for supported models. **Affects token usage.** Fast mode optimises response generation, potentially changing token consumption patterns. ### Disable Legacy Model Remap `CLAUDE_CODE_DISABLE_LEGACY_MODEL_REMAP` — Prevents automatic remapping of legacy model names to current models. Without this flag, older model IDs may be transparently upgraded to newer versions. ### Disable Nonstreaming Fallback `CLAUDE_CODE_DISABLE_NONSTREAMING_FALLBACK` — Disables the automatic fallback to non-streaming mode when streaming fails. The system will no longer retry failed streaming requests as non-streaming. ### Disable Thinking `CLAUDE_CODE_DISABLE_THINKING` — Completely disables extended thinking even on models that support it. This is more aggressive than disabling adaptive thinking — no thinking tokens are used at all. **Affects token usage.** Eliminates all thinking tokens, which can represent a significant portion of total token consumption. ### Effort Level `CLAUDE_CODE_EFFORT_LEVEL` — Overrides the effort level for the session. Valid values: `low`, `medium`, `high`, or `max`. Set to `unset` or `auto` to let the system choose automatically (these return null internally). Takes precedence over user settings. The `max` level is only available on Opus 4.6. **Affects token usage.** Directly controls the thinking budget — higher effort means more reasoning tokens. ### Max Output Tokens `CLAUDE_CODE_MAX_OUTPUT_TOKENS` — Overrides the maximum output tokens for API requests. Directly sets the `max_tokens` parameter, limiting how many tokens the model can generate per response. **Affects token usage.** Hard cap on output tokens per response. ### Subagent Model `CLAUDE_CODE_SUBAGENT_MODEL` — Forces a specific model for all subagents. Overrides subagent model selection logic entirely. Common values: `sonnet`, `haiku`, or a full model ID. **Affects token usage.** Cheaper subagent models reduce cost per delegated task at the expense of capability. ### Betas (Anthropic) `ANTHROPIC_BETAS` — Enables beta API features by adding beta headers to API requests. Beta features may include new capabilities that affect token consumption, such as extended thinking or prompt caching. ### Custom Headers (Anthropic) `ANTHROPIC_CUSTOM_HEADERS` — Allows adding custom HTTP headers to all Anthropic API requests. ### Custom Model Option (Anthropic) `ANTHROPIC_CUSTOM_MODEL_OPTION` — Allows defining a custom model option in the CLI model picker. Used alongside `ANTHROPIC_CUSTOM_MODEL_OPTION_NAME` and `ANTHROPIC_CUSTOM_MODEL_OPTION_DESCRIPTION` for adding non-standard models to the selection interface. ### Default Haiku Model (Anthropic) `ANTHROPIC_DEFAULT_HAIKU_MODEL` — Overrides which specific model ID maps to the "haiku" tier. Affects cost and capability of all haiku-tier tasks. **Affects token usage.** Different model versions may have different context windows and pricing. ### Default Opus Model (Anthropic) `ANTHROPIC_DEFAULT_OPUS_MODEL` — Overrides which specific model ID maps to the "opus" tier. **Affects token usage.** Controls cost and capability of opus-tier tasks. ### Default Sonnet Model (Anthropic) `ANTHROPIC_DEFAULT_SONNET_MODEL` — Overrides which specific model ID maps to the "sonnet" tier. **Affects token usage.** Controls cost and capability of sonnet-tier tasks. ### Log (Anthropic) `ANTHROPIC_LOG` — Controls logging level for the Anthropic SDK. Default is `warn`. Valid values follow standard log levels. ### Model (Anthropic) `ANTHROPIC_MODEL` — Sets the primary model for API requests. Standard Anthropic SDK environment variable. **Affects token usage.** Different models have different capabilities, context windows, and token pricing. ### Small Fast Model (Anthropic) `ANTHROPIC_SMALL_FAST_MODEL` — Specifies an alternative smaller, faster model for lightweight internal tasks such as hook evaluation, classification, and other utility operations that don't require the full capabilities of the primary model. **Affects token usage.** Routes lightweight operations to a cheaper model, reducing overall token costs. ### Small Fast Model Aws Region (Anthropic) `ANTHROPIC_SMALL_FAST_MODEL_AWS_REGION` — Sets the AWS region for the small/fast model when using Bedrock deployment. Configuration only. --- ## MCP, Plugins, and Features Flags for managing MCP servers, plugins, feature flags, and tool behaviour. ### Disable Advisor Tool `CLAUDE_CODE_DISABLE_ADVISOR_TOOL` — Removes the Advisor tool from the available tool set. The advisor tool schema and interactions are excluded entirely. **Affects token usage.** One fewer tool definition in the system prompt, plus no advisor-related interactions. ### Disable Attachments `CLAUDE_CODE_DISABLE_ATTACHMENTS` — Disables all attachment generation including file references and diagnostics. **Affects token usage.** Significantly reduces tokens by removing attachments from the conversation. ### Disable Background Tasks `CLAUDE_CODE_DISABLE_BACKGROUND_TASKS` — Prevents background task processing. Background tasks may generate additional context or API calls. **Affects token usage.** Background tasks can consume tokens; disabling them prevents that. ### Disable Cron `CLAUDE_CODE_DISABLE_CRON` — Disables cron/scheduled task support. ### Disable Experimental Betas `CLAUDE_CODE_DISABLE_EXPERIMENTAL_BETAS` — Disables all experimental beta features. Some beta features may carry token overhead. ### Disable Feedback Survey `CLAUDE_CODE_DISABLE_FEEDBACK_SURVEY` — Disables feedback survey prompts in the UI. ### Disable File Checkpointing `CLAUDE_CODE_DISABLE_FILE_CHECKPOINTING` — Disables file state checkpointing/snapshots. ### Disable Official Marketplace Autoinstall `CLAUDE_CODE_DISABLE_OFFICIAL_MARKETPLACE_AUTOINSTALL` — Prevents automatic installation of official marketplace plugins on startup. ### Enable Cfc `CLAUDE_CODE_ENABLE_CFC` — Enables the CFC feature (likely related to caching or function calling). May affect caching behaviour. ### Enable Fine Grained Tool Streaming `CLAUDE_CODE_ENABLE_FINE_GRAINED_TOOL_STREAMING` — Enables streaming tool results at finer granularity. Affects delivery mechanism, not content. ### Enable Prompt Suggestion `CLAUDE_CODE_ENABLE_PROMPT_SUGGESTION` — Enables AI-generated prompt suggestions in the UI. **Affects token usage.** Suggestions require lightweight model calls to generate. ### Enable Sdk File Checkpointing `CLAUDE_CODE_ENABLE_SDK_FILE_CHECKPOINTING` — Enables file checkpointing specifically in SDK mode. ### Enable Token Usage Attachment `CLAUDE_CODE_ENABLE_TOKEN_USAGE_ATTACHMENT` — Adds token usage statistics as attachments in the conversation. **Affects token usage.** Adds a small attachment with token stats to each turn. ### Enable Xaa `CLAUDE_CODE_ENABLE_XAA` — Enables the XAA feature (Extended Agent Actions or similar). Experimental. ### Extra Body `CLAUDE_CODE_EXTRA_BODY` — Adds extra fields to the API request body. Impact depends on what fields are added — could include token-related parameters. ### Extra Metadata `CLAUDE_CODE_EXTRA_METADATA` — Adds extra metadata to API requests. Metadata only, no content impact. ### Force Global Cache `CLAUDE_CODE_FORCE_GLOBAL_CACHE` — Forces use of the global prompt cache. May reduce costs by improving cache hit rates. ### Max Tool Use Concurrency `CLAUDE_CODE_MAX_TOOL_USE_CONCURRENCY` — Sets the maximum number of tools to execute concurrently. Controls execution parallelism, not the amount of content generated. ### Plugin Cache Dir `CLAUDE_CODE_PLUGIN_CACHE_DIR` — Sets the directory for plugin cache storage. ### Plugin Git Timeout Ms `CLAUDE_CODE_PLUGIN_GIT_TIMEOUT_MS` — Timeout in milliseconds for Git operations when installing plugins. ### Plugin Seed Dir `CLAUDE_CODE_PLUGIN_SEED_DIR` — Directory containing seed/bundled plugins. ### Plugin Use Zip Cache `CLAUDE_CODE_PLUGIN_USE_ZIP_CACHE` — Uses ZIP-based cache for plugin storage instead of the default. ### Post For Session Ingress V `CLAUDE_CODE_POST_FOR_SESSION_INGRESS_V` — Version selector for the session ingress POST endpoint. API versioning only. ### Subprocess Env Scrub `CLAUDE_CODE_SUBPROCESS_ENV_SCRUB` — Scrubs/sanitises environment variables when spawning subprocesses. A security feature. ### Sync Plugin Install `CLAUDE_CODE_SYNC_PLUGIN_INSTALL` — Makes plugin installation synchronous instead of async. ### Sync Plugin Install Timeout Ms `CLAUDE_CODE_SYNC_PLUGIN_INSTALL_TIMEOUT_MS` — Timeout in milliseconds for synchronous plugin installation. --- ## Networking and Proxy Flags for configuring network connections, proxies, and TLS. None directly affect token usage. ### Client Cert `CLAUDE_CODE_CLIENT_CERT` — Specifies a client certificate file path for TLS/mTLS authentication when connecting to proxy servers or APIs. ### Client Key `CLAUDE_CODE_CLIENT_KEY` — Specifies the private key file path corresponding to the client certificate for TLS authentication. ### Client Key Passphrase `CLAUDE_CODE_CLIENT_KEY_PASSPHRASE` — Provides the passphrase to decrypt an encrypted client key file. ### Host Http Proxy Port `CLAUDE_CODE_HOST_HTTP_PROXY_PORT` — Port number for an HTTP proxy server running on the host machine. Used in sandboxed or containerised environments. ### Host Socks Proxy Port `CLAUDE_CODE_HOST_SOCKS_PROXY_PORT` — Port number for a SOCKS5 proxy server running on the host machine. ### Proxy Resolves Hosts `CLAUDE_CODE_PROXY_RESOLVES_HOSTS` — When enabled, DNS resolution happens through the proxy server instead of locally. ### Skip Bedrock Auth `CLAUDE_CODE_SKIP_BEDROCK_AUTH` — Skips the AWS Bedrock credential authentication flow. ### Skip Fast Mode Network Errors `CLAUDE_CODE_SKIP_FAST_MODE_NETWORK_ERRORS` — In fast mode, network errors that would normally pause or retry are skipped to maintain speed. May indirectly affect token usage if errors cause re-sends. ### Skip Foundry Auth `CLAUDE_CODE_SKIP_FOUNDRY_AUTH` — Skips the Anthropic Foundry authentication flow. ### Skip Vertex Auth `CLAUDE_CODE_SKIP_VERTEX_AUTH` — Skips the Google Vertex AI authentication flow. --- ## Output and Display Flags controlling how Claude Code renders output in the terminal. A few of these can indirectly reduce token usage by encouraging terser responses. ### Accessibility `CLAUDE_CODE_ACCESSIBILITY` — Enables accessibility features for screen readers and assistive technology. Affects how content is rendered in the terminal UI. ### Brief `CLAUDE_CODE_BRIEF` — Enables brief/condensed output mode. Checked in multiple rendering contexts throughout the codebase, reducing decorative elements and focusing on core content. **Affects token usage.** By encouraging shorter output, may indirectly reduce output tokens. ### Brief Upload `CLAUDE_CODE_BRIEF_UPLOAD` — Controls whether to use brief attachment upload mode. Can be set independently or is automatically enabled when `replBridgeEnabled` is active. Uses an alternate, more compact upload path for file attachments. **Affects token usage.** May reduce overhead in how attachment data is transmitted. ### Disable Terminal Title `CLAUDE_CODE_DISABLE_TERMINAL_TITLE` — Prevents Claude Code from setting the terminal window title via escape sequences. ### Disable Virtual Scroll `CLAUDE_CODE_DISABLE_VIRTUAL_SCROLL` — Disables virtual scrolling in the terminal UI. Virtual scrolling renders only visible content as a performance optimisation. Disabling it renders all content immediately. ### Eager Flush `CLAUDE_CODE_EAGER_FLUSH` — Forces immediate flushing of output buffers after each operation. Also triggered automatically in cowork mode. Useful for debugging or ensuring real-time output. ### Exit After First Render `CLAUDE_CODE_EXIT_AFTER_FIRST_RENDER` — Causes Claude Code to exit immediately after the first UI render. A testing flag — skips various initialisation and prefetch operations. Used for measuring startup time. ### Exit After Stop Delay `CLAUDE_CODE_EXIT_AFTER_STOP_DELAY` — When set to a number (milliseconds), Claude Code automatically exits after that many milliseconds of idle time following a stop condition. Used for headless and automation scenarios. ### Force Full Logo `CLAUDE_CODE_FORCE_FULL_LOGO` — Forces display of the full ASCII Claude logo, even if the terminal width would suggest a compact version. ### Question Preview Format `CLAUDE_CODE_QUESTION_PREVIEW_FORMAT` — Controls the format for displaying question/prompt previews in the UI. ### Simple `CLAUDE_CODE_SIMPLE` — Enables simplified output mode with minimal UI decorations. Checked in numerous rendering contexts. Strips colours, formatting, and decorative elements. **Affects token usage.** By reducing output complexity, may indirectly affect response token usage. ### Syntax Highlight `CLAUDE_CODE_SYNTAX_HIGHLIGHT` — Controls whether syntax highlighting is enabled for code blocks. Uses the `bat` library under the hood. ### Syntax Highlight Bat Theme `CLAUDE_CODE_SYNTAX_HIGHLIGHTBAT_THEMEF` — Specifies the `bat` theme for syntax highlighting. The env var name contains a typo (`THEMEF` instead of `THEME`) in the actual implementation — this is the real name you need to use. --- ## Planning and Tasks Flags for plan mode, task management, and multi-agent coordination. Several affect token usage by adding planning context or enabling additional agent activity. ### Agent Name `CLAUDE_CODE_AGENT_NAME` — Sets the name/identifier for an agent instance. Metadata only. ### Agent Rule Disabled `CLAUDE_CODE_AGENT_RULE_DISABLED` — Disables agent-specific rules or constraints. May reduce rule-related system prompt content. ### Blocking Limit Override `CLAUDE_CODE_BLOCKING_LIMIT_OVERRIDE` — Overrides the default blocking limit for context window usage. Sets a custom threshold before the session blocks due to token exhaustion. **Affects token usage.** Controls when compaction or blocking occurs based on token count. ### Enable Tasks `CLAUDE_CODE_ENABLE_TASKS` — Enables the tasks/subagent system for coordinating multiple parallel work streams. **Affects token usage.** Tasks create additional messages and context for coordination. ### Experimental Agent Teams `CLAUDE_CODE_EXPERIMENTAL_AGENT_TEAMS` — Enables experimental multi-agent teams for collaborative work between agents. **Affects token usage.** Adds team coordination messages and context, multiplying token consumption. ### Plan Mode Interview Phase `CLAUDE_CODE_PLAN_MODE_INTERVIEW_PHASE` — Controls interview/planning phase behaviour in plan mode. **Affects token usage.** Adds interview dialogue and planning context to the conversation. ### Plan Mode Required `CLAUDE_CODE_PLAN_MODE_REQUIRED` — Forces plan mode to be active. Plan mode adds system prompts and attachments for structured planning. **Affects token usage.** Adds plan mode system prompts and planning attachments. ### Plan V `CLAUDE_CODE_PLAN_V` — Version selector for the plan mode implementation. Different versions may have different token overhead. ### Task List Id `CLAUDE_CODE_TASK_LIST_ID` — Specifies which task list to use for task management. Routing only. --- ## Provider Routing Flags for routing API calls through different cloud providers. These change where requests go, not how many tokens they consume. ### Provider Managed By Host `CLAUDE_CODE_PROVIDER_MANAGED_BY_HOST` — Indicates that provider selection is managed by the host or IDE integration rather than by the user. ### Use Bedrock `CLAUDE_CODE_USE_BEDROCK` — Routes API calls through AWS Bedrock instead of the direct Anthropic API. ### Use Ccr V `CLAUDE_CODE_USE_CCR_V` — Version selector for CCR (Claude Code Runtime/Router). Infrastructure versioning. ### Use Foundry `CLAUDE_CODE_USE_FOUNDRY` — Routes API calls through Anthropic Foundry, the enterprise platform. ### Use Vertex `CLAUDE_CODE_USE_VERTEX` — Routes API calls through Google Cloud Vertex AI. ### Bedrock Base Url (Anthropic) `ANTHROPIC_BEDROCK_BASE_URL` — Sets the AWS Bedrock endpoint URL for Claude via Bedrock. ### Foundry Api Key (Anthropic) `ANTHROPIC_FOUNDRY_API_KEY` — API key for Anthropic Foundry. ### Foundry Auth Token (Anthropic) `ANTHROPIC_FOUNDRY_AUTH_TOKEN` — Auth token for Anthropic Foundry. ### Foundry Base Url (Anthropic) `ANTHROPIC_FOUNDRY_BASE_URL` — Foundry API endpoint URL. ### Foundry Resource (Anthropic) `ANTHROPIC_FOUNDRY_RESOURCE` — Specifies the Foundry resource/workspace identifier. ### Vertex Base Url (Anthropic) `ANTHROPIC_VERTEX_BASE_URL` — Google Vertex AI endpoint URL for Claude. ### Vertex Project Id (Anthropic) `ANTHROPIC_VERTEX_PROJECT_ID` — GCP project ID required for Vertex AI access. --- ## Remote and Containers Flags for remote development, containers, and workspace mapping. None affect token usage. ### Container Id `CLAUDE_CODE_CONTAINER_ID` — Identifies the container when running in a containerised environment. ### Environment Kind `CLAUDE_CODE_ENVIRONMENT_KIND` — Specifies the environment type: local, remote, container, etc. ### Environment Runner Version `CLAUDE_CODE_ENVIRONMENT_RUNNER_VERSION` — Version identifier for the environment runner. ### Host Platform `CLAUDE_CODE_HOST_PLATFORM` — Overrides the detected host OS platform. ### Remote `CLAUDE_CODE_REMOTE` — Indicates that remote development mode is active. ### Remote Environment Type `CLAUDE_CODE_REMOTE_ENVIRONMENT_TYPE` — Specifies the type of remote environment (SSH, container, etc.). ### Remote Send Keepalives `CLAUDE_CODE_REMOTE_SEND_KEEPALIVES` — Enables keepalive packets for remote connections to prevent timeouts. ### Remote Session Id `CLAUDE_CODE_REMOTE_SESSION_ID` — Identifies the remote session instance. ### Workspace Host Paths `CLAUDE_CODE_WORKSPACE_HOST_PATHS` — Maps workspace paths between host and container/remote environments. --- ## Sandbox and Security Flags for sandboxing, isolation, and security checks. None affect token usage. ### Additional Protection `CLAUDE_CODE_ADDITIONAL_PROTECTION` — Enables additional security layers beyond standard sandboxing. Exact protections vary by platform. ### Bash Sandbox Show Indicator `CLAUDE_CODE_BASH_SANDBOX_SHOW_INDICATOR` — When enabled, shows a visual indicator that commands are running in sandbox mode by changing the tool name to `SandboxedBash`. ### Bubblewrap `CLAUDE_CODE_BUBBLEWRAP` — Enables bubblewrap-based sandboxing on Linux systems. Uses namespace-based isolation via the bubblewrap tool. ### Disable Command Injection Check `CLAUDE_CODE_DISABLE_COMMAND_INJECTION_CHECK` — Disables security checks that detect potential command injection attempts in tool calls. ### Force Sandbox `CLAUDE_CODE_FORCE_SANDBOX` — Forces all bash commands to run in sandbox mode regardless of other settings or permissions. --- ## Search and File System Flags controlling file search behaviour and file read limits. The file read token cap is a key lever for context size. ### File Read Max Output Tokens `CLAUDE_CODE_FILE_READ_MAX_OUTPUT_TOKENS` — Sets the maximum token limit for file read operations. Default is around 25,000 tokens. Files exceeding this limit are truncated or require targeted reads. **Affects token usage.** Directly controls how much file content is sent to the model as input tokens. ### Glob Hidden `CLAUDE_CODE_GLOB_HIDDEN` — When enabled (default: `true`), glob/file search operations include hidden files (dotfiles) in results. ### Glob No Ignore `CLAUDE_CODE_GLOB_NO_IGNORE` — When enabled (default: `true`), glob operations ignore `.gitignore` and similar ignore files, returning all matches. ### Glob Timeout Seconds `CLAUDE_CODE_GLOB_TIMEOUT_SECONDS` — Timeout in seconds for ripgrep-based glob/search operations. Default is 20 seconds on most systems, 60 on WSL. --- ## Session and Lifecycle Flags for shell configuration, session management, and startup behaviour. ### Action `CLAUDE_CODE_ACTION` — Specifies a startup action or command to execute when the session begins. ### Dont Inherit Env `CLAUDE_CODE_DONT_INHERIT_ENV` — Prevents inheriting environment variables from the parent process. Provides a clean environment for the session. ### Entrypoint `CLAUDE_CODE_ENTRYPOINT` — Identifies the entrypoint: CLI, IDE, or SDK. Used for telemetry and conditional behaviour. ### Git Bash Path `CLAUDE_CODE_GIT_BASH_PATH` — Path to Git Bash on Windows systems. ### Max Retries `CLAUDE_CODE_MAX_RETRIES` — Maximum retry attempts for failed API calls. Fewer retries means less chance of wasted tokens on re-sent requests. ### New Init `CLAUDE_CODE_NEW_INIT` — Changes the `/init` command to create multiple CLAUDE.md files and offer skills/hooks setup, instead of creating a single CLAUDE.md with documentation only. ### Sessionend Hooks Timeout Ms `CLAUDE_CODE_SESSIONEND_HOOKS_TIMEOUT_MS` — Timeout in milliseconds for session-end hooks to complete. ### Shell `CLAUDE_CODE_SHELL` — Specifies the shell to use for the Bash tool. ### Shell Prefix `CLAUDE_CODE_SHELL_PREFIX` — Prefix applied to commands run in the shell. ### Tmpdir `CLAUDE_CODE_TMPDIR` — Overrides the temporary directory path. --- ## Teams and Collaboration Flags for multi-agent collaboration and cowork features. ### Base Ref `CLAUDE_CODE_BASE_REF` — Base Git reference for diff comparisons in collaborative workflows. ### Is Cowork `CLAUDE_CODE_IS_COWORK` — Indicates that cowork/collaboration mode is active. Collaboration features may add coordination context. ### Sse Port `CLAUDE_CODE_SSE_PORT` — Port for Server-Sent Events connections used by IDE and collaboration features. ### Team Name `CLAUDE_CODE_TEAM_NAME` — Name of the team for multi-agent collaboration. ### Teammate Command `CLAUDE_CODE_TEAMMATE_COMMAND` — Command specification for invoking teammate agents. ### Use Cowork Plugins `CLAUDE_CODE_USE_COWORK_PLUGINS` — Enables cowork-specific plugins. May add plugin-provided context. ### Worker Epoch `CLAUDE_CODE_WORKER_EPOCH` — Epoch/generation identifier for worker processes in multi-agent setups. --- ## Telemetry and Observability Flags for analytics, tracing, and metrics collection. None affect token usage except `ENABLE_TOKEN_USAGE_ATTACHMENT` which adds a small stats attachment per turn. ### Datadog Flush Interval Ms `CLAUDE_CODE_DATADOG_FLUSH_INTERVAL_MS` — Interval in milliseconds for flushing Datadog metrics. ### Disable Nonessential Traffic `CLAUDE_CODE_DISABLE_NONESSENTIAL_TRAFFIC` — Disables non-essential network requests such as analytics and telemetry. ### Emit Session State Events `CLAUDE_CODE_EMIT_SESSION_STATE_EVENTS` — Enables emitting session state change events for SDK integrations. ### Emit Tool Use Summaries `CLAUDE_CODE_EMIT_TOOL_USE_SUMMARIES` — Enables emitting tool usage summaries to telemetry. ### Enable Telemetry `CLAUDE_CODE_ENABLE_TELEMETRY` — Master switch for telemetry and analytics collection. ### Enable Token Usage Attachment `CLAUDE_CODE_ENABLE_TOKEN_USAGE_ATTACHMENT` — Adds token usage statistics as a small attachment in the conversation. **Affects token usage.** Adds a small per-turn overhead with token stats. ### Enhanced Telemetry Beta `CLAUDE_CODE_ENHANCED_TELEMETRY_BETA` — Enables enhanced telemetry features (beta). ### Otel Flush Timeout Ms `CLAUDE_CODE_OTEL_FLUSH_TIMEOUT_MS` — Timeout in milliseconds for OpenTelemetry flush operations. ### Otel Headers Helper Debounce Ms `CLAUDE_CODE_OTEL_HEADERS_HELPER_DEBOUNCE_MS` — Debounce interval in milliseconds for the OpenTelemetry headers helper. ### Otel Shutdown Timeout Ms `CLAUDE_CODE_OTEL_SHUTDOWN_TIMEOUT_MS` — Timeout in milliseconds for OpenTelemetry shutdown. ### Tags `CLAUDE_CODE_TAGS` — Custom tags attached to telemetry and logging events. --- ## Terminal Multiplexer Flags for tmux integration. None affect token usage. ### Tmux Prefix `CLAUDE_CODE_TMUX_PREFIX` — Custom tmux prefix key binding. ### Tmux Prefix Conflicts `CLAUDE_CODE_TMUX_PREFIX_CONFLICTS` — Handles tmux prefix key conflicts. ### Tmux Session `CLAUDE_CODE_TMUX_SESSION` — Name of the tmux session to use or create. ### Tmux Truecolor `CLAUDE_CODE_TMUX_TRUECOLOR` — Enables truecolor support in tmux. --- ## Uncategorised Flags that don't fit neatly into another group. ### Search Hints In List `CLAUDE_CODE_SEARCH_HINTS_IN_LIST` — Includes search hints in tool listings. May add hint text to tool descriptions. ### Test Fixtures Root `CLAUDE_CODE_TEST_FIXTURES_ROOT` — Root directory for test fixtures. A development/testing flag. ### Use Powershell Tool `CLAUDE_CODE_USE_POWERSHELL_TOOL` — Uses PowerShell instead of the Bash tool on Windows. --- ## Tuning for Cost and Token Savings With over 150 flags available, it's easy to get lost. If your goal is to reduce token consumption and spend, here are the levers that matter most, ranked roughly by impact. ### The Big Wins **Cut thinking tokens.** Extended thinking can account for the majority of tokens on complex tasks. `CLAUDE_CODE_DISABLE_THINKING` eliminates them entirely. If that's too aggressive, `CLAUDE_CODE_EFFORT_LEVEL` set to `low` or `medium` dials it back without removing it, and `CLAUDE_CODE_DISABLE_ADAPTIVE_THINKING` switches from dynamic budgets to fixed ones, giving you more predictable spend. **Shrink the system prompt.** Every conversation starts with a system prompt that includes CLAUDE.md files, git instructions, tool definitions, and more. `CLAUDE_CODE_DISABLE_CLAUDE_MDS` is the nuclear option — it drops all CLAUDE.md content. `CLAUDE_CODE_DISABLE_GIT_INSTRUCTIONS` strips the git workflow guide. `CLAUDE_CODE_DISABLE_ADVISOR_TOOL` and `CLAUDE_CODE_DISABLE_ATTACHMENTS` remove tool definitions and attachment overhead respectively. If you have specific heavy CLAUDE.md files, the `claudeMdExcludes` setting in `settings.json` lets you surgically exclude them without disabling the entire system. **Use cheaper models for subagents.** `CLAUDE_CODE_SUBAGENT_MODEL` set to `sonnet` or `haiku` routes all delegated agent work to a cheaper model. Pair it with `ANTHROPIC_SMALL_FAST_MODEL` to also downgrade the model used for internal lightweight tasks like hook evaluation and classification. ### Moderate Savings **Control compaction.** `CLAUDE_CODE_AUTO_COMPACT_WINDOW` with a lower value triggers compaction earlier, keeping your context window leaner. `CLAUDE_CODE_SM_COMPACT` enables session memory compaction which automatically summarises conversation history — a significant reduction on long sessions. **Limit file reads.** `CLAUDE_CODE_FILE_READ_MAX_OUTPUT_TOKENS` caps how many tokens a single file read can inject into context. The default is around 25,000 — lowering it forces the model to use targeted reads instead of loading entire files. **Disable auto-memory.** `CLAUDE_CODE_DISABLE_AUTO_MEMORY` stops the auto-memory system from reading and writing to the project memory directory, removing that content from your context window. **Cap output.** `CLAUDE_CODE_MAX_OUTPUT_TOKENS` hard-limits how many tokens the model can generate per response. Useful if you find responses are consistently longer than needed. ### Minor Savings **Skip prompt history.** `CLAUDE_CODE_SKIP_PROMPT_HISTORY` avoids loading previous prompt history at session start. **Brief mode.** `CLAUDE_CODE_BRIEF` encourages terser output across the board. **MCP instruction deltas.** `CLAUDE_CODE_MCP_INSTR_DELTA` sends only changes to MCP instructions rather than the full set each time, saving tokens when MCP servers are added or removed during a session. ### Example: Cost-Optimised Configuration Here's a `settings.json` snippet that pulls most of these levers at once: ```json { "effortLevel": "medium", "env": { "CLAUDE_CODE_DISABLE_ADAPTIVE_THINKING": "1", "CLAUDE_CODE_DISABLE_AUTO_MEMORY": "1", "CLAUDE_CODE_DISABLE_GIT_INSTRUCTIONS": "1", "CLAUDE_CODE_SUBAGENT_MODEL": "sonnet", "CLAUDE_CODE_FILE_READ_MAX_OUTPUT_TOKENS": "10000", "CLAUDE_CODE_MAX_OUTPUT_TOKENS": "16000", "CLAUDE_CODE_BRIEF": "1", "ANTHROPIC_SMALL_FAST_MODEL": "claude-haiku-4-5-20251001" } } ``` This keeps the main model on Opus with medium effort, but trims context aggressively and offloads lightweight work to cheaper models. Adjust to taste — the right balance depends on whether you value thoroughness or speed. ### Applying Changes with `/update-config` You don't need to edit `settings.json` by hand. Claude Code has a built-in `/update-config` skill that lets you describe the change you want in plain language. Just type `/update-config` followed by your request: - `/update-config set effort level to low` - `/update-config add CLAUDE_CODE_BRIEF=1 to my env vars` - `/update-config use sonnet for subagents` - `/update-config disable auto memory and git instructions` The skill reads your current settings, merges your changes without clobbering existing config, and writes the result. It handles the three settings files (`~/.claude/settings.json` for global, `.claude/settings.json` for project, `.claude/settings.local.json` for local overrides) and will ask you which scope you want if it's ambiguous. It's the fastest way to experiment with different configurations without leaving the conversation. --- # Skill: And Then A Claude Code skill for ambiguity-first planning — exhaust unknowns before committing to a plan, preventing rework and scope surprises. category: Skill date: Mon Apr 13 2026 00:00:00 GMT+0000 (Coordinated Universal Time) reading-time: 8 min read url: https://conor.fyi/writing/and-then-skill --- # And Then — Ambiguity-First Planning No plan survives unasked questions. This skill exhausts ambiguity before committing to a plan — preventing rework, missed edge cases, and scope surprises. ## When to Use Use this skill when you want to plan a feature, scope out work, or think through a problem before building. Trigger phrases include "what would it take to...", "let's plan", "scope this", "think this through", "what are we missing", "before we start", or when you describe something you want to build and there are unresolved questions that would lead to rework. Also useful when a request feels underspecified and jumping straight to implementation would be premature. ## Why This Exists The most expensive line of code is the one you write before understanding the problem. Developers (and AI agents) have a bias toward action — start building, figure it out along the way. That works for small tasks but fails catastrophically for anything with moving parts. This skill forces the uncomfortable but valuable pause: "What don't we know yet?" The goal isn't to ask endless questions. It's to identify the specific unknowns that would derail implementation, resolve as many as possible from the codebase itself, and only burden the user with questions that genuinely need their input. When the blocking unknowns are resolved, produce a plan that's grounded in reality. ## Workflow ### Phase 1: Silent Context Gathering Before asking the user a single question, build a mental model of the project and the request. This phase is silent — no output to the user. #### What to gather 1. **Project context** — Read CLAUDE.md, MEMORY.md, and any domain-specific docs they reference. Understand the project's architecture, conventions, and current state. 2. **Recent work** — Understand what's been happening lately: ```bash gh pr list --state merged --limit 10 --json title,number,mergedAt,headRefName git log main --oneline -15 ``` 3. **Overlapping work** — Check for existing issues, plans, or in-progress branches that touch the same area: ```bash gh issue list --state open --limit 30 --json title,number,labels,body ``` Also check for plan files or similar project-management artifacts. 4. **Codebase exploration** — Glob and grep the areas the request touches. Read key files — models, services, views. Understand the current state before proposing a future state. #### Depth control Start shallow. Go deeper only where ambiguity concentrates. If the request touches "the technique editor," read the technique editor. Don't read every file in the project. Use Explore agents for broad investigation when a shallow scan reveals the request is more cross-cutting than it first appeared. The point of this phase is to enter the conversation informed — so your questions are sharp and your assumptions are grounded, not generic. ### Phase 2: Ambiguity Extraction Analyze the user's request against everything you gathered. Identify every point of ambiguity, categorized: | Category | What's unclear | |----------|---------------| | **Requirements** | What exactly should this do? Expected behavior, acceptance criteria | | **Technical** | How should this be built? Patterns, services, models, data flow | | **Scope** | What's in vs out? Where are the boundaries? What's v1 vs follow-up? | | **Dependencies** | What else is affected? What needs to exist first? What breaks? | | **UX** | What does the user see? Edge cases, empty states, error states, flows | | **Domain** | Terminology, business rules, domain-specific constraints | Tag each ambiguity as one of: - **Blocking** — Cannot produce a valid plan without resolving this. Implementation would stall or require rework. - **Refinement** — Has a sensible default. Nice to confirm, but a reasonable assumption can stand. #### Resolve from code before asking This is the skill's most important behavior. For each ambiguity, attempt to resolve it from the codebase first: - Does the component/service/pattern already exist? Read it. - How was a similar feature implemented? Find it. - What's the current data model? Check the schema. - Is there test coverage? Grep for it. When you resolve something from code, record it transparently: > "I was going to ask about X, but I found Y in `path/to/file:42`, so I'm assuming Z." This builds trust and lets the user correct wrong assumptions without being asked a question they'd find frustrating ("you could have just looked!"). Only surface ambiguities to the user that genuinely cannot be resolved from code. ### Phase 3: Present Tracker & Resolution Loop Present the ambiguity tracker to the user, then begin asking questions to resolve the remaining unknowns. #### Tracker Format Render this at the start, and update it after each round of questions: ``` ## Ambiguity Tracker (N resolved, N blocking, N refinement) ### Blocking - [x] ~~Which data model handles X?~~ → Found in Position.swift:89 - [ ] What should happen when the user has no sessions? - [ ] Does this replace the existing flow or sit alongside it? ### Refinement - [x] ~~Preferred animation style?~~ → User: "match existing transitions" - [ ] Empty state copy/messaging ### Resolved from Code - ~~Does a query service exist for X?~~ → Yes, EntityListService (Services/Query/EntityListService.swift) - ~~What's the current navigation pattern?~~ → GraphRouter with recents (Shared/Navigation/GraphRouter.swift) ``` The tracker is alive — items get added as new ambiguity emerges from answers, and crossed out as things get resolved. It's not locked to the initial extraction. #### Question rules 1. **1-3 atomic questions per round.** Never overwhelm. Group related questions from the same category. 2. **Show your reasoning.** Explain why you're asking — what you found, what you checked, what you're unsure about. Context makes questions easier to answer. 3. **Challenge assumptions.** If the user said something that conflicts with codebase reality, say so directly: "You mentioned X, but the codebase currently does Y — should we change Y, or did you mean something different?" 4. **Surface risks proactively.** Don't wait to be asked. "This touches Z which has no tests," "This would require changing a shared component used by 5 views," "This data migration would affect all existing users." 5. **Explore edge cases.** "What happens when this fails?" / "What if the list is empty?" / "What about the user's first time seeing this?" 6. **Question scope creep.** "Is X actually needed for v1, or is it a follow-up?" Prefer shipping smaller things sooner. #### The adversarial edge Be collaborative — you're on the same team. But be thorough in a way that prevents rework: - Challenge assumptions that conflict with codebase reality - Point out risks: untested areas, shared components, data migration concerns - Ask "what happens when this fails/is empty/times out?" - Question scope creep: "Is X needed for v1, or is it a follow-up?" - Suggest how work should be broken up — prefer atomic PRs and focused tickets - Stress-test the happy path: "You described the success case — what's the failure mode?" Don't block on stylistic disagreements or purely theoretical concerns. Focus on things that would actually cause rework or bugs. ### Phase 4: Output #### Exit triggers The resolution loop ends when: - **All blocking ambiguities are resolved** — you propose "I think we're clear on the blocking questions" and the user confirms - **User signals readiness** — "plan it," "LFG," "this will do," "good enough," or similar. Confirm their intent before proceeding. - **User can exit anytime** — if blocking ambiguities remain, flag them as **open risks** in the output rather than refusing to proceed #### Scope inference Infer the right output format from the scope of the work: | Signal | Likely Output | |--------|---------------| | Small — fits in 1 PR, single session of work | Single issue with DoD, affected files, risks | | Medium — 2-3 related PRs | Plan file or small set of linked issues | | Large — multi-PR, cross-domain | Epic with atomic child issues | Offer your opinion on how the work should be broken up. Prefer atomic PRs and independently-deliverable tickets. The user decides the final structure. #### Writing the output When producing issues or plans: 1. **Use the project's issue template** if one exists (check `.github/ISSUE_TEMPLATE/`) 2. **Match the style of existing issues** (check recent issues via `gh issue list --limit 5 --json title,body`) 3. **Fall back to this structure** if neither exists: ```markdown ## Summary [1-3 sentences — what and why] ## Scope - **In**: [what this covers] - **Out**: [what's explicitly excluded] ## Implementation - [ ] Step 1 — description (`path/to/file`) - [ ] Step 2 — description (`path/to/file`) ## Files Affected - `path/to/file` — what changes and why ## Risks & Open Questions - [Unresolved refinement ambiguities] - [Technical risks identified during interrogation] ## Definition of Done - [ ] Golden path works - [ ] Edge cases handled: [list them] - [ ] Tests pass (if applicable) - [ ] No regressions in adjacent features ``` 4. For **epics**, create the parent first, then atomic child issues — each independently deliverable. Each child references the parent. 5. For **plan files**, match the project's plan format if one exists (check CLAUDE.md for conventions). ## Tone You're the thoughtful colleague who asks "but what about..." before anyone starts coding. Collaborative but thorough. A little adversarial — in the constructive sense. You're not blocking progress, you're preventing rework. You'd rather spend 10 minutes asking questions now than 2 hours refactoring later. When you challenge something, explain why. When you surface a risk, propose a mitigation. When you question scope, suggest what to defer and why. --- # Skill: GitHub Labels A Claude Code skill that sets up a structured label taxonomy on any GitHub repo — priority, clarity, risk, blast radius, and more. category: Skill date: Sun Apr 12 2026 00:00:00 GMT+0000 (Coordinated Universal Time) reading-time: 6 min read url: https://conor.fyi/writing/github-labels-skill --- # GitHub Labels Skill This skill implements the label taxonomy described in [Workflow, April 2026](/writing/working-april-26). Install it on any GitHub repository using `gh label create`. ## Prerequisites - `gh` CLI installed and authenticated (`gh auth status` should succeed) - Write access to the target repository ## How it works 1. Ask the user which repository to target (owner/repo format, or auto-detect from current git remote) 2. Present the available label groups and ask which ones to install 3. Create each label via `gh label create` with `--force` (upserts — safe to re-run) ## Label Groups Present these groups to the user. Let them pick individually or say "all" for everything. ### 1. Priority (`priority`) Triage priority — what ships first. | Label | Color | Description | |-------|-------|-------------| | `P1` | `#b60205` | Must ship first, blocks other work | | `P2` | `#d93f0b` | Core features, ship after P1 | | `P3` | `#e99695` | Polish and low-urgency items | | `P4` | `#f9d0c4` | Post-launch polish and enhancements | | `P5` | `#fef2c0` | Nice to have, no pressure | ### 2. Clarity (`clarity`) How well-defined is the issue? Drives whether it needs a spike or is ready to build. | Label | Color | Description | |-------|-------|-------------| | `clarity:1` | `#5319e7` | Vague idea — no spec, no definition of done, needs discussion | | `clarity:2` | `#7b61ff` | Problem defined, solution unclear — needs a design spike | | `clarity:3` | `#a78bfa` | Direction known, details TBD — can start with questions | | `clarity:4` | `#c4b5fd` | Clear spec, minor ambiguities — AI-shippable with light review | | `clarity:5` | `#ddd6fe` | Crystal clear, full definition of done — just execute | ### 3. Risk (`risk`) How dangerous is this change? Higher = more review and testing needed. | Label | Color | Description | |-------|-------|-------------| | `risk:1` | `#0e8a16` | Isolated change, well-tested area, hard to break | | `risk:2` | `#53d353` | Small surface area, existing patterns, minor regression chance | | `risk:3` | `#fbca04` | Touches shared code, some edge cases, needs careful testing | | `risk:4` | `#e99695` | Cross-domain impact, state management, concurrency concerns | | `risk:5` | `#b60205` | Data model migration, navigation architecture, or seed data changes | ### 4. Blast Radius (`blast`) How many files/domains does this touch? | Label | Color | Description | |-------|-------|-------------| | `blast:1` | `#bfdadc` | Single file — one view or one service, no ripple effects | | `blast:2` | `#7ec8cb` | Single domain — 2-5 files within one feature folder | | `blast:3` | `#3bb3b8` | Cross-domain — touches shared code or 2+ feature domains | | `blast:4` | `#1d7a7e` | Architectural — services, navigation, data flow changes | | `blast:5` | `#0e4f52` | Full-stack — data pipeline + app, or schema changes | ### 5. Size (`size`) T-shirt sizing for effort estimation. | Label | Color | Description | |-------|-------|-------------| | `size:XS` | `#c5def5` | Trivial change, single file | | `size:S` | `#85c1e9` | Straightforward, few files | | `size:M` | `#5dade2` | Moderate scope, some design needed | | `size:L` | `#2e86c1` | Significant feature, many files | | `size:XL` | `#1a5276` | Epic-level, major cross-cutting work | ### 6. Parallelism (`parallelism`) Lane-based work distribution — which issues can run concurrently. | Label | Color | Description | |-------|-------|-------------| | `parallel:1` | `#f0e68c` | Lane 1 work stream | | `parallel:2` | `#daa520` | Lane 2 work stream | | `parallel:3` | `#cd853f` | Lane 3 work stream | | `parallel:4` | `#b8860b` | Lane 4 work stream | | `parallel:5` | `#8b6914` | Lane 5 work stream | | `serial` | `#6c757d` | Cross-cutting — touches 2+ lanes, run alone | ### 7. Sequencing (`sequencing`) Implementation order within a milestone or epic. | Label | Color | Description | |-------|-------|-------------| | `seq:01` | `#006b75` | Sequence step 1 | | `seq:02` | `#006b75` | Sequence step 2 | | `seq:03` | `#006b75` | Sequence step 3 | | `seq:04` | `#006b75` | Sequence step 4 | | `seq:05` | `#006b75` | Sequence step 5 | | `seq:06` | `#006b75` | Sequence step 6 | | `seq:07` | `#006b75` | Sequence step 7 | | `seq:08` | `#006b75` | Sequence step 8 | | `seq:09` | `#006b75` | Sequence step 9 | | `seq:10` | `#006b75` | Sequence step 10 | ### 8. Type (`type`) What kind of work is this? Tells agents (and humans) which approach to take. | Label | Color | Description | |-------|-------|-------------| | `type:bug` | `#d73a4a` | Something isn't working correctly | | `type:feature` | `#0075ca` | New functionality or capability | | `type:refactor` | `#cfd3d7` | Code improvement, no behaviour change | | `type:chore` | `#ededed` | Maintenance — deps, CI, config, docs | | `type:spike` | `#d4c5f9` | Research or time-boxed exploration | ### 9. Special (`special`) Workflow flags that don't fit a scale. | Label | Color | Description | |-------|-------|-------------| | `ai-shippable` | `#1d76db` | Delegatable to AI agents — clarity:4+ and risk:2 or lower | | `needs-design` | `#d4c5f9` | Requires design work before implementation | ## Execution For each selected group, run `gh label create` for every label in that group: ```bash gh label create "" --color "" --description "" --repo "" --force ``` The `--force` flag means this is idempotent — running it again updates existing labels rather than erroring. ## Interaction Flow 1. **Detect repo**: Check `gh repo view --json nameWithOwner -q .nameWithOwner` from the current directory. If it works, offer it as the default. Otherwise ask. 2. **Present groups**: Show the user a numbered list: ``` Available label groups: 1. Priority (P1-P5) — triage priority 2. Clarity (clarity:1-5) — issue definition quality 3. Risk (risk:1-5) — change danger level 4. Blast Radius (blast:1-5) — scope of impact 5. Size (size:XS-XL) — effort estimation 6. Parallelism (parallel:1-5 + serial) — lane assignment 7. Sequencing (seq:01-10) — implementation order 8. Type (type:bug, feature, refactor, chore, spike) — work category 9. Special (ai-shippable, needs-design) — workflow flags Enter numbers (e.g. "1,3,4"), "all", or ask me about any group. ``` 3. **Confirm**: Show the total label count and target repo, ask for confirmation. 4. **Execute**: Create labels, reporting progress. Group output by category. 5. **Summary**: Report what was created/updated, note any failures. --- # Workflow, April 2026 This months theme is Github issues, templates, and Whatsapping OpenClaw on a Raspberry Pi to tell Claude what to work on next. category: Engineering date: Wed Apr 01 2026 00:00:00 GMT+0000 (Coordinated Universal Time) reading-time: 12 min read url: https://conor.fyi/writing/working-april-26 --- The ways of working in software engineering are rapidly mutating and I figured it might be worth journaling about it while riding the wave. I wrote [Three years of AI](https://www.conor.fyi/writing/three-years-of-ai) to brain-dump the past few years of change. This is more about my active work processes. Feels like they're constantly evolving to keep up with AI. I don't expect that to stop anytime soon, so this might turn into a series. My dayjob is a tech-lead at Toast but my year long addiction to ClaudeCode has me building a good few side projects. Side projects bring freedom, and freedom brings experimentation, learning and different perspectives. ## Projects This month my main focus is on my new app, [Grapla](https://www.grapla.app). I launched it on St. Patricks day after spending about a year building it with Claude, so I'm now in fast-follow mode to catch up on quality and feature gaps since it released. Some of these are long term roadmap features that I figured we could go live without and others are bugs and snags I'm finding by using the app. Secondary projects I'm working on include this website, two other iOS apps, and an experiment I'm running where I have OpenClaw on a Raspberry Pi running an autonomous [self healing and self evolving news aggregator](https://www.tokenburn.fyi), that ingests news articles and updates itself on a cron job. A story for another write-up when it matures a little... ![PiCool](/images/ways-of-working/picool.jpeg) ## Main Focus The Grapla app is my most dynamic project at the moment in terms of how I'm working, and it's what I'm busiest with. Since it's now launched, this fast-follow work pattern means I'm playing catch-up on bug fixes and the feature roadmap, shaping the work in a way that has me testing, finding bugs and gaps, and opening Github issues. The trailing end of the SDLC for this project. ## High-level dev loop I'm working in your normal loop of identifying work that needs to be done, gathering context on what's involved, deciding on solutions, breaking those down into atomic units of work, organising them, and then actioning them. Usually writing zero lines of code. The fun part is the unusual cycle this is happening in: - Use the app on the phone. - Spot snags that needs work. - Screenshot them and scribble notes on the screenshots. - Have OpenClaw running on a Raspberry Pi. - Whatsapp the screenshots to it and explain what you want to fix. - Let it gather context from the codebase and open a Github issue. - Convert issues into PRs - Claude can do that on both the R-Pi and the Macbook. This doesn't all have to be done in one go. I'll usually gather screenshots while fiddling with the app and they might sit there for a day or two before I deal with them. The flexibility and async nature of the workflow is what makes it useful, especially for side-projects.
## The harness [OpenClaw](https://openclaw.ai/) is basically an agent harness that you can communicate with via apps like Whatsapp and Telegram, letting you give it instructions to run on the machine that you have it running on. There was a lot of hype around people buying Mac Mini's recently for it, but you can also just run it on a Raspberry Pi, taking up a lot less space and power. You do need to be running Xcode on a Mac to build iOS apps - so I can't use the Pi to build them, but ClaudeCode will happily pick up Github issues, open PRs, and leave them there for me to review, build and validate later on the Macbook. Repositories are cloned onto the Pi, and Claude does most of its reasoning in the cloud, so the Pi is never under much pressure. OpenClaw is just the mediator that you can give orders to and ping for status updates.
![Inky screen](/images/ways-of-working/inky.jpeg)
## The secret sauce I think the most useful finding I've had recently is around how you create and manage the actual Github issues themselves. Engineering work is very quickly shifting into the realm of specifications and orchestration and away from writing code by hand, so the more tips, tricks and skills you can build up around that sort of project management mindset, the better. The tricks I'm leaning into here are issue templates and issue labels. Lemme explain. ### Issue template When I'm getting Claude to open a Github issue for any features or issues I want to spec out, I need that issue to be detailed enough that another agent with zero context can pick it up and run with it, but I'm opening a lot of these on my phone from a screenshot and a quick Whatsapp message. You don't want to have to tell Claude what details to put in the issue every time, so you define an issue template in the repo. Adding a little reminder memory in the CLAUDE.md file is recommended too, like "When opening issues in Github, use the agent issue template". Your issue template can be whatever shape you like, but this is the outline of what I'm using. - Context & Motivation - Current State - Proposed Changes - Model / API Spec - Blast Radius - Implementation Steps - Side-Fixes - Definition of Done - Verification Plan - Key Files Reference
![Inky screen](/images/ways-of-working/issues.png)
So when Pi-Claude is creating an issue from one of my screenshots, it's asking me for clarity on anything ambiguous first, while also looking at the code, and then filling in this whole template. Most of the time it nails it. ### The labels With a rich label system on your Github issues, like priority, risk, size, blast radius, clarity and concurrency — they become a protocol that lets AI agents pick up issues, assess safety, and ship code with minimal human input. If you want to set these up on your own repo, there's a [Claude Code skill for that](/writing/github-labels-skill) — it lets you pick which groups to install and creates them all via `gh label create`. ### Priority: What matters most |Label|Meaning| |---|---| |**P1**|Must ship first, blocks other work| |**P2**|Core features, ship after P1| |**P3**|Polish and low-urgency items| |**P4**|Post-launch polish and enhancements| |**P5**|Nice to have, no pressure| Nothing groundbreaking here. The next dimensions are where it gets useful for agents. ### Clarity: How well-defined is the work? |Label|Meaning| |---|---| |**clarity:1**|Vague idea — no spec, no definition of done, needs discussion| |**clarity:2**|Problem defined, solution unclear — needs a design spike| |**clarity:3**|Direction known, details TBD — can start with questions| |**clarity:4**|Clear spec, minor ambiguities — AI-shippable with light review| |**clarity:5**|Crystal clear, full definition of done — just execute| Probably the most important dimension for AI delegation. A vague idea and a crystal-clear spec require different approaches. An agent should only pick up `clarity:4` or `clarity:5` issues. Anything below that needs human input and additional clarity. ### Risk: How dangerous is the change? |Label|Meaning| |---|---| |**risk:1**|Isolated change, well-tested area, hard to break| |**risk:2**|Small surface area, existing patterns, minor regression chance| |**risk:3**|Touches shared code, some edge cases, needs careful testing| |**risk:4**|Cross-domain impact, state management, concurrency concerns| |**risk:5**|Data model migration, navigation architecture, or seed data changes| Risk tells an agent how much scrutiny the PR needs, but can be handy for being careful with code reviews too. ### Blast radius: How far does the change reach? |Label|Meaning| |---|---| |**blast:1**|Single file — one view or one service, no ripple effects| |**blast:2**|Single domain — 2-5 files within one feature folder| |**blast:3**|Cross-domain — touches shared code or 2+ feature domains| |**blast:4**|Architectural — services, navigation, data flow changes| |**blast:5**|Full-stack — data pipeline + iOS app, or schema changes| Blast radius is related to risk but not the same. You can have a `risk:1` change with `blast:3` (a safe refactor across many files) or a `risk:5` change with `blast:1` (a single migration file that reshapes your data model).
![Labels](/images/ways-of-working/labels.png)
### Size: How much effort? |Label|Meaning| |---|---| |**size:XS**|Trivial change, single file| |**size:S**|Straightforward, few files| |**size:M**|Moderate scope, some design needed| |**size:L**|Significant feature, many files| |**size:XL**|Epic-level, major cross-cutting work| I always want to be working in small iterations, so anything bigger than M should probably be decomposed further. ### Parallelism: What's safe to work on simultaneously? This is where things get powerful for multi-agent workflows, like running Claude on Git worktrees in parallel. |Label|Meaning| |---|---| |**parallel:1**|Lane 1: safe to parallelise with lanes 2,3,4,5| |**parallel:2**|Lane 2: safe to parallelise with lanes 1,3,4,5| |**parallel:3**|Lane 3: safe to parallelise with lanes 1,2,4,5| |**parallel:4**|Lane 4: safe to parallelise with lanes 1,2,3,5| |**parallel:5**|Lane 5: safe to parallelise with lanes 1,2,3,4| |**serial**|Cross-cutting — touches 2+ lanes, run alone| Lane labels let you spin up multiple agents working on different parts of the codebase without merge conflicts. Each lane maps to a relatively independent area of the app. The `serial` label flags cross-cutting work that should wait until lane work settles. ### The AI label: ai-shippable This issue can be fully delegated to an AI agent session with clear spec, no design decisions needed, and testable outcomes. An issue gets this label when it hits: - `clarity:4` or higher - `risk:3` or lower - A clear definition of done in the issue body ### Composing the labels The power is in combination. When an agent (or a human) sees an issue tagged: > `P2` `size:S` `clarity:5` `risk:1` `blast:2` `parallel:3` `ai-shippable` They instantly know: this is a core feature, small and straightforward, crystal-clear spec, minimal risk, contained to one domain, safe to work on alongside other lanes, and can be fully delegated. Ship it. Compared to: > `P1` `size:L` `clarity:2` `risk:4` `blast:4` `needs-design` `serial` This is critical but dangerous. Large scope, unclear solution, high risk, architectural impact, needs design work, and conflicts with other lanes. This needs a human driving it. ### Implementation sequence For launch planning, I added `seq:01` through `seq:10` labels to define the order issues should be tackled. Combined with priority and parallelism, this gives you a full execution plan: 1. Filter by `seq:01`, find all `parallel:*` issues, spin up agents for each lane 2. When those complete, move to `seq:02` 3. Flag `serial` issues for dedicated runs between sequences
## The skills I have three main agent skills I use to help out with the project management here. Issue labels are great but they often need to be re-synced as the code evolves. They can drift a little. The issue might become simpler or more complex, priority may change based on other recent work, or for whatever other reason, it's good to have a shortcut to get an agent to give you a summary on where things stand, and suggest issue updates. These are the names and agent descriptions for the main skills I'm using for this. ### `issue-drift-sync` Sync GitHub issues with recent work — compare commits, PRs, and branch activity against open issues to detect and fix drift. Use this skill whenever the user asks to update issues, sync issue statuses, reconcile work with tickets, check for stale issues, or says things like 'update my issues', 'sync issues with what we did', 'check issue drift', 'are my issues up to date', or 'what issues can we close'. Also use proactively after completing significant work across multiple issues. ### `feature-kickoff` Kickoff a new feature from a GitHub issue — fetch issue context, detect existing work, scan the target domain's codebase, and produce a scoped implementation plan with branch creation. Use this skill when the user says 'kickoff', 'start feature', 'begin work on issue', 'pick up #N', 'start #N', 'new feature', 'kick off', or references starting work on a specific issue number. ### `session-handoff` Summarize a development session — collect commits, PRs, file changes, and issue activity, then produce a handoff report with memory updates and next-session priorities. Use this skill when the user says 'handoff', 'wrap up', 'end of session', 'session summary', 'what did we do', 'update memory', 'save progress', 'EOD', 'end of day', 'session recap', or wants to capture what happened in a development session. The skill I use most here is the drift-sync. It's a quick and lazy way to just try to keep issues up to date. They're only on my Macbook at the moment but I must port them over to the Pi next. ## That's it The issue labelling is the main thing worth sharing this month because it's been super useful for kicking off parallel agents on small decomposed tasks. Being able to create those issues through Whatsapp has been fun and useful too, but I'm still doing the majority of the work on the Macbook, it's just handy to have the mobile option. It's still more efficient to grab a big batch phone screenshots from the cloud and create those issues on Macbook Claude with a proper keyboard. ### Next up I'm currently exploring and contrasting the code between [OpenClaw](https://openclaw.ai/) and [Paperclip](https://paperclip.ing/) to understand how they both approach the heartbeat pattern for agent harnesses. If I wrap my head around it I'll write about it. Slán! --- # Skill: Swift Accessibility Agent A drop-in Claude Code skill that audits and fixes SwiftUI accessibility modifiers — for humans and AI agents alike. category: Skill date: Sat Mar 07 2026 00:00:00 GMT+0000 (Coordinated Universal Time) reading-time: 7 min read url: https://conor.fyi/writing/swift-accessibility-skill --- # Swift Accessibility Agent Make SwiftUI apps fully navigable by VoiceOver, XCTest, and AI agents by ensuring every interactive element carries the five accessibility properties: **identifier**, **label**, **hint**, **value**, and **traits**. ## Why this matters Most AI agents navigate iOS apps via screenshots — slow (~2-5s per step), expensive (~1,600 image tokens per screenshot), and fragile. A fully populated accessibility tree lets agents query structured text (~200-400 tokens), tap by identifier (deterministic), and verify via logs — no vision model needed. The same work also makes the app properly accessible to humans using VoiceOver, Switch Control, and Voice Control. ## Three modes The user will tell you what they want, or you can suggest the right mode based on context. ### 1. `init` — Scaffold CoordinateTracker Creates the `CoordinateTracker.swift` file in the project. This is the infrastructure that lets agents query exact screen coordinates for any tracked element without screenshots. **When to use**: First time setting up a project for agent navigation, or when the user says "init", "set up tracking", or "add coordinate tracker". **Steps**: 1. Ask the user where Swift source files live (e.g. `Sources/`, `App/`, etc.) — or detect the most likely location by looking for existing `.swift` files 2. Check if `CoordinateTracker.swift` already exists anywhere in the project 3. If not, create it using the CoordinateTracker reference implementation below 4. Confirm the file location with the user ### 2. `audit` — Report accessibility gaps Scans SwiftUI files and reports which interactive elements are missing accessibility modifiers, without changing any code. **When to use**: The user wants to understand current coverage before making changes, or says "audit", "check accessibility", "what's missing". **Steps**: 1. Identify the target scope — a single file, a directory, or a glob pattern 2. Find all `.swift` files in scope 3. For each file, scan for interactive SwiftUI elements (see "What to scan for" below) 4. For each element, check which of the five properties are present 5. Produce a structured report: ``` ## Accessibility Audit Report ### file: Views/SessionTimerView.swift | Line | Element | Type | identifier | label | hint | value | traits | |------|---------|------|:---:|:---:|:---:|:---:|:---:| | 23 | "Save" | Button | — | — | — | n/a | auto | | 45 | HStack | List row | — | — | — | — | — | | 67 | Toggle | Toggle | — | OK | — | — | auto | ### Summary - Files scanned: 12 - Interactive elements found: 34 - Fully accessible: 8 (24%) - Missing identifiers: 26 - Missing labels: 18 - Missing hints: 22 - Missing values: 14 (of elements that carry state) ``` **Important**: `value` only applies to elements that carry state (Toggle, Picker, Slider, Stepper, list rows with data, progress indicators). Don't flag buttons or navigation links as missing `value` unless they have dynamic state. `traits` are often inferred automatically by SwiftUI (Button gets `.button`, etc.) — only flag when traits are ambiguous or missing (e.g. a tappable HStack that should be marked as a button). ### 3. `fix` — Add missing accessibility modifiers Reads each file, identifies gaps, and adds the appropriate modifiers. This is the main workhorse mode. **When to use**: The user wants to actually improve their code, or says "fix", "add modifiers", "make accessible", "augment". **Steps**: 1. Run the audit logic first to identify gaps 2. For each element with gaps, add the missing modifiers 3. Follow the naming convention and modifier patterns below 4. If `--track` or "with tracking" is mentioned, also add `.trackElement()` calls (requires `init` to have been run first — check for CoordinateTracker.swift) 5. Show the user what changed before applying (or apply directly if they've asked for that) ## What to scan for These SwiftUI elements need accessibility modifiers when interactive or informational: ### Always needs full coverage - `Button` / `Button(action:)` / `.onTapGesture` - `NavigationLink` - `Toggle` - `Picker` / `DatePicker` - `Slider` - `Stepper` - `TextField` / `SecureField` / `TextEditor` - `Link` - `Menu` ### Needs coverage when tappable or informational - `HStack` / `VStack` / `ZStack` used as list rows (look for `onTapGesture`, `NavigationLink` wrapping, or `List { ... }` context) - `Image` that conveys meaning (not decorative) - `Label` when used standalone - `Text` that displays dynamic state - Custom view structs used as interactive components ### Should be hidden (`.accessibilityHidden(true)`) - Decorative `Image(systemName: "chevron.right")` disclosure indicators - Decorative shapes (circles, dividers used purely for visual effect) - Redundant text already represented by a parent element's label ### View-level identifiers - `ScrollView`, `List`, `Form`, `NavigationStack` — the top-level container of each screen should have `.accessibilityIdentifier("screen_name_view")` so agents can orient themselves ## Naming convention Use this structured pattern for identifiers: ``` {category}_{context}_{element}_{modifier?} ``` - **category**: The domain area (`technique`, `session`, `position`, `settings`, `navigation`) - **context**: The screen or section (`editor`, `list`, `detail`, `timer`, `tab_bar`) - **element**: The UI type (`button`, `row`, `textfield`, `toggle`, `picker`) - **modifier** (optional): Disambiguator (`save`, `delete`, `name`, `filter`) Examples: ```swift "technique_editor_save_button" "position_list_row_\(position.id)" "session_timer_start_button" "navigation_tab_bar_training" "form_textfield_technique_name" "settings_notifications_toggle" ``` Infer `category` and `context` from the file name, containing view struct, and surrounding code. The identifier should be self-describing — someone reading `"technique_editor_save_button"` in a log should immediately know the domain, screen, and element without looking up code. ## How to write good labels, hints, and values ### Labels (`.accessibilityLabel()`) - Describe **what the element is**, not how it looks - Read it as if you're using the app without a screen - Good: `"Save technique"`, `"Guard position"`, `"Session duration"` - Bad: `"Button"`, `"MarqueeText"`, `"Blue circle"` ### Hints (`.accessibilityHint()`) - Describe **what happens** when you interact - Use present tense, describe the consequence - Good: `"Validates and stores the current technique"` - Bad: `"Tap to save"` (VoiceOver already tells users to tap) ### Values (`.accessibilityValue()`) - The **current state** of the element - Only for elements with state (toggles, pickers, counters, list rows with data) - Good: `"3 of 5 selected"`, `"On"`, `"Page 2 of 4"`, `"\(position.transitionCount) transitions"` - Bad: (omit entirely if the element has no state — don't set an empty value) ## Modifier placement pattern Add modifiers directly after the element, before any layout modifiers like `.padding()` or `.frame()`. Group accessibility modifiers together: ```swift Button("Save") { saveTechnique() } .accessibilityIdentifier("technique_editor_save_button") .accessibilityLabel("Save technique") .accessibilityHint("Validates and stores the current technique") .padding() .frame(maxWidth: .infinity) ``` For list rows, apply modifiers to the outermost container and hide decorative children: ```swift HStack(spacing: 12) { Circle().fill(.blue).frame(width: 8) .accessibilityHidden(true) VStack(alignment: .leading) { Text(position.name) Text("\(position.transitionCount) transitions") .foregroundStyle(.secondary) } Spacer() Image(systemName: "chevron.right") .accessibilityHidden(true) } .accessibilityIdentifier("position_list_row_\(position.id)") .accessibilityLabel(position.name) .accessibilityHint("Opens detailed information for \(position.name)") .accessibilityValue("\(position.transitionCount) transitions") ``` ## `.trackElement()` (opt-in) Only add `.trackElement()` when the user explicitly opts in (says "with tracking", passes `--track`, or has run `init`). When adding it, use the same string as the `accessibilityIdentifier`: ```swift Button("Start session") { startSession() } .accessibilityIdentifier("session_timer_start_button") .accessibilityLabel("Start training session") .accessibilityHint("Begins a new timed training session") .trackElement("session_timer_start_button") ``` ## CoordinateTracker reference implementation Drop this into your project as `CoordinateTracker.swift` during `init` mode: ```swift import SwiftUI @MainActor final class CoordinateTracker: ObservableObject { static let shared = CoordinateTracker() private init() {} struct TrackedElement { let id: String let frame: CGRect var center: CGPoint { CGPoint(x: frame.midX, y: frame.midY) } } private(set) var elements: [String: TrackedElement] = [:] private(set) var currentView: String? private(set) var viewMetadata: [String: String] = [:] func track(id: String, frame: CGRect) { elements[id] = TrackedElement(id: id, frame: frame) } func tapPoint(for id: String) -> CGPoint? { elements[id]?.center } func updateViewContext(viewName: String, metadata: [String: String] = [:]) { currentView = viewName viewMetadata = metadata } } extension View { func trackElement(_ id: String) -> some View { background( GeometryReader { geo in Color.clear.onAppear { CoordinateTracker.shared.track( id: id, frame: geo.frame(in: .global) ) } } ) } } ``` Update view context on screen appear: ```swift .onAppear { CoordinateTracker.shared.updateViewContext( viewName: "SessionTimerView", metadata: ["sessionId": session.id] ) } ``` ## Quality checks After fixing a file, verify: 1. Every interactive element has at least `identifier` + `label` 2. Every element with an action has `hint` 3. Every element with state has `value` 4. Decorative elements are hidden 5. View-level containers have identifiers 6. Identifiers follow the naming convention 7. Labels describe meaning, not appearance 8. No duplicate identifiers within the same view --- # Accessibility and AI Agents Accessibility was designed for humans, but the surface it exposes in your apps can benefit your agents and save you money — if you populate it. category: Engineering date: Fri Mar 06 2026 00:00:00 GMT+0000 (Coordinated Universal Time) reading-time: 13 min read url: https://conor.fyi/writing/ai-access --- I've since turned the patterns in this post into a [drop-in Claude Code skill](/writing/swift-accessibility-skill) that can audit and fix your SwiftUI accessibility modifiers automatically. I was testing my iOS app last year and letting the agent drive the simulator, and learned that the tooling that drives the simulator also exposes an accessibility tree — a data/text representation of the page layout that a screen reader can use. ## The Problem Most AI agents interact with iOS apps the way most humans do, by looking at the screen and tapping to interact. They take a screenshot and run it through a model, figure out where the buttons and interactive elements are on the screen, and then try to tap or gesture on those coordinates. The model has to infer what interactive elements are available, where they sit, and what they do from the pixels alone. It's slow because every interaction needs to take a screenshot and do a round trip. It's expensive — screenshots are token heavy (will explain later). And it's fragile — the coordinates can often be incorrectly inferred for various reasons. The thing is though, that all of this context information the agent needs already exists inside the app. Every SwiftUI view has an accessibility tree — a structured hierarchy of elements with identifiers, labels, hints, values, and traits. VoiceOver uses it and XCTest uses it, and developers should really be using it properly too to make their apps properly accessible. Most apps just don't populate it well enough for an agent to use. ## The Potential Here's a rough comparison of estimated costs in time and tokens per interaction using Claude before we get into the details. | | Screenshot-based | Accessibility-based | | ---------------- | -------------------------------------- | -------------------------- | | Per interaction | ~1,600 image tokens + vision reasoning | ~200-400 text tokens | | Verify action | ~1,600 image tokens | Structured log, ~50 tokens | | 10-step flow | ~32,000+ tokens | ~2,500-4,500 tokens | | Latency per step | 2-5 seconds | Milliseconds | | Deterministic | No | Yes | | Tap Accuracy | Flaky | Surgical | --- ## Accessibility Trees If you've built iOS apps you've probably seen the accessibility modifiers in SwiftUI. You might have added a `.accessibilityLabel()` here and there for VoiceOver support. But the tree is more structured than most developers realise. Each node in the accessibility tree can carry five properties: - **Identifier** — a programmatic name for targeting (`technique_editor_save_button`) - **Label** — what the element is ("Save technique") - **Hint** — what happens on interaction ("Validates and stores the current technique") - **Value** — current state ("3 of 5 selected", "On", "Page 2 of 4") - **Traits** — element type (button, link, header, adjustable) When all five are set on every interactive element, an AI agent can navigate with the same precision as XCTest. It queries the tree, finds the element by identifier, reads its label to understand what it does, and taps it. Deterministic, fast, and resilient to layout changes. The reality is that most apps set one or two of these properties on a fraction of their elements. Buttons without identifiers. List rows without labels. Pickers without values. The tree exists but it's sparse — enough for basic VoiceOver but not enough for reliable programmatic navigation. --- ## What to add to your code The good news is that this isn't a framework adoption — it's native and waiting to be used. You just need to be more thorough with modifiers you already have access to. ### Buttons and interactive elements Every `Button`, `NavigationLink`, and `Picker` needs the full set: ```swift // Before — invisible to agents and barely visible to VoiceOver Button("Save") { saveTechnique() } // After — fully discoverable Button("Save") { saveTechnique() } .accessibilityIdentifier("technique_editor_save_button") .accessibilityLabel("Save technique") .accessibilityHint("Validates and stores the current technique") ``` It feels verbose at first but it becomes second nature fast, and it's super easy to get your coding agents to retrofit it. The identifier is for programmatic targeting and the label is what VoiceOver reads aloud. The hint explains the consequence of the action when taken. If a human can tap it, it really needs to be in the tree. ### List rows This is the blind spot that catches most apps out. A row that looks tappable to a sighted user but is invisible to everything else: ```swift // Before — tappable but silent HStack(spacing: 12) { Circle().fill(.blue).frame(width: 8) VStack(alignment: .leading) { Text(position.name) Text("\(position.transitionCount) transitions") .foregroundStyle(.secondary) } Spacer() Image(systemName: "chevron.right") } // After — the row and its parts are discoverable HStack(spacing: 12) { Circle().fill(.blue).frame(width: 8) .accessibilityHidden(true) VStack(alignment: .leading) { Text(position.name) Text("\(position.transitionCount) transitions") .foregroundStyle(.secondary) } Spacer() Image(systemName: "chevron.right") .accessibilityHidden(true) } .accessibilityIdentifier("position_list_row_\(position.id)") .accessibilityLabel(position.name) .accessibilityHint("Opens detailed information for \(position.name)") .accessibilityValue("\(position.transitionCount) transitions") ``` The row-level modifiers give agents and VoiceOver a single element to interact with. Decorative sub-elements like the chevron and the status dot are hidden — they add visual meaning but would clutter the tree. Note the `.accessibilityValue()` — it carries the row's state. Without it, an agent knows the row exists but not what data it contains. Same for toggles, segmented controls, counters — anything with state needs a value. It's the difference between an agent that can find your UI and one that can read it. ### View-level context Individual elements aren't enough. An agent also needs to know where in the app it is, which screen is active, and what state the app is in. ```swift ScrollView { // Content } .accessibilityIdentifier("technique_detail_view") .onAppear { logger.info("View appeared: TechniqueDetailView [\(technique.id)]") } ``` When an agent lands on a screen and queries the tree, the view-level identifier orients it. The structured log confirms the navigation succeeded. Without these, the agent has to infer context from the elements it finds. It's possible but it's slow and error-prone. One more important detail is to label the meaning, not the component. A scrolling marquee labelled "MarqueeText" tells VoiceOver and agents nothing. "Position summary: Bottom Left" tells them everything. The label should describe what information is being communicated rather than how it's rendered — read it like you're using an app without a screen. ## Coordinates and naming The accessibility tree tells an agent what exists. Two more pieces complete the picture: *where* things are on screen, and whether your identifiers are structured enough for an agent to reason about. ### Coordinate tracking When an agent needs to tap an element, knowing its identifier isn't enough. It needs exact screen coordinates. For simulator-based automation, a coordinate tracker gives you precise, queryable element positions. ```swift Button("Start session") { startSession() } .accessibilityIdentifier("session_timer_start_button") .accessibilityLabel("Start training session") .trackElement("session_timer_start_button") ``` `.trackElement()` registers the element's frame with a coordinator. When the agent asks "where is `session_timer_start_button`?", it gets back exact coordinates without any screenshots needed. The tracker can also maintain view context — which screen is active and any associated metadata. ```swift .onAppear { CoordinateTracker.shared.updateViewContext( viewName: "SessionTimerView", metadata: ["sessionId": session.id] ) } ``` An agent can orient itself instantly, e.g. "I'm on SessionTimerView, session abc123, and here are the elements with their coordinates." Compare that to taking a screenshot, sending it to a vision model, and hoping it correctly identifies the current screen. ### Drop-in implementation Here's the minimal SwiftUI code. A singleton tracker, a `GeometryReader`-based view modifier, and a `View` extension — under 40 lines. ```swift import SwiftUI @MainActor final class CoordinateTracker: ObservableObject { static let shared = CoordinateTracker() private init() {} struct TrackedElement { let id: String let frame: CGRect var center: CGPoint { CGPoint(x: frame.midX, y: frame.midY) } } private(set) var elements: [String: TrackedElement] = [:] private(set) var currentView: String? private(set) var viewMetadata: [String: String] = [:] func track(id: String, frame: CGRect) { elements[id] = TrackedElement(id: id, frame: frame) } func tapPoint(for id: String) -> CGPoint? { elements[id]?.center } func updateViewContext(viewName: String, metadata: [String: String] = [:]) { currentView = viewName viewMetadata = metadata } } extension View { func trackElement(_ id: String) -> some View { background( GeometryReader { geo in Color.clear.onAppear { CoordinateTracker.shared.track( id: id, frame: geo.frame(in: .global) ) } } ) } } ``` The `GeometryReader` captures the element's frame in global coordinates on appear. When an agent asks "where is `session_timer_start_button`?", the tracker returns exact coordinates — no screenshots needed. Usage is a one-liner per element: ```swift Button("Start session") { startSession() } .accessibilityIdentifier("session_timer_start_button") .accessibilityLabel("Start training session") .trackElement("session_timer_start_button") ``` ### Why naming conventions help One thing that paid off quickly in my app workflow was adopting a consistent identifier pattern: ``` {category}_{context}_{element}_{modifier?} ``` ```swift "technique_editor_save_button" "position_list_row_\(position.id)" "navigation_tab_bar_training" "form_textfield_technique_name" ``` Whatever convention fits your app is up to you and whatever suits the app structure. When identifiers are structured an agent can query for all `technique_*` elements and immediately scope what's available. A test can assert on `position_list_row_*` without hardcoding specific IDs. And when you see `session_timer_start_button` in a log, you immediately know the category, screen context, and element type without looking anything up. Contrast this with `saveBtn`, `item_3`, or `button1` — an agent can find them but can't infer anything about what they do or where they sit. --- ## Toolchain and costs To connect an AI agent to your simulator you need tooling that bridges the gap. Facebook have an open source tool called iOS Development Bridge, or "IDB". Agents like Claude can use this directly. I originally wrapped it in an MCP server last year to streamline its use and convert it into a handy toolchain for ClaudeCode, but Skills are now the better way to provide tools to your agents. They use very little context until they're invoked, rather than always being in context/memory even when you're not using them in a session. Everything in context in a session gets sent to the model and counts towards costs. Check the `/context` regularly to avoid waste. ### Why a populated tree changes the economics The performance difference between screenshot-based and tree-based navigation is significant. Screenshot costs add up. Vision models like Claude don't process images as-is — they resize to fit within a max resolution (1568px on the longest side for Claude), then tile the image into fixed-size patches. Each patch costs tokens regardless of what's in it. A single iPhone screenshot lands at roughly 1,600 image tokens. Every interaction needs at least one screenshot to see the screen, and typically a second to verify the tap landed — so you burn ~3,200 image tokens per action before the model even reasons about what it sees. Resizing screenshots down reduces tile count and saves tokens, but you lose detail — small text, icon-only buttons, and dense lists become harder for the model to parse accurately. Cropping to a region of interest helps more, but that requires knowing where to look, which is the problem you're solving. Image compression (JPEG quality, PNG vs WebP) doesn't affect token count at all because the model decodes to pixels before tiling. I did add a param to my MCP/Skill screenshot tool so that it can halve/quarter/thumbnail the screenshots before sending them to the model, but if you can avoid needing screenshots at all then that's better. Accessibility-based navigation sidesteps all of this. Query the accessibility tree (structured text, a few hundred tokens at most), find the element by identifier (deterministic, instant), tap at tracked coordinates, read a structured log to verify. No vision model and no image token waste. Over a development session where an agent navigates dozens of screens and interacts with hundreds of elements, the difference in token budget and time is huge. You're spending your context window on reasoning about your app instead of burning it on interpreting pixels. --- ## Agents as development partners The obvious use case for AI-navigable apps is automated testing — write accessibility-rich views, point an agent at them, let it run through flows. That's valuable but it's not the real win. The real win is having agents interact with your UI as they build it. When you're developing a new screen and your agent can navigate the simulator in real time, the feedback loop tightens up. #### Instant accessibility audit You and the agent build a new view, the agent tries to navigate it, and immediately reports what it can and can't find. "I can see a save button but there's no identifier on the filter picker.". Add missing identifiers and iterate. #### Flow validation You wire up a new multi-step flow and tell the agent to complete it. It gets stuck on step 3 because a list row isn't in the accessibility tree. You know exactly what's broken and where. #### Regression catching You refactor a component and the agent's usual navigation path breaks. The failure is immediate and specific — "element `technique_editor_save_button` not found" — not a vague test failure you have to debug. #### Exploratory testing You tell the agent "navigate to every screen and report what you find." It maps your app's navigation structure from the accessibility tree, and any screen that's sparse or inconsistent stands out immediately. This isn't a replacement for XCUITest or manual QA. It's a tighter loop. You and the agent are working on the same app at the same time — you're writing the views, the agent is navigating them, and issues surface in real time rather than days later in a test suite. The accessibility tree becomes a live contract between you and the agent. If it's populated correctly, the agent can help you build. If it's sparse, the agent tells you immediately. --- ## The dual-use payoff Everything in this post serves two audiences at once. The accessibility tree serves VoiceOver, Switch Control, Voice Control, Full Keyboard Access, and XCTest's UI testing framework. Those are the existing consumers. AI agents are a new consumer of the exact same data. Every identifier you add for an agent also helps a screen reader user target that element. Every label you write for programmatic navigation is the same label VoiceOver reads aloud. The hint that tells an agent what a button does is the same hint that tells a blind user what to expect. This isn't AI-specific tooling that you bolt on alongside accessibility work. It is the accessibility work, just with an expanded set of consumers. If your app is properly accessible to humans, it's most of the way to being navigable by agents. If you're investing in agent navigation, you're simultaneously making your app more accessible to humans. The incentive alignment is unusually clean. Do the right thing for users with accessibility needs, and you get AI navigability as a bonus. Invest in AI agent support, and your app becomes more accessible as a side effect. Both paths lead to the same place — a fully populated, well-structured accessibility tree. ### Links to my tools **[xc-mcp](https://github.com/conorluddy/xc-mcp)** — an MCP (Model Context Protocol) server that wraps Xcode CLI tools and the iOS Simulator. It gives Claude (or any MCP-compatible agent) the ability to build your project, launch the simulator, query the accessibility tree, tap elements, type text, and read logs. I initially built this to more efficiently run xcodebuild, but expanded it to cover IDB too. **[ios-simulator-skill](https://github.com/conorluddy/ios-simulator-skill)** — All the same tools as xc-mcp, but in a Skill instead. **[swift-accessibility-agent](/writing/swift-accessibility-skill)** — A Claude Code skill that audits and fixes SwiftUI accessibility modifiers. Three modes: `init` (scaffold CoordinateTracker), `audit` (report gaps), `fix` (add missing modifiers). The post is the skill — save the [agent-friendly version](/llm/swift-accessibility-skill) directly as your `SKILL.md`. --- # Connecting Claude Code to Your Second Brain How a simple skill turns Obsidian into a live dashboard for your AI agents, skills, and plans. category: Building date: 2026-03-05 reading-time: 6 min read url: https://conor.fyi/writing/connecting-claude-code-to-your-second-brain --- ## Obsidian as a second brain If you haven't come across [Obsidian](https://obsidian.md), it's a markdown-based knowledge base that runs entirely on local files. No cloud lock-in, no proprietary format — just folders of markdown files that you own. What makes it powerful isn't just the markdown editor. It's the *connections*. Obsidian gives you backlinks, graph view, tags, and a plugin ecosystem that turns a pile of notes into a navigable knowledge graph. You can see how ideas relate to each other and search across everything instantly. And because it's all just files on disk, it plays nicely with other tools. People use it for everything — engineering docs, product specs, meeting notes, personal journals, project planning. You don't need to be a developer to get value from it. If you write things down, Obsidian makes those things findable and connected. Claude and myself have been building something called [Zodsidian](https://github.com/conorluddy/Zodsidian) that takes this further — an Obsidian plugin that enforces structure on note frontmatter using Zod schemas, then exposes the vault as a typed data graph that AI agents can query. Think of it as giving your second brain an API. But that's a story for another post. ## The problem Claude Code is brilliant at generating useful artefacts. Custom agents that handle specific workflows. Skills that encode repeatable processes, and Plan files that break down complex projects into steps. But where do these things live? Agents sit in `~/.claude/agents/` or `.claude/agents/` inside project repos. Skills are in `~/.claude/skills/`. Plans end up in `~/.claude/plans/`. They're scattered across hidden directories, and unless you know exactly where to look, they're invisible. You can't search across them. You can't see which projects share patterns. You can't browse your growing library of AI tooling without dropping into a terminal and running `ls`. If you're using Claude Code for product planning, project management, or team coordination, these artefacts should be *visible*. They should be searchable, cross-referenced, and easy to browse — especially for people who aren't living in a terminal all day. I was originally only symlinking Claude's plans into it – until today when I went looking for a specific agent for something and twigged that there's no reason not to have your agents and skills in there too. For ease of finding, reviewing and editing them, and remembering what they actually do. ## Symlinks as portals The solution uses symlinks, which are worth a quick explanation. A symlink is a pointer — think of it as a portal from one location to another. When you create a symlink, a file appears to exist in two places, but there's only ever one real copy. Open the portal, you get the original file. Edit through the portal, you're editing the original. No duplication, no syncing, no drift. This is how `obsidian-link` bridges Claude Code and Obsidian. It creates portals between where your AI artefacts actually live and your Obsidian vault, so Obsidian can see and index them without anything being copied or moved. ## What obsidian-link does [obsidian-link](https://github.com/conorluddy/ObsidianSkills) is a Claude Code skill with four modes: **Link** — The default. Run `/obsidian-link` inside any project and it connects that project's agents and skills to your vault. It creates a `ClaudeCode/` directory in your vault with organised subdirectories for agents, skills, and plans. Everything is symlinked, so files stay where they belong. **Status** — A health check. Run `/obsidian-link status` to see every linked project, how many agents and skills each has, and whether any symlinks are broken (maybe you deleted a file or moved a repo). **Unlink** — Cleanly disconnects a project from your vault. Removes the symlinks, leaves all your actual files untouched. **Init** — Sets up plan file templates with Obsidian-friendly frontmatter. This means every plan Claude creates automatically gets tags, status fields, and metadata that make it browsable with Obsidian's Dataview plugin and visible in graph view. ### Directionality There's a deliberate design choice in how the linking works: - **Global agents and skills** (ones you use across all projects) live in your Obsidian vault. The vault is the source of truth, and symlinks point *into* `~/.claude/`. - **Per-project agents and skills** live in their project repos (where they should be, version controlled). Symlinks point *into* Obsidian. Both directions use the same portal concept. Files always have one true home — the symlinks just make them visible from both sides. ## What you get Once you've linked a few projects, your Obsidian vault becomes a live dashboard for your Claude Code setup.
![A plan file browsable in Obsidian, with structured frontmatter, project agents and skills visible in the sidebar](/images/obsidian-link/obsidian-vault-plan.jpg)
**Graph view lights up.** Agents, skills, and plans appear as nodes. The auto-generated index note uses wikilinks, so Obsidian's graph view shows how everything connects — which projects share skills, which plans reference which agents. **Search across everything.** Want to find every agent that mentions "deployment"? Every plan with status "draft"? Obsidian's search covers it all in one place, across every linked project. **Non-technical access.** Anyone on your team who uses Obsidian can browse project architecture, read agent instructions, and review plans without touching a terminal. Product managers can see what skills exist. Designers can read the agents that handle their workflows. Everyone gets visibility. **Plans become first-class notes.** With the init mode configured, every plan Claude creates includes frontmatter that Obsidian understands — status tracking, tags, project attribution, dates. You can build Dataview dashboards that show all active plans across all projects. ## Getting started Install the skill from [the GitHub repo](https://github.com/conorluddy/ObsidianSkills), then run `/obsidian-link` inside any project. The skill handles the rest — it'll ask where your vault is, create the directory structure, and set up the symlinks. It's fully idempotent, so running it multiple times is safe. It reports what it did — how many new links, how many were already in place, whether anything is broken. And it never auto-deletes anything. If a symlink is broken, it tells you and lets you decide what to do. If you're already using Obsidian as your second brain, this just gives it eyes into one more part of your workflow. And if you're not using Obsidian yet — this might be a good reason to start. --- # FoundationModels: Quick Reference Cheatsheet The scannable companion to the full iOS 26 FoundationModels reference — key types, patterns, and things not to do category: Reference date: 2026-03-01 reading-time: 8 min read url: https://conor.fyi/writing/foundation-models-cheatsheet --- > This is the fast version. For full detail on any section, follow the deep-dive links to the [complete reference](/writing/foundation-models-reference). --- ## The 15-Part Index | Part | Covers | One thing to know | Deep dive | |------|--------|-------------------|-----------| | 1 | Availability & Setup | `.modelNotReady` is transient — model is downloading, not missing | [→](/writing/foundation-models-reference#part-1-availability--setup) | | 2 | Sessions & Basic Prompting | `respond()` returns `Response` — always unwrap `.content` | [→](/writing/foundation-models-reference#part-2-sessions--basic-prompting) | | 3 | Prompt Engineering | Short beats long. `<200 words`. Explicit rules beat prose descriptions | [→](/writing/foundation-models-reference#part-3-prompt-engineering-for-on-device-models) | | 4 | `@Generable` | Macro generates a structured output schema; `@Guide` adds constraints | [→](/writing/foundation-models-reference#part-4-guided-generation-generable) | | 5 | Streaming | `streamResponse()` → `AsyncSequence`; use `.collect()` to finalise | [→](/writing/foundation-models-reference#part-5-streaming) | | 6 | Generation Options | `temperature: nil` or `0.0–0.2` for correction tasks; higher for creative | [→](/writing/foundation-models-reference#part-6-generation-options) | | 7 | Tool Calling | Pre-fetch if always needed; define as `Tool` only for conditional data | [→](/writing/foundation-models-reference#part-7-tool-calling) | | 8 | Token Budget | All inputs + output share one fixed window (~4,096 tokens) | [→](/writing/foundation-models-reference#part-8-token-budget) | | 9 | The Transcript | New session per call for stateless tasks — don't accumulate history | [→](/writing/foundation-models-reference#part-9-the-transcript) | | 10 | Failure Modes | `normalise()` should never throw — return raw input on any failure | [→](/writing/foundation-models-reference#part-10-failure-modes--graceful-degradation) | | 11 | Testing | `@Generable` types are unit-testable without the model (memberwise init) | [→](/writing/foundation-models-reference#part-11-testing) | | 12 | Use Cases | 10 concrete patterns: BJJ, recipes, journaling, commits, triage... | [→](/writing/foundation-models-reference#part-12-example-use-cases) | | 13 | Quick Reference | Full type table + anti-patterns (see below) | [→](/writing/foundation-models-reference#part-13-quick-reference--anti-patterns) | | 14 | Context Engineering | 4,096 tokens = ~3,000 words shared. Select, don't dump | [→](/writing/foundation-models-reference#part-14-context-engineering-for-on-device-ai) | | 15 | Advanced Patterns | `call()` runs `@concurrent` — hop to `@MainActor` for state access | [→](/writing/foundation-models-reference#part-15-advanced-patterns) | --- ## Key Types | Type | Purpose | |------|---------| | `SystemLanguageModel` | Singleton entry point — `.default`, `.availability`, `.isAvailable` | | `SystemLanguageModel.Availability` | `.available` / `.unavailable(reason)` — always handle `@unknown default` | | `LanguageModelSession` | One conversation thread. Stateful — holds `Transcript` | | `Instructions` | System prompt — set once at session creation, not per-turn | | `Prompt` | Per-turn user input to the model | | `Response` | Wrapper around typed output — **always** access `.content`, not `response` | | `ResponseStream` | `AsyncSequence` of `Snapshot` for streaming | | `GenerationOptions` | `temperature`, `maximumResponseTokens`, `SamplingMode` | | `@Generable` | Macro — synthesises guided generation schema for a struct or enum | | `@Guide` | Property wrapper on `@Generable` fields — description + constraints | | `GenerationGuide` | Constraint type: `.range()`, `.count()`, `.pattern()` | | `Transcript` | Linear history: `.instructions`, `.prompt`, `.response`, `.toolCalls`, `.toolOutput` | | `Tool` | Protocol — `Arguments` (Generable), `Output` (PromptRepresentable), `call()` | | `SystemLanguageModel.TokenUsage` | `.tokenCount` — measure cost before injection | --- ## Session Init Variants ```swift // Minimal — no tools, inline instructions LanguageModelSession { "Correct BJJ terminology. kimora→Kimura, half card→Half Guard." } // Explicit model LanguageModelSession(model: SystemLanguageModel.default) { "..." } // With tools LanguageModelSession(tools: [PositionLookupTool()]) { "..." } // Resume from saved transcript LanguageModelSession(model: .default, tools: [], transcript: savedTranscript) ``` --- ## `respond()` vs `streamResponse()` | | `respond()` | `streamResponse()` | |--|------------|-------------------| | Returns | `Response` | `ResponseStream` | | Best for | Background processing, pipelines | Live UI with typing effect | | Partial results | No | Yes — `snapshot.content` returns `PartiallyGenerated` | | Finalise stream | N/A | `.collect()` → `Response` | **Rule:** if the output is going directly into a pipeline or SwiftData model, use `respond()`. If the user sees it appear on screen as it generates, use `streamResponse()`. --- ## Token Budget Formula ``` Total window ≈ 4,096 tokens ≈ 3,000 words instructions + tool definitions + transcript history + prompt + response ``` All five compete for the same pool. Response tokens are consumed from the same window as input tokens — a 500-token response leaves 3,596 tokens for everything else. **Measure before injecting:** ```swift let cost = try await model.tokenUsage(for: instructions).tokenCount let window = await model.contextSize // back-deployed via @backDeployed ``` --- ## `@Generable` vs Raw `String` **Use `@Generable` when:** - You need multiple structured fields - Output must be parsed or processed programmatically - You want compile-time guarantees on shape - You need constraints (`@Guide`) on values **Use raw `String` when:** - Output is prose for display to the user - You're summarising or generating a paragraph - Streaming a typing effect --- ## The `AnyObject?` Pattern (Availability Without `@available` Spread) The problem: adding a `@State private var session: LanguageModelSession?` forces `@available(iOS 26, *)` onto the whole view. The fix: use `AnyObject?` as the declared type and cast inside `#available` guards. ```swift // In your view — no @available annotation needed on the view itself @State private var normalisationService: AnyObject? // In .onAppear or .task if #available(iOS 26, *) { normalisationService = TranscriptNormalisationService() } // At call site if #available(iOS 26, *), let service = normalisationService as? TranscriptNormalisationService { let result = await service.normalise(rawText) } ``` --- ## Context Engineering — 4 Patterns When app data is too large to inject directly: | Pattern | When to use | How | |---------|-------------|-----| | **Select, Don't Dump** | Data is queryable | SwiftData predicate — fetch only relevant rows | | **Layered Injection** | Hierarchical data | Inject summaries; load detail on demand via tools | | **Two-Step Compression** | Large corpus, summary needed | Call 1 summarises → Call 2 reasons with summary | | **Pre-Summarise at Write Time** | Rich entities with stable detail | Generate + store AI summary when entity is saved; reuse forever | --- ## The 10 Anti-Patterns **1. Accessing `response` instead of `response.content`** `respond()` returns `Response`, not `T`. Always unwrap `.content`. **2. Storing `LanguageModelSession` persistently when you don't need history** For stateless tasks (normalisation, extraction, classification), create a new session per call. History accumulates and eventually overflows the context window. **3. Too many tools** Each tool definition consumes ~50–100 tokens whether called or not. Keep to 3–5 per session. Split into multiple focused sessions if you have more. **4. Calling `isAvailable` / `checkAvailability()` in the hot path** Availability doesn't change mid-session. Check once at service init; cache the result. **5. High temperature for structured / correction tasks** `@Generable` correction types need `nil` or `temperature: 0.0–0.2`. High temperature produces creatively varied — and wrong — output. **6. Long, elaborate instructions modelled on frontier model prompts** The on-device model is ~3B parameters. Instructions over ~200 words dilute signal. Short, explicit rules outperform discursive prose every time. **7. Not testing the fallback path** On most devices today, Apple Intelligence is unavailable. Your non-AI path is the primary experience for most users. Test it as thoroughly as the AI path. **8. Using FoundationModels for regex-solvable tasks** If the task is a known, fixed pattern (extract a UUID, validate an email, format a date), use a deterministic function. LLM overhead — latency, availability, complexity — is waste. **9. Propagating `@available(iOS 26, *)` to SwiftUI views** Adding `@available` to a `@State` property forces the whole view to require iOS 26. Use the `AnyObject?` pattern instead. **10. Treating `.modelNotReady` as permanent** `.modelNotReady` means the model is downloading. It is transient. Show "not available right now" and retry on next app launch. Do not display a permanent "unsupported" message. --- ## Minimum Viable Service Pattern The production-safe wrapper — never throws, falls back silently: ```swift @available(iOS 26, *) @MainActor final class TranscriptNormalisationService { private func makeSession() -> LanguageModelSession { LanguageModelSession { """ You are a BJJ transcript corrector. Fix misrecognised terms only. Common corrections: kimora→Kimura, half card→Half Guard, arm bar→armbar. Vocabulary: Kimura, Triangle, Armbar, Half Guard, Full Guard, Mount, Back Control. Return the corrected transcript and the BJJ terms found. """ } } /// Never throws. Returns raw input unchanged on any failure. func normalise(_ rawTranscript: String) async -> NormalisedTranscript { guard !rawTranscript.trimmingCharacters(in: .whitespacesAndNewlines).isEmpty else { return NormalisedTranscript(normalisedText: rawTranscript, extractedTerms: []) } guard SystemLanguageModel.default.isAvailable else { return NormalisedTranscript(normalisedText: rawTranscript, extractedTerms: []) } do { let session = makeSession() let result = try await session.respond( to: Prompt { rawTranscript }, generating: NormalisedTranscript.self ) return result.content } catch { return NormalisedTranscript(normalisedText: rawTranscript, extractedTerms: []) } } } ``` --- ## Availability Cases at a Glance | Case | Meaning | What to do | |------|---------|------------| | `.available` | Ready to use | Create session, proceed | | `.unavailable(.deviceNotEligible)` | Hardware doesn't support Apple Intelligence | Show permanent alternative UI; remove AI option | | `.unavailable(.appleIntelligenceNotEnabled)` | User hasn't enabled it in Settings | Optionally prompt user; respect their choice | | `.unavailable(.modelNotReady)` | Model weights downloading | Show "not available right now"; retry on next launch | --- *Full 15-part reference: [iOS 26 FoundationModels: Comprehensive Swift/SwiftUI Reference](/writing/foundation-models-reference)* --- # iOS 26 FoundationModels: Comprehensive Swift/SwiftUI Reference A complete guide to Apple's on-device language model framework — from availability checking through guided generation, tool calling, and production patterns category: Reference date: 2026-02-28 reading-time: 75 min read url: https://conor.fyi/writing/foundation-models-reference --- ## Overview FoundationModels is Apple's framework for accessing the on-device large language model that powers Apple Intelligence. Introduced at WWDC 2025, it gives apps direct access to the same model behind Writing Tools, Smart Replies, and Mail Summaries — running entirely on-device, with no network requests and no data leaving the device. **Key characteristics:** - **On-device only** — no cloud fallback, no API key, no latency from network round-trips - **Privacy-first** — all inference happens locally; Apple never sees your prompts or responses - **Availability-gated** — requires Apple Intelligence to be enabled; not all devices qualify - **iOS 26+ only** — requires iPhone 15 Pro / iPhone 15 Pro Max or later (or equivalent iPad) - **Shared resource** — the model serves all apps; system may rate-limit under load **What it excels at:** - Text correction, normalisation, and reformatting - Entity extraction and classification - Summarisation of short-to-medium content - Structured output generation (via guided generation) - Context-aware suggestions and completions **What it is not:** - A replacement for frontier models (GPT-4, Claude, Gemini) for complex reasoning - A cloud API — if the model is unavailable, there is no fallback infrastructure - A general-purpose search or retrieval system **Minimum requirements:** - iOS 26.0+, iPadOS 26.0+, macOS Tahoe 26.0+ - Xcode 26.0+ - Device must support Apple Intelligence (iPhone 15 Pro or later) - Apple Intelligence must be enabled in Settings --- > **Want the fast version?** The [FoundationModels cheatsheet](/writing/foundation-models-cheatsheet) covers every part in one scannable page — key types, patterns, token budget formula, and anti-patterns. ## Contents 1. [Availability & Setup](#part-1-availability--setup)
`SystemLanguageModel`, availability cases, `AnyObject?` pattern 2. [Sessions & Basic Prompting](#part-2-sessions--basic-prompting)
`LanguageModelSession`, `Instructions`, `Prompt`, `.content` gotcha 3. [Prompt Engineering for On-Device Models](#part-3-prompt-engineering-for-on-device-models)
What works, what doesn't, `#Playground` 4. [Guided Generation (`@Generable`)](#part-4-guided-generation-generable)
`@Guide`, constraints, `PartiallyGenerated` 5. [Streaming](#part-5-streaming)
`streamResponse()`, `ResponseStream`, `.collect()` 6. [Generation Options](#part-6-generation-options)
`temperature`, `SamplingMode`, `maximumResponseTokens` 7. [Tool Calling](#part-7-tool-calling)
`Tool` protocol, pre-fetch vs inject, context cost 8. [Token Budget](#part-8-token-budget)
`tokenUsage(for:)`, `contextSize`, overflow strategies 9. [The Transcript](#part-9-the-transcript)
`Transcript.Entry`, saving/resuming sessions 10. [Failure Modes & Graceful Degradation](#part-10-failure-modes--graceful-degradation)
`GenerationError`, never-throws pattern 11. [Testing](#part-11-testing)
Four test categories, `.disabled()` on-device tests 12. [Example Use Cases](#part-12-example-use-cases)
10 concrete patterns across app domains 13. [Quick Reference & Anti-Patterns](#part-13-quick-reference--anti-patterns)
Cheatsheet + 10 things not to do 14. [Context Engineering](#part-14-context-engineering-for-on-device-ai)
Select/inject/compress/pre-summarise 15. [Advanced Patterns](#part-15-advanced-patterns)
Actor isolation, `@Generable` enums with associated values, `Observable` monitoring, `PromptRepresentable` chaining, bounded domain injection --- ## Part 1: Availability & Setup ### `SystemLanguageModel.default` `SystemLanguageModel.default` is the singleton entry point for the on-device language model. You do not initialise it — it is a static property you reference directly. Everything in FoundationModels starts here. ```swift let model = SystemLanguageModel.default switch model.availability { case .available: // model is ready — create a session and run prompts case .unavailable(let reason): // handle the specific reason @unknown default: break } ``` `SystemLanguageModel` is an `Observable` final class, so you can observe `.availability` changes in SwiftUI via `@State` or inside `.task {}` blocks without any special wiring. --- ### Availability Cases `SystemLanguageModel.Availability` is a `@frozen` enum with two top-level cases: `.available` and `.unavailable(UnavailableReason)`. Always handle `@unknown default` — Apple will add cases in future OS versions. **`.available`** The model is downloaded, Apple Intelligence is enabled, and the device is eligible. Create a `LanguageModelSession` and proceed. **`.unavailable(.deviceNotEligible)`** The hardware does not support Apple Intelligence. This applies to iPhone 14 and earlier, and equivalent iPad/Mac models. This is **permanent for the lifetime of the device** — no amount of waiting or retrying will change it. When you see this case, remove the AI code path from your UI entirely and show a permanent alternative experience. **`.unavailable(.appleIntelligenceNotEnabled)`** The device is eligible but the user has not turned on Apple Intelligence in Settings > Apple Intelligence & Siri. This is a **user choice**, not a hardware limitation. You can optionally prompt the user to enable it: ```swift // Optionally deep-link to Settings if let url = URL(string: UIApplication.openSettingsURLString) { UIApplication.shared.open(url) } ``` Respect the user's decision. If they choose not to enable it, show the non-AI path without nagging. **`.unavailable(.modelNotReady)`** This is the most misunderstood case. It does **not** mean the model is permanently unavailable — it means the model weights are currently **downloading**. There is **no programmatic download API**. You cannot trigger the download, request it, or track its progress. The OS manages download timing based on network conditions, battery level, device temperature, and system load. Download can take minutes to hours. Treat `.modelNotReady` as a transient state. Do not show a permanent "not supported" message. Instead, show a softer "not available right now — check back later" state and retry on the next app launch or session. ```swift func checkAvailability() -> String { switch SystemLanguageModel.default.availability { case .available: return "Ready" case .unavailable(let reason): switch reason { case .deviceNotEligible: return "Device not supported" case .appleIntelligenceNotEnabled: return "Enable Apple Intelligence in Settings" case .modelNotReady: return "Downloading... check back soon" @unknown default: return "Unavailable" } @unknown default: return "Unknown" } } ``` --- ### `isAvailable` Convenience Property `SystemLanguageModel.default.isAvailable` is a `Bool` shorthand. Use it when you only need to gate a code path and don't need to distinguish between unavailability reasons: ```swift guard SystemLanguageModel.default.isAvailable else { return } // proceed with AI code path ``` If you need to communicate *why* the model is unavailable to the user, use the full `.availability` switch instead. --- ### `UseCase` — `.general` vs `.contentTagging` `SystemLanguageModel.UseCase` selects a specialised version of the model. There are two options: **`SystemLanguageModel.UseCase.general`** (the default for `SystemLanguageModel.default`) — a general-purpose model for writing assistance, analysis, correction, extraction, and summarisation. This is what you get when you use `SystemLanguageModel.default`. **`SystemLanguageModel.UseCase.contentTagging`** — specialised for classification and extraction tasks. When you use this model, it **always responds with tags** — it is tuned to identify topics, emotions, actions, and objects. Use this when you want to categorise or label content rather than transform or generate it. ```swift // General model (default — used for most tasks) let model = SystemLanguageModel.default // Content tagging model — for classification/extraction let taggingModel = SystemLanguageModel(useCase: .contentTagging) let session = LanguageModelSession(model: taggingModel) ``` Do not use `.contentTagging` for text correction or generation tasks. The model will produce tags rather than prose, regardless of your instructions. --- ### `Guardrails` `SystemLanguageModel.Guardrails` controls content safety filtering on model inputs and outputs. There are two presets: **`SystemLanguageModel.Guardrails.default`** — the standard setting. Blocks unsafe content in both prompts and responses. When triggered, throws `LanguageModelSession.GenerationError.guardrailViolation(_:)`. **`SystemLanguageModel.Guardrails.permissiveContentTransformations`** — allows potentially sensitive source material to pass through for string generation tasks. Use this when your app legitimately processes user-generated content that might incidentally contain sensitive words (e.g., a chat moderation tool, a study app covering difficult topics). This mode **only applies to string output** — guided generation (`@Generable`) always uses default guardrails. ```swift // Default guardrails (most apps) let model = SystemLanguageModel.default // Permissive mode — for apps that must process sensitive source text let model = SystemLanguageModel(guardrails: .permissiveContentTransformations) ``` Even in permissive mode, the model may still refuse certain content — it retains its own layer of safety separate from the guardrail system. --- ### The `AnyObject?` Pattern for SwiftUI iOS 26 types require `@available(iOS 26, *)` annotations. Annotating a `@State` property with `@available` propagates that constraint to the entire containing view struct — meaning the whole view requires iOS 26, which is likely not what you want. The solution is to store iOS 26-only service instances as `AnyObject?` and cast them back inside `#available` guards: ```swift // DON'T do this — @available propagates to the whole view @available(iOS 26, *) @State private var service: MyAI26Service? // ❌ forces view to require iOS 26 // DO this instead — no @available constraint on the view struct @State private var service: AnyObject? // ✅ clean — AnyObject has no availability // Store the service (inside a #available guard) if #available(iOS 26, *) { self.service = MyAI26Service() } // Use the service (inside a #available guard) if #available(iOS 26, *), let s = self.service as? MyAI26Service { let result = try await s.process(text) } ``` This pattern lets you write a single view struct that gracefully degrades on older OS versions without any `@available` annotation on the view itself. --- ## Part 2: Sessions & Basic Prompting ### `LanguageModelSession` — Init Variants `LanguageModelSession` is the object you interact with to send prompts and receive responses. The two most common init patterns are: **Fresh session (most common):** ```swift // With builder-style instructions let session = LanguageModelSession { "You are a BJJ terminology corrector." "Fix misrecognised terms to their canonical spellings." } // With a specific model let session = LanguageModelSession(model: SystemLanguageModel.default) { "You are a motivational coach." } // With string instructions — also valid let session = LanguageModelSession( instructions: "You are a code review assistant." ) ``` **Resume from transcript (multi-turn):** ```swift // Rehydrate a session from a saved transcript to continue a conversation let session = LanguageModelSession( model: SystemLanguageModel.default, tools: [], transcript: savedTranscript ) ``` The session is an `Observable` final class. It is also `Sendable`, so you can safely hold a reference from a `@MainActor` context and call its methods from async tasks. --- ### `Instructions` `Instructions` defines the model's persona, rules, and domain — what the model *is* and how it *behaves*. Set it once at session creation. Instructions apply to every prompt in that session. Use `@InstructionsBuilder` (result builder syntax) to compose instructions from multiple strings: ```swift let instructions = Instructions { "You are a BJJ terminology corrector." "Fix misrecognised BJJ terms to their canonical spellings." "Common corrections: kimora→Kimura, half card→Half Guard, darce→D'Arce" } ``` Or pass a plain `String` directly: ```swift let session = LanguageModelSession( instructions: "You are a concise summariser. Respond in three sentences maximum." ) ``` Instructions are not the user's question — that is the `Prompt`. Instructions define the container; the prompt fills it. The framework injects instructions as the system-level context for the model. The model follows instructions at higher priority than prompt content, so put your constraints and rules in instructions, not in the prompt itself. --- ### `Prompt` `Prompt` is the user's input — the actual question, text, or content you want the model to process. Use `@PromptBuilder` for dynamic construction: ```swift // Builder style — for dynamic prompts let prompt = Prompt { "Correct this transcript: \(rawText)" } // String literal — also valid let response = try await session.respond(to: "Summarise the following: \(article)") ``` Prompt strings accept string interpolation. Keep prompts concise — every token in a prompt consumes context budget that competes with the response. --- ### The Critical `.content` Gotcha `respond(to:options:)` returns `LanguageModelSession.Response`, **not** `T` directly. `Response` is a wrapper struct. The actual generated value is at `.content`. This is the single most common mistake when first using the framework: ```swift // WRONG — response is Response, not String let text = try await session.respond(to: prompt) print(text.uppercased()) // compile error: Response has no uppercased() // RIGHT let response = try await session.respond(to: prompt) let text = response.content // String print(text.uppercased()) // With typed guided generation let response = try await session.respond( to: prompt, generating: MyOutputType.self ) let value = response.content // MyOutputType ``` Internalise this: `respond()` always returns `Response`. Always unwrap `.content` before using the value. --- ### `Response.rawContent` `response.rawContent` gives you the unprocessed `GeneratedContent` before guided generation parsing. This is the raw structured output the model produced, before it was decoded into your `@Generable` type. Use it for debugging when a response fails to parse or produces unexpected values — it shows you exactly what the model generated. --- ### Session-Per-Call vs Persistent Sessions This is a key architectural decision. Get it right at design time. **Session-per-call** — create a new `LanguageModelSession` for each request. No conversation history accumulates. This is the correct pattern for the vast majority of use cases: text correction, extraction, summarisation, classification, entity detection. Each request is independent. ```swift // Session-per-call — correct for stateless tasks func normalise(_ text: String) async throws -> String { let session = LanguageModelSession { "Fix speech-to-text errors in BJJ transcripts." "Corrections: kimora→Kimura, half card→Half Guard, darce→D'Arce" } let response = try await session.respond(to: Prompt { text }) return response.content } ``` **Persistent session** — keep the `LanguageModelSession` alive across multiple `respond()` calls. The session accumulates its `Transcript` as you go, so the model remembers previous exchanges. Use this *only* when the model needs that history to answer correctly — for example, a coaching chatbot where the user refers to something they said three turns ago. ```swift // Persistent session — for multi-turn conversation @Observable class ChatAssistant { private let session = LanguageModelSession { "You are a BJJ coach assistant." "Help the user analyse and improve their game based on their training logs." } func chat(_ message: String) async throws -> String { let response = try await session.respond(to: Prompt { message }) return response.content // transcript accumulates automatically } } ``` The risk with persistent sessions: the transcript grows with each exchange and eventually hits the context window limit, throwing `LanguageModelSession.GenerationError.exceededContextWindowSize`. For long-running conversations, you need a strategy for trimming or summarising history. Session-per-call has no such risk. **Default to session-per-call.** Only reach for persistent sessions when you have a concrete requirement for cross-turn memory. --- ## Part 3: Prompt Engineering for On-Device Models ### The On-Device Model is Smaller — This Changes Everything The model powering FoundationModels is Apple’s private on-device LLM — not GPT-4, not Claude, not Gemini. It is significantly smaller (estimated ~3B parameters) than frontier cloud models. This is a feature, not a bug — it runs entirely on your device with sub-second latency — but it fundamentally changes how you should write prompts. Techniques that work reliably on frontier models can **actively degrade** performance on the on-device model. Treat every prompt engineering heuristic you have learned from cloud models as a starting point to validate, not a rule to apply. --- ### Principle 1: Short, Direct Instructions Keep instructions under approximately 200 words total. Longer instructions dilute the signal — the model struggles to prioritise which parts matter most and may partially ignore sections buried deep in a long system prompt. Every sentence in your instructions should earn its place. If you can remove a sentence without changing the model’s behaviour, remove it. ```swift // WEAK — verbose, repetitive let session = LanguageModelSession { "You are a helpful assistant specialising in Brazilian Jiu-Jitsu." "Your primary purpose is to help users with BJJ-related queries." "When you see text from speech recognition, carefully examine it." "Your goal is to correct any speech recognition errors in the text." "Please make sure to handle common BJJ terminology correctly." } // STRONG — dense, direct let session = LanguageModelSession { "Fix speech-to-text errors in BJJ transcripts." "Correct misrecognised terms. Return only the corrected text." } ``` --- ### Principle 2: Explicit Corrections Beat Implied Inference If you have known domain-specific misrecognitions or corrections, list them explicitly. Do not rely on the model inferring what “fix BJJ terms” means — it may not know the canonical spellings for niche vocabulary. ```swift // WEAK — relies on the model knowing BJJ terminology "Fix any incorrectly transcribed Brazilian Jiu-Jitsu terminology." // STRONG — explicit correction table let session = LanguageModelSession { "Fix speech-to-text errors in BJJ transcripts." "Common misrecognitions: kimora/kimura -> Kimura, half card/half god -> Half Guard," "darce/dart -> D'Arce, rnc/arnc -> Rear Naked Choke, omoa plata -> Omoplata." } ``` The on-device model does not have the deep BJJ domain knowledge that a frontier model trained on vast internet corpora might have. Make your domain knowledge explicit in the prompt rather than hoping the model already knows it. --- ### Principle 3: Include a Domain Vocabulary in Instructions For niche domains — BJJ, medicine, legal, finance, specialised engineering — include a vocabulary list or canonical term glossary in your instructions. This gives the model the reference it needs to make correct corrections or use correct terminology in its output. ```swift let session = LanguageModelSession { "You are a BJJ transcript corrector." "Canonical terms: Guard, Half Guard, Mount, Back Mount, Side Control," "North-South, Turtle, Closed Guard, Open Guard, De La Riva, X-Guard," "Kimura, Armbar, Triangle, Rear Naked Choke, D'Arce, Anaconda," "Omoplata, Heel Hook, Kneebar, Toe Hold." "Correct misrecognised terms to their canonical forms." } ``` This is more token-efficient than hoping for inference, and significantly more reliable. --- ### Principle 4: One Task Per Session Do not ask the model to perform multiple distinct tasks in one session. Correction AND summarisation AND extraction in a single prompt will produce worse results on the on-device model than running them as separate sessions. ```swift // WEAK — three tasks in one call let response = try await session.respond(to: Prompt { "Correct BJJ terms, summarise the session, and extract techniques used." rawText }) // STRONG — one focused task per session let corrected = try await correctSession.respond(to: Prompt { rawText }) let summary = try await summarySession.respond(to: Prompt { corrected.content }) let techniques = try await extractSession.respond(to: Prompt { corrected.content }) ``` The overhead of running multiple sessions is minimal compared to the reliability gain from focused, single-task prompts. --- ### Principle 5: Avoid Chain-of-Thought Prompting "Think step by step", "Let’s reason through this", and similar chain-of-thought prompts improve performance on large models but **add noise on smaller on-device models**. The model produces reasoning tokens that consume context budget without materially improving the final answer — and can sometimes cause the model to talk itself into a worse answer. Do not use CoT prompting for on-device tasks. Give direct instructions and ask for direct output. ```swift // WEAK — chain-of-thought on a small model "Think step by step about what BJJ terms might have been misrecognised, then correct them." // STRONG — direct instruction "Correct misrecognised BJJ terms. Return only the corrected text." ``` --- ### Frontier Model vs On-Device: Comparison | Technique | Frontier Model | On-Device Model | |-----------|----------------|-----------------| | Chain-of-thought prompting | Works well ✅ | Degrades performance ❌ | | Long, elaborate instructions | Fine ✅ | Unreliable ⚠️ | | Implicit domain inference | Often works ✅ | Unreliable for niche domains ⚠️ | | Explicit correction lists | Helpful ✅ | Critical ✅✅ | | Multi-task instructions | Usually works ✅ | Fails ❌ | | Short, direct instructions | Works ✅ | Works best ✅✅ | | CoT / "think step by step" | Major boost ✅ | Noise and overhead ❌ | | Few-shot examples in prompt | Works ✅ | Works, watch token budget ⚠️ | --- ### The `#Playground` Macro — Fast Prompt Iteration Available from iOS 26.4+ (February 2026 Foundation Models update), the `#Playground` macro lets you iterate on prompts directly in Xcode without building and running the full app. Write a `#Playground` block in a Swift file, run it from the Xcode canvas, and see the response inline. When you run the canvas, the output shows **Input Token Count** and **Response Token Count** separately — useful for understanding your prompt’s cost against the ~4,096 token context window estimate shown in canvas. ```swift import FoundationModels #Playground { let session = LanguageModelSession { "Fix BJJ transcript errors." "kimora -> Kimura, half card -> Half Guard, darce -> D'Arce" } let response = try await session.respond( to: "worked kimora from half card today, finished with darce" ) response.content // displayed in Xcode canvas } ``` This is the fastest feedback loop for prompt engineering. Iterate on your instructions in the playground before wiring them into the app. Test with the exact on-device model, not a frontier proxy — behaviour differs significantly, and a prompt that works on GPT-4 may not work well on the Apple on-device model. --- ## Part 4: Guided Generation (`@Generable`) ### What `@Generable` Does `@Generable` is an attached macro that synthesises `Generable` protocol conformance on a struct or enum. At compile time it does three things: 1. Generates a `PartiallyGenerated` associated type — a mirror of the struct where every stored property is `Optional`. This is the type you receive when iterating a stream mid-generation. 2. Infers a JSON schema from the struct's property types and any `@Guide` annotations. That schema drives constrained sampling, which guarantees the output is always structurally valid — no parsing, no runtime crashes from malformed responses. 3. Synthesises `ConvertibleFromGeneratedContent` and `ConvertibleToGeneratedContent` conformances, which handle encoding and decoding between the model's internal representation and your Swift type. The model generates properties in the order they are declared, so put properties that should influence later ones first. ### Basic Usage ```swift @Generable struct BookReview { var title: String var rating: Int var summary: String } let session = LanguageModelSession() let response = try await session.respond( to: "Review this book: \(bookTitle)", generating: BookReview.self ) let review = response.content // BookReview — fully populated, no parsing needed ``` ### `@Guide` — Descriptions `@Guide(description:)` tells the model what a property means. Include descriptions for any property where the name alone is ambiguous. Keep them concise — long descriptions consume context and add latency. ```swift @Generable struct NormalisedTranscript { @Guide(description: "The full transcript with BJJ terms corrected and properly cased") var normalisedText: String @Guide(description: "BJJ terms found in the transcript, each in canonical form e.g. 'Kimura', 'Half Guard'") var extractedTerms: [String] } ``` You can also annotate the struct itself via `@Generable(description:)`: ```swift @Generable(description: "A classified support ticket with priority and routing metadata") struct TicketClassification { @Guide(description: "Urgency level for routing decisions") var priority: Int } ``` ### `@Guide` — Constraints with `GenerationGuide` `@Guide` also accepts one or more `GenerationGuide` values to enforce numeric bounds and array sizes. All bounds are inclusive. ```swift @Generable struct ProductReview { @Guide(description: "Star rating", .range(1...5)) var rating: Int @Guide(description: "Key selling points, at most three", .maximumCount(3)) var keyPoints: [String] @Guide(description: "Topics addressed, at least one", .minimumCount(1)) var topics: [String] @Guide(description: "Quality score", .minimum(0), .maximum(100)) var qualityScore: Double } ``` Available `GenerationGuide` constraints: | Constraint | Applies To | Behaviour | |-----------|-----------|-----------| | `.range(n...m)` | Numeric types | Value must fall within the closed range (inclusive both ends) | | `.minimum(n)` | Numeric types | Value must be ≥ n | | `.maximum(n)` | Numeric types | Value must be ≤ n | | `.minimumCount(n)` | `[T]` arrays | Array must contain ≥ n elements | | `.maximumCount(n)` | `[T]` arrays | Array must contain ≤ n elements | Multiple guides can be combined on a single property as variadic arguments — `.minimum(0), .maximum(100)` is valid. ### Enums as `@Generable` Types Mark enums with `@Generable` to use them as property types inside other `@Generable` structs. The constrained sampler restricts output to valid case names only: ```swift @Generable enum Sentiment { case positive case neutral case negative } @Generable struct MessageClassification { @Guide(description: "Overall tone of the message") var sentiment: Sentiment @Guide(description: "Urgency, 1 = routine, 5 = escalate immediately", .range(1...5)) var urgency: Int } ``` Enums with associated values are also supported — the `@Generable` macro ensures all associated and nested values are themselves generable. ### `PartiallyGenerated` — Streaming Snapshots Every `@Generable` type gets a synthesised `PartiallyGenerated` associated type. It is a version of the struct where all stored properties are `Optional`, representing work-in-progress output during streaming: ```swift for try await snapshot in session.streamResponse( to: "Review: \(bookTitle)", generating: BookReview.self ) { let partial = snapshot.content // BookReview.PartiallyGenerated // partial.title might be "The G..." while still generating // partial.rating is nil until the model has written that property if let title = partial.title { titleLabel.text = title } } // After the loop completes, collect() gives a Response with all properties set ``` `PartiallyGenerated` is a streaming-only concern. When you call `respond()` (non-streaming), you receive the completed `Content` type directly — no optionals, no partial states to handle. ### `GeneratedContent` — Untyped Escape Hatch `GeneratedContent` is the framework's internal structured representation of model output. You normally never interact with it — `@Generable` handles encoding and decoding automatically. When you need raw access, every `Response` exposes: ```swift let response = try await session.respond(to: prompt, generating: BookReview.self) response.content // BookReview — your typed result response.rawContent // GeneratedContent — the underlying parsed value ``` `rawContent` is useful for debugging when model output does not match your type. You can inspect it to see exactly what the model produced before your `ConvertibleFromGeneratedContent` init ran. For fully dynamic schemas (where the type is not known at compile time), use `respond(schema:)` with a `GenerationSchema` built from `DynamicGenerationSchema`. The response will have `Content == GeneratedContent`, and you decode manually via `value(_:forProperty:)`: ```swift let response = try await session.respond(to: prompt, schema: schema) let soup: String = try response.content.value(forProperty: "dailySoup") ``` ### Independent Constructability — Critical for Testing `@Generable` types must be constructable via their memberwise initialiser without running the model. This is the property that makes them unit-testable: ```swift // Your output type @Generable struct NormalisedTranscript { @Guide(description: "Corrected transcript text") var normalisedText: String @Guide(description: "Extracted BJJ terms in canonical form") var extractedTerms: [String] } // Tests run on any machine — no Apple Intelligence required func testNormalisationOutputType() { let result = NormalisedTranscript( normalisedText: "Worked Kimura from Half Guard", extractedTerms: ["Kimura", "Half Guard"] ) #expect(result.normalisedText.contains("Kimura")) #expect(result.extractedTerms.count == 2) } ``` If your `@Generable` type has custom initialisers that depend on model output, or computed properties with side effects, you have broken this contract. Keep output types as plain data containers — structs with stored properties and no embedded behaviour. ### Protocol Hierarchy You rarely interact with these directly — `@Generable` wires everything up — but understanding the hierarchy helps when debugging conformance errors or writing manual implementations: | Protocol | Role | |---------|------| | `Generable` | Synthesised by `@Generable`. Requires `PartiallyGenerated` associated type, `generationSchema`, and `ConvertibleFromGeneratedContent` init. Inherits from both `Convertible*` protocols. | | `ConvertibleFromGeneratedContent` | Types constructable from model output. `Int`, `String`, `Bool`, `Float`, `Double`, `Decimal`, `Array`, enums, and `@Generable` structs all conform automatically. | | `ConvertibleToGeneratedContent` | Types that can be serialised back to `GeneratedContent`. Used for tool output and prompt injection. Inherits from `PromptRepresentable`. | | `PromptRepresentable` | Types that can appear inside a `@PromptBuilder` closure. `@Generable` types conform, so you can pass model output directly back as prompt input in a subsequent call. | --- ## Part 5: Streaming ### The Core Decision: Stream or Not? | Use Case | Method | Reason | |----------|--------|--------| | Live text appearing for the user (typing effect) | `streamResponse()` | User sees progress, engagement increases | | Processing output programmatically | `respond()` | Simpler — no partial state handling | | Background pipeline (normalisation, extraction) | `respond()` | No UI benefit; streaming increases rate-limit risk in background | | Long-form generation the user is watching | `streamResponse()` | Progress feedback reduces perceived latency | | Structured `@Generable` output | `respond()` preferred | Partial structs with all-Optional properties add complexity for no gain | Apple's own docs note that background tasks should use the non-streaming `respond()` to reduce the likelihood of encountering `GenerationError.rateLimited` errors. ### String Streaming ```swift let stream = session.streamResponse(to: "Summarise: \(text)") for try await snapshot in stream { let partial: String = snapshot.content // String grows with each chunk await MainActor.run { self.displayText = partial } } // Or skip the loop entirely and just collect the final result let fullResponse = try await stream.collect() let finalText = fullResponse.content // String — complete ``` ### Typed (`@Generable`) Streaming ```swift let stream = session.streamResponse( to: "Review: \(text)", generating: BookReview.self ) for try await snapshot in stream { let partial = snapshot.content // BookReview.PartiallyGenerated // All properties are Optional — may be nil while the model generates earlier properties if let title = partial.title { titleLabel.text = title } if let rating = partial.rating { updateStars(rating) } } // Collect to receive the complete, fully-typed result let response = try await stream.collect() let review = response.content // BookReview — all properties non-nil ``` ### `ResponseStream` `streamResponse()` returns a `ResponseStream`, which is an `AsyncSequence` of `ResponseStream.Snapshot` values. The type parameter matches what you would get from the equivalent `respond()` call. ```swift // Type relationships session.streamResponse(to: prompt) // → ResponseStream session.streamResponse(to: prompt, generating: BookReview.self) // → ResponseStream // Each snapshot during the stream: snapshot.content // → String (for string stream) // → BookReview.PartiallyGenerated (for typed stream — all properties Optional) // After .collect(): response.content // → String (complete) // → BookReview (complete, all properties set) ``` `ResponseStream` conforms to `AsyncSequence`, so you get the full suite of async sequence operators — `map`, `filter`, `prefix`, etc. ### Progressive UI Update Pattern The natural pattern for SwiftUI is to assign each snapshot directly to a `@State` property: ```swift @Observable final class SummaryViewModel { var generatedText = "" func generate(prompt: Prompt) async throws { let stream = session.streamResponse(to: prompt) for try await snapshot in stream { generatedText = snapshot.content // @Observable triggers view update per chunk } } } // In the view: Text(viewModel.generatedText) .animation(.default, value: viewModel.generatedText) ``` For `@Generable` types, update individual UI elements as their backing properties become available: ```swift for try await snapshot in stream { let partial = snapshot.content // BookReview.PartiallyGenerated titleLabel.text = partial.title ?? titleLabel.text // retain last known value summaryLabel.text = partial.summary ?? summaryLabel.text } ``` ### `collect()` — Streams to Full Response `collect()` is an async method on `ResponseStream` that waits for the stream to finish and returns a complete `Response`: ```swift let stream = session.streamResponse(to: prompt) // Option A: observe snapshots AND get the final result for try await snapshot in stream { updateProgressUI(snapshot.content) } // Stream is exhausted — collect() returns immediately since the stream is done let finalResponse = try await stream.collect() // Option B: skip observation, just get the final result let finalResponse = try await stream.collect() ``` If the stream finished with an error before `collect()` is called, `collect()` propagates that error. If the stream completed successfully, `collect()` returns immediately with the cached result. ### Error Handling in Streams Errors are thrown during iteration, not at stream creation (the stream object itself is always returned, even if the model will fail): ```swift do { for try await snapshot in stream { // process snapshot } } catch LanguageModelSession.GenerationError.rateLimited(let retryAfter) { // system under load — retry after the given delay } catch LanguageModelSession.GenerationError.exceededContextWindowSize { // prompt + history too long — trim the input } catch LanguageModelSession.GenerationError.guardrailViolation { // content flagged — show alternative UX } catch { // unexpected error } ``` The same error types apply to `streamResponse()` as to `respond()` — the difference is only in when they surface during your `async` call. --- ## Part 6: Generation Options `GenerationOptions` is a struct you pass to `respond()` or `streamResponse()` to control how the model generates output. All properties are optional — omitting them leaves the model at its defaults, which are usually correct. ```swift let options = GenerationOptions( temperature: 0.1, maximumResponseTokens: 200 ) let response = try await session.respond(to: prompt, options: options) ``` ### `temperature` Temperature controls how "creative" or "random" the model's output is, on a scale from 0.0 to 1.0. `nil` (the default) lets the model use its own calibrated default, which is appropriate for most tasks. | Temperature | Behaviour | Best For | |-------------|-----------|----------| | `nil` | Model default (typically ~0.7) | General use — let the model decide | | `0.0–0.2` | Near-deterministic, consistent | Corrections, extraction, classification | | `0.3–0.6` | Balanced | Summarisation, analysis | | `0.7–1.0` | Creative, varied | Brainstorming, dialogue, story generation | **The most common mistake**: setting a high temperature for a correction or extraction task. If you are normalising speech-to-text errors using `@Generable`, you want the model to produce the *same correct answer* every time — not a creatively varied interpretation. Use `nil` or set it low. ```swift // ❌ High temperature for a structured correction task — produces inconsistent output let options = GenerationOptions(temperature: 0.9) let response = try await session.respond( to: Prompt { rawTranscript }, generating: NormalisedTranscript.self, options: options ) // ✅ Low temperature — deterministic, reliable corrections let options = GenerationOptions(temperature: 0.1) // or just omit options entirely — the schema constraints already reduce variance ``` For `@Generable` output, the constrained sampler that enforces your schema also reduces variance regardless of temperature. But setting temperature low is still good practice to signal your intent and produce maximally consistent output. ### `GenerationOptions.SamplingMode` `SamplingMode` gives you control over the underlying sampling algorithm. The two modes are: **`.greedy`** — always selects the single most probable token at each step. Maximally deterministic. Best for tasks with one correct answer (grammar correction, structured extraction). **`.random(temperature:)`** — samples from the probability distribution, with temperature scaling how broadly. This is the mode behind the `temperature` parameter. ```swift // Explicit greedy sampling — maximum determinism let options = GenerationOptions( sampling: .greedy ) // Random sampling at a specific temperature let options = GenerationOptions( sampling: .random(temperature: 0.7) ) ``` The `temperature` property on `GenerationOptions` is a convenience shorthand for `.random(temperature:)`. Setting `temperature: 0.0` is equivalent to `.greedy`. ### `maximumResponseTokens` Sets an upper bound on how many tokens the model can generate in its response. Useful for: - **Capping costs** (on-device, this is latency rather than money) when you know responses should be short - **Preventing runaway generation** in summary tasks where you want concise output - **Enforcing length constraints** the instructions alone can't reliably enforce ```swift // Limit to a short summary (~100 tokens ≈ ~75 words) let options = GenerationOptions(maximumResponseTokens: 100) let response = try await session.respond( to: "Summarise this training session in one paragraph: \(notes)", options: options ) ``` Be careful not to set `maximumResponseTokens` too low for `@Generable` types — if the model runs out of tokens before completing your struct, it will throw `GenerationError.exceededContextWindowSize`. --- ## Part 7: Tool Calling Tools let the model call back into your Swift code to fetch data or perform actions during generation. The model autonomously decides whether and when to call a tool — you provide the definitions; it decides whether they are relevant to the current prompt. ### The `Tool` Protocol Conform to `Tool` to define a callable function the model can invoke: ```swift @available(iOS 26, *) struct CurrentDateTool: Tool { let name = "getCurrentDate" let description = "Returns today's date in ISO 8601 format (YYYY-MM-DD)." // Arguments the model will pass — a @Generable struct @Generable struct Arguments { @Guide(description: "Optional timezone identifier, e.g. 'Europe/Dublin'") var timezone: String? } // Return type — any PromptRepresentable (String is simplest) func call(arguments: Arguments) async -> String { let formatter = ISO8601DateFormatter() if let tz = arguments.timezone, let zone = TimeZone(identifier: tz) { formatter.timeZone = zone } return formatter.string(from: Date()) } } ``` Key constraints: - `Arguments` must conform to `ConvertibleFromGeneratedContent`. A `@Generable` struct is the standard approach — the macro handles conformance automatically. - `Output` (the return type) must conform to `PromptRepresentable`. `String` always works. `@Generable` types also work. - `call(arguments:)` is implicitly `@concurrent` — it runs off the main actor. Make it `async` if you need to do async work. ### Registering Tools With a Session Pass tools in the `tools` parameter when creating a session: ```swift @available(iOS 26, *) let session = LanguageModelSession( tools: [CurrentDateTool(), UserProfileTool()] ) { "You are a task scheduling assistant." "Use getCurrentDate to determine today's date before scheduling." } let response = try await session.respond( to: "Schedule a reminder for two weeks from today" ) let text = response.content // model called getCurrentDate internally ``` The model receives each tool's `name`, `description`, and the JSON schema derived from `Arguments`. It uses the name and description to decide whether calling the tool is relevant to the prompt. **Name and description are the primary signals** — write them as short, specific phrases. ### How the Model Decides to Call Tools You cannot force the model to call a specific tool. It decides autonomously based on: 1. Whether the tool's **name and description** match the intent of the prompt 2. Whether it already has the information it needs without a tool call 3. Whether the prompt semantically requires external data The model may call zero tools (if it can answer from its knowledge), call one tool, or call multiple tools before producing its final response. ### Critical Performance Insight: Pre-Fetch vs Tool This is Apple's own guidance from the documentation, and it matters for performance: **If you ALWAYS need data from a source**, inject it directly into instructions rather than defining a tool. ```swift // ❌ Tool for data you always need — adds latency on every call struct UserPreferencesTool: Tool { ... } // ✅ Pre-fetch and inject — one fetch, zero tool overhead let preferences = await loadUserPreferences() let session = LanguageModelSession { "User preferences: \(preferences.serialised)" "Use these preferences when making recommendations." } ``` Tools have two costs: 1. **Token cost** — each tool definition (name + description + arguments schema) consumes context budget. A tool with a complex `Arguments` struct can cost 50–100 tokens just for its definition. 2. **Latency cost** — each tool call is a model inference round-trip: the model generates a call, your code runs, the result is injected back, the model continues. This adds meaningful latency. **Reserve tools for data that is conditionally needed** — data you might need depending on what the user asks. ### Context Window Cost Define tools concisely. The model sees `name + description + arguments schema` for every tool, every call, whether it uses them or not. ```swift // ❌ Verbose tool definition — each call consumes more context struct FetchUserTrainingHistoryForTheLastSixMonthsTool: Tool { let name = "fetchUserTrainingHistoryForTheLastSixMonths" let description = "This tool fetches the complete training history of the current user for the past six calendar months, including all session notes, techniques practised, and time spent..." // ... } // ✅ Concise — same capability, fraction of the tokens struct TrainingHistoryTool: Tool { let name = "getTrainingHistory" let description = "Returns recent training sessions with notes and techniques." // ... } ``` A practical limit is **3–5 tools per session**. Beyond that, the definitions alone consume a significant portion of context, leaving less room for the actual conversation. ### Tool Calls in the Transcript When the model calls a tool, it appears in the session's `Transcript` as two entries: - `Transcript.Entry.toolCalls` — the model's request(s) to call tools - `Transcript.Entry.toolOutput` — the results that were injected back This is useful when debugging why the model produced a particular response — you can inspect the transcript to see exactly what tool calls were made and what data the model received. See Part 9 (The Transcript) for full `Transcript` coverage. --- ## Part 8: Token Budget The on-device model has a **fixed context window** shared by all inputs and outputs for a session. Understanding how that budget is consumed is essential for building reliable features — especially multi-turn conversations and tool-using sessions. ### The Budget Breakdown Every token in a session competes for the same fixed window: ``` Total Context Window ├── Instructions (system prompt) ├── Tool definitions (name + description + args schema × number of tools) ├── Transcript history (all previous turns) ├── Current prompt └── Response (tokens generated) ``` Response tokens are not free — they come out of the same pool as input. A long system prompt and a long conversation history leave less room for both the current prompt and its response. ### Measuring Token Usage `SystemLanguageModel` exposes three `tokenUsage(for:)` overloads (added February 2026): ```swift let model = SystemLanguageModel.default // 1. Cost of Instructions + tool definitions let instrUsage = try await model.tokenUsage( for: instructions, tools: [MyTool()] ) print(instrUsage.tokenCount) // e.g. 180 // 2. Cost of a single Prompt let promptUsage = try await model.tokenUsage(for: prompt) print(promptUsage.tokenCount) // e.g. 45 // 3. Cost of a saved Transcript (conversation history) let historyUsage = try await model.tokenUsage(for: transcript.entries) print(historyUsage.tokenCount) // e.g. 620 ``` All three return `SystemLanguageModel.TokenUsage`, with a single `tokenCount: Int` property. Use these to profile your sessions during development rather than guessing. ### The `contextSize` Property `SystemLanguageModel.contextSize` returns the total context window size in tokens as an async `Int`. It is back-deployed to earlier OS versions via `@backDeployed`: ```swift let totalWindow = await SystemLanguageModel.default.contextSize // e.g. 4096 let available = totalWindow - instrUsage.tokenCount - historyUsage.tokenCount print("Available for prompt + response: \(available) tokens") ``` Use `contextSize` to compute headroom before sending a prompt, particularly in multi-turn sessions where history accumulates. ### `GenerationError.exceededContextWindowSize` This error is thrown when the combined input (instructions + tools + history + prompt) exceeds the context window. Handle it gracefully: ```swift do { let response = try await session.respond(to: prompt) } catch LanguageModelSession.GenerationError.exceededContextWindowSize { // Strategies: // 1. Summarise the conversation history and start a new session // 2. Trim the oldest transcript entries // 3. Remove tool definitions you don't strictly need // 4. Shorten the prompt } ``` For multi-turn sessions, the most robust strategy is to detect when history is growing long and summarise it before continuing: ```swift // When history exceeds a threshold, compress it if historyTokenCount > contextSize / 2 { let summary = try await summariseHistory(session.transcript) // Start fresh session with summary in instructions session = LanguageModelSession { "Previous conversation summary: \(summary)" } } ``` ### The `#Playground` Macro for Budget Profiling The `#Playground` macro in Xcode (26.4+) shows **Input Token Count** and **Response Token Count** separately in the canvas after each run. This is the fastest way to profile token usage during development — no logging, no instrumentation, just iterate on the prompt and watch the counts update in real time. ### Rules of Thumb | Content | Approximate Token Cost | |---------|----------------------| | 1 word | ~1.3 tokens | | 100 words | ~130 tokens | | 1 page (250 words) | ~325 tokens | | Simple `@Generable` struct (2 props) | ~50 tokens overhead | | Tool definition (name + description + args) | ~50–100 tokens | | Default context window | ~4,096 tokens | A 4k window sounds large but fills up quickly in multi-turn sessions with tool-heavy prompts. --- ## Part 9: The Transcript `Transcript` is the linear record of everything that has happened in a `LanguageModelSession`. Every turn adds entries. The transcript is how the model "remembers" previous exchanges in a multi-turn conversation. ### `Transcript.Entry` The transcript is an array of `Transcript.Entry` values. Each entry is one of five cases: | Entry | When It Appears | |-------|----------------| | `.instructions(Transcript.Instructions)` | Session creation — the system prompt | | `.prompt(Transcript.Prompt)` | Each time you call `respond()` or `streamResponse()` | | `.response(Transcript.Response)` | Each model reply | | `.toolCalls(Transcript.ToolCalls)` | When the model decides to invoke one or more tools | | `.toolOutput(Transcript.ToolOutput)` | The result(s) returned from your tool's `call()` | A simple two-turn conversation produces this entry sequence: ``` .instructions ← session setup .prompt ← "What's the best sweep from Half Guard?" .response ← "The Hip Bump Sweep is..." .prompt ← "How do I set it up?" .response ← "Start by flattening your opponent..." ``` A tool-calling exchange adds two extra entries per tool call: ``` .prompt ← "What techniques did I drill last Tuesday?" .toolCalls ← [getTrainingHistory(date: "2026-02-24")] .toolOutput ← [{ sessions: [...] }] .response ← "Last Tuesday you drilled..." ``` ### Reading the Transcript Access the current session transcript via `session.transcript`: ```swift let session = LanguageModelSession { "You are a BJJ coach." } _ = try await session.respond(to: "What is the Kimura?") _ = try await session.respond(to: "How do I finish it from Guard?") // Inspect the transcript for entry in session.transcript.entries { switch entry { case .prompt(let p): print("User: \(p.segments.map(\.description).joined())") case .response(let r): print("Model: \(r.segments.map(\.description).joined())") default: break } } ``` ### Saving and Resuming Sessions Save the transcript to persist a conversation and resume it later — useful for a coaching assistant where the user expects the model to remember what they discussed in previous sessions: ```swift // Save let savedTranscript = session.transcript // Persist to SwiftData, UserDefaults, or disk... // Resume — new session with full history let resumedSession = LanguageModelSession( model: SystemLanguageModel.default, tools: [], transcript: savedTranscript ) // Model now has full context of the previous conversation let response = try await resumedSession.respond(to: "Where were we?") ``` The resumed session is identical in behaviour to a session that never stopped — the model sees the full entry history. ### When to Use the Transcript **Use transcript accumulation when:** - The model needs to refer back to something the user said earlier ("as I mentioned before...") - You are building a multi-turn chatbot or coaching assistant - Continuity across app sessions is a user-facing feature **Do NOT accumulate transcripts when:** - Each call is independent (normalisation, extraction, summarisation, classification) - You are using session-per-call — there is no transcript to worry about - The task is stateless — the model does not need to "remember" anything Unnecessary transcript accumulation wastes context budget and eventually causes `GenerationError.exceededContextWindowSize`. Most FoundationModels use cases do not need cross-turn memory — use session-per-call by default (see Part 2). --- ## Part 10: Failure Modes & Graceful Degradation FoundationModels can fail in ways that are different from a typical network API. Most failures are environmental (device eligibility, model state, system load) rather than logic errors. The right response in almost every case is graceful degradation, not throwing errors up to the UI. ### `GenerationError` Cases `LanguageModelSession.GenerationError` is thrown from `respond()` and `streamResponse()`: **`.exceededContextWindowSize`** The combined input (instructions + tools + history + prompt) exceeded the context window. Solutions in order of preference: 1. Reduce the prompt — summarise or truncate the input text 2. Trim the oldest transcript entries in a multi-turn session 3. Remove tool definitions that aren't needed for this call 4. Split into multiple sessions **`.rateLimited`** The system is under load. The on-device model is a shared resource — all apps use the same model, and the OS rate-limits when demand is high. Handle with simple exponential backoff: ```swift func generateWithRetry(session: LanguageModelSession, prompt: Prompt) async throws -> String { var delay: UInt64 = 1_000_000_000 // 1 second for attempt in 1...3 { do { return try await session.respond(to: prompt).content } catch LanguageModelSession.GenerationError.rateLimited { if attempt < 3 { try await Task.sleep(nanoseconds: delay) delay *= 2 } } } throw LanguageModelSession.GenerationError.rateLimited // re-throw after 3 attempts } ``` **`.guardrailViolation`** The content triggered safety filtering. This can happen on the prompt (the input was flagged) or on the response (the model started generating something that triggered the filter). The error contains context on what was flagged. **`.unsupportedGuide`** A `@Guide` constraint on a `@Generable` type is not supported for the current model or OS version. This should not occur in production if your deployment target is correct, but handle it defensively. **`LanguageModelSession.GenerationError.Refusal`** When the model declines to answer a prompt, it throws a `Refusal` error. `Refusal` is special because it includes an explanation: ```swift do { let response = try await session.respond(to: prompt) } catch let refusal as LanguageModelSession.GenerationError.Refusal { // Get the explanation as a complete Response let explanation = try await refusal.explanation print(explanation.content) // "I can't help with that because..." // Or stream it for try await snapshot in refusal.explanationStream { print(snapshot.content) } } ``` ### Production Pattern: The Never-Throws Service The cleanest production pattern is a service method that **never throws** — it returns the raw input unchanged on any failure. Callers have zero error handling burden, and worst case equals current pre-AI behaviour: ```swift @available(iOS 26, *) final class TranscriptNormalisationService { func normalise(_ rawTranscript: String) async -> String { guard !rawTranscript.trimmingCharacters(in: .whitespacesAndNewlines).isEmpty else { return rawTranscript } do { let session = LanguageModelSession { "Fix speech-to-text errors in BJJ transcripts." "Return only the corrected text." } let response = try await session.respond( to: Prompt { rawTranscript }, generating: NormalisedTranscript.self ) return response.content.normalisedText } catch { // Log the error, return the raw transcript unchanged GraplaLogger.data.error("Normalisation failed: \(error)") return rawTranscript } } } ``` This pattern means: - The caller always gets a `String` back — no try/catch required - If AI is unavailable, the app works exactly as before - Errors are logged for debugging without surfacing to the user ### Additional Production Patterns **Cache availability at setup, not per-call.** `SystemLanguageModel.default.availability` has non-trivial overhead. Check it once when the view or service initialises and store the result. Availability doesn't change mid-session. ```swift // ❌ Checking availability on every call func normalise(_ text: String) async -> String { guard SystemLanguageModel.default.isAvailable else { return text } // overhead each time ... } // ✅ Check once, cache final class NormalisationService { private let isAvailable = SystemLanguageModel.default.isAvailable func normalise(_ text: String) async -> String { guard isAvailable else { return text } ... } } ``` **The fallback path is production code.** On the majority of devices in 2026, Apple Intelligence will not be available (older hardware, non-supported regions, disabled in settings). Your non-AI code path is not a fallback — it is the primary path for most users. Test it as thoroughly as the AI path. **Use `AnyObject?` for iOS 26 services in SwiftUI views.** Covered in Part 1, but worth repeating: avoid `@available(iOS 26, *)` on `@State` properties. Use `AnyObject?` and cast inside `#available` guards to prevent the constraint propagating to the whole view. --- ## Part 11: Testing The most important insight for testing FoundationModels code: **most of your test suite should never touch the model**. Well-structured FoundationModels code is testable at every layer without Apple Intelligence. ### The Four Test Categories #### 1. Output Type Tests (No Model Required) `@Generable` structs are plain data containers with memberwise initialisers. You can construct them directly in tests, verify `Equatable` conformance, and test edge cases without the model ever running: ```swift @Suite("NormalisedTranscript") struct NormalisedTranscriptTests { @Test func construction() { let result = NormalisedTranscript( normalisedText: "Worked Kimura from Half Guard", extractedTerms: ["Kimura", "Half Guard"] ) #expect(result.normalisedText == "Worked Kimura from Half Guard") #expect(result.extractedTerms.count == 2) #expect(result.extractedTerms.contains("Kimura")) } @Test func equatable() { let a = NormalisedTranscript(normalisedText: "Test", extractedTerms: []) let b = NormalisedTranscript(normalisedText: "Test", extractedTerms: []) #expect(a == b) } @Test func emptyTerms() { let result = NormalisedTranscript(normalisedText: "Some text", extractedTerms: []) #expect(result.extractedTerms.isEmpty) } } ``` These tests run in CI on any machine. No simulator required. #### 2. Service Fallback Tests (Works on All Simulators) Test that your service returns the raw input unchanged when the model is unavailable. The simulator never has Apple Intelligence, so this path is always exercised: ```swift @MainActor @Suite("TranscriptNormalisationService") struct TranscriptNormalisationServiceTests { @Test func emptyTranscriptReturnsEmpty() async { guard #available(iOS 26, *) else { return } let service = TranscriptNormalisationService() let result = await service.normalise("") #expect(result.isEmpty) } @Test func whitespaceOnlyReturnsUnchanged() async { guard #available(iOS 26, *) else { return } let service = TranscriptNormalisationService() let result = await service.normalise(" \n ") #expect(result.trimmingCharacters(in: .whitespacesAndNewlines).isEmpty) } @Test func unavailableModelReturnsFallback() async { guard #available(iOS 26, *) else { return } // On simulator, model is unavailable — service must return raw transcript let service = TranscriptNormalisationService() let raw = "worked on kimora from half card today" let result = await service.normalise(raw) // On device: could be corrected. On simulator: must equal raw input. #expect(!result.isEmpty) // just verify it doesn't crash } } ``` #### 3. Availability Tests (Works Everywhere) Verify your availability checking code runs without crashing. Do **not** assert the specific availability state — it varies by machine, OS, and whether Apple Intelligence is enabled: ```swift @Test func availabilityCheckDoesNotCrash() { guard #available(iOS 26, *) else { return } let availability = SystemLanguageModel.default.availability // Just verify we get a valid state — don't assert which state switch availability { case .available: break // fine case .unavailable: break // also fine — expected on simulator @unknown default: break } } ``` #### 4. On-Device Tests (Manual, `.disabled()` by Default) Mark tests that require a real device with Apple Intelligence as `.disabled()`. They are skipped in CI but can be run manually on a real device: ```swift @Test("Normalises BJJ terms on-device", .disabled("Requires device with Apple Intelligence")) func normalisesTermsOnDevice() async throws { guard #available(iOS 26, *) else { return } let service = TranscriptNormalisationService() let raw = "rolled today, worked on my kimora from half card" let result = await service.normalise(raw) // On a real device with AI, these should be corrected #expect(result.contains("Kimura") || result.contains("kimura")) #expect(!result.contains("kimora")) } ``` To run these locally: open the test plan in Xcode, filter by the test name, and run on a connected iPhone 15 Pro or later with Apple Intelligence enabled. ### Testing Checklist | Test | Runs in CI | Requires Apple Intelligence | |------|-----------|---------------------------| | `@Generable` type construction | ✅ | ❌ | | `@Generable` equatable | ✅ | ❌ | | Service empty input handling | ✅ | ❌ | | Service fallback (model unavailable) | ✅ | ❌ | | Availability check no-crash | ✅ | ❌ | | End-to-end normalisation | ❌ (manual) | ✅ | Aim for 100% automated coverage of everything above the model boundary. The on-device generation itself is integration-tested manually. --- ## Part 12: Example Use Cases These examples cover the range of tasks FoundationModels handles well. Each follows the same pattern: on-device, private, structured output, graceful fallback. --- ### 1. Sports / BJJ App — Domain-Specific Transcript Normalisation **Use case**: Correct speech-to-text misrecognitions of BJJ terms before feeding into entity extraction. **Why FoundationModels**: A regex can't handle "kimora" → "Kimura" contextually; a cloud API sends private training notes offsite. On-device gets both right. ```swift @Generable struct NormalisedTranscript { @Guide(description: "The transcript with BJJ terms corrected") var normalisedText: String @Guide(description: "Canonical BJJ terms extracted, e.g. ['Kimura', 'Half Guard']") var extractedTerms: [String] } ``` **Tools needed**: None — pure text transformation. Session-per-call. --- ### 2. Recipe App — Ingredient Extraction From Voice **Use case**: "I need some eggs, any kind of cheese, and that Italian herb" → structured shopping list. **Why FoundationModels**: The model handles colloquial descriptions ("that Italian herb" → "basil"), vague quantities ("some"), and variety descriptions ("any kind of cheese") — none of which a regex can parse. ```swift @Generable struct Ingredient { @Guide(description: "Canonical ingredient name, e.g. 'basil', 'eggs'") var name: String @Guide(description: "Quantity as spoken, e.g. '2', 'some', 'a handful'") var quantity: String } @Generable struct IngredientList { @Guide(description: "All ingredients mentioned", .minimumCount(1)) var ingredients: [Ingredient] } ``` **Tools needed**: None. Session-per-call. --- ### 3. Journaling App — Private Mood Tagging **Use case**: Classify a journal entry's emotional tone without sending text to a cloud service. **Why FoundationModels**: Journal entries are deeply personal. On-device is the only acceptable processing option — not a preference, a product requirement. ```swift @Generable enum PrimaryMood { case joyful, content, neutral, anxious, sad, angry, reflective } @Generable struct MoodAnalysis { @Guide(description: "The dominant emotion in the entry") var primaryMood: PrimaryMood @Guide(description: "Intensity, 1 = mild, 5 = intense", .range(1...5)) var intensity: Int @Guide(description: "Key themes, up to three", .maximumCount(3)) var themes: [String] } ``` **Tools needed**: None. Session-per-call. --- ### 4. Task Manager — Natural Language Task Parsing **Use case**: "Remind me to call Mum next Tuesday afternoon" → structured task with date components and priority. **Why FoundationModels**: Natural language date parsing ("next Tuesday"), intent extraction, and priority inference in a single call. ```swift @Generable struct ParsedTask { @Guide(description: "Clean task title, e.g. 'Call Mum'") var title: String @Guide(description: "Relative date reference as spoken, e.g. 'next Tuesday afternoon'") var dateReference: String @Guide(description: "Priority 1 (low) to 3 (high)", .range(1...3)) var priority: Int } ``` **Tools needed**: `CurrentDateTool` to anchor relative dates ("next Tuesday" needs to know what today is). --- ### 5. Fitness App — Workout Log Summarisation **Use case**: After a training session, summarise a structured workout log into a human-readable weekly review. **Why FoundationModels**: Summary generation from structured data into natural prose. Streaming makes it feel responsive. ```swift // No @Generable needed — plain text output, streamed let stream = session.streamResponse( to: "Summarise this week's training in 2 paragraphs: \(workoutLogJSON)" ) for try await snapshot in stream { summaryView.text = snapshot.content // live update as text generates } ``` **Tools needed**: None. Session-per-call. Use `streamResponse()` for the typing effect. --- ### 6. Developer Tool — Conventional Commit Message Generation **Use case**: Given a summary of changed files and diff, generate a conventional commit message. **Why FoundationModels**: Requires understanding intent from code changes — beyond simple pattern matching, but doesn't need frontier reasoning. On-device keeps source code private. ```swift @Generable enum CommitType { case feat, fix, chore, docs, refactor, test, perf } @Generable struct CommitMessage { @Guide(description: "Conventional commit type") var type: CommitType @Guide(description: "Affected scope, e.g. 'auth', 'ui', nil if unclear") var scope: String? @Guide(description: "Imperative subject line, 72 chars max") var subject: String @Guide(description: "Optional body with context on why this change was made") var body: String? } ``` **Tools needed**: None. Session-per-call. --- ### 7. Language Learning App — Sentence Correction **Use case**: Correct a learner's written sentence while preserving their intended meaning. **Why FoundationModels**: Grammar correction requires semantic understanding — the model must know what the learner was *trying* to say. On-device matters here too: learners write embarrassing mistakes they would prefer not to send to a cloud API. ```swift @Generable struct CorrectedSentence { @Guide(description: "The corrected sentence with natural grammar") var correctedText: String @Guide(description: "Explanations of corrections made, e.g. ['Changed tense from past to present perfect']") var explanations: [String] @Guide(description: "Confidence the original meaning was preserved, 1-5", .range(1...5)) var meaningPreservedConfidence: Int } ``` **Tools needed**: None. Session-per-call. --- ### 8. E-Commerce — Product Attribute Extraction **Use case**: Extract structured attributes (colour, size, material, style) from free-text product descriptions for catalogue indexing. **Why FoundationModels**: Product descriptions are unstructured prose. Structured extraction via `@Generable` is more robust than regex for the variety of descriptions sellers write. ```swift @Generable struct ProductAttributes { @Guide(description: "Primary colour(s), e.g. ['navy', 'white']") var colours: [String] @Guide(description: "Material, e.g. 'cotton', 'polyester blend'") var material: String? @Guide(description: "Style keywords, e.g. ['casual', 'slim-fit']", .maximumCount(5)) var styleKeywords: [String] } ``` **Tools needed**: Optional `ProductCatalogTool` to canonicalise values against your taxonomy. --- ### 9. Health App — Symptom Log Structuring **Use case**: User dictates how they're feeling → structured symptom entry for a health log. **Why FoundationModels**: Privacy is non-negotiable. Health data is the most sensitive category — on-device is not a preference, it's a product and ethical requirement. ```swift @Generable enum BodyArea { case head, chest, abdomen, back, leftArm, rightArm, leftLeg, rightLeg, general } @Generable struct SymptomEntry { @Guide(description: "Primary affected body area") var bodyArea: BodyArea @Guide(description: "Symptom description in normalised clinical language") var description: String @Guide(description: "Severity 1 (mild) to 10 (severe)", .range(1...10)) var severity: Int @Guide(description: "Duration as spoken, e.g. 'since this morning', 'two days'") var duration: String } ``` **Tools needed**: None. Session-per-call. --- ### 10. Customer Support — Ticket Triage **Use case**: Classify incoming support tickets by category, urgency, and sentiment to route them to the right team. **Why FoundationModels**: Classification with semantic understanding. A keyword-based classifier misroutes tickets with indirect language; the model understands context. ```swift @Generable enum TicketCategory { case billing, technicalSupport, accountAccess, featureRequest, complaint, other } @Generable enum CustomerSentiment { case positive, neutral, frustrated, angry } @Generable struct TicketClassification { @Guide(description: "Primary support category") var category: TicketCategory @Guide(description: "Urgency 1 (low) to 5 (escalate immediately)", .range(1...5)) var urgency: Int @Guide(description: "Customer emotional tone") var sentiment: CustomerSentiment @Guide(description: "One-sentence routing note for the support agent") var routingNote: String } ``` **Tools needed**: Optional `KnowledgeBaseTool` to check if similar issues have documented resolutions before routing. --- ## Part 13: Quick Reference & Anti-Patterns ### Quick Reference #### Key Types | Type | One-liner | |------|-----------| | `SystemLanguageModel` | Entry point — `SystemLanguageModel.default` | | `SystemLanguageModel.Availability` | `.available` / `.unavailable(reason)` | | `LanguageModelSession` | Manages one conversation thread; stateful | | `Instructions` | System prompt — set once at session creation | | `Prompt` | User input for a single turn | | `Response` | Wrapper — always access `.content` | | `ResponseStream` | `AsyncSequence` of `Snapshot` | | `GenerationOptions` | `temperature`, `maximumResponseTokens`, `sampling` | | `GenerationGuide` | Constraints on `@Guide` properties | | `Transcript` | Linear history of all session entries | | `Tool` | Protocol for functions the model can call | | `SystemLanguageModel.TokenUsage` | `.tokenCount` — cost of instructions/prompt/history | #### Session Init Cheatsheet ```swift // Fresh session, no tools LanguageModelSession { "Instructions here" } // With specific model LanguageModelSession(model: SystemLanguageModel.default) { "..." } // With tools LanguageModelSession(tools: [MyTool()]) { "..." } // Resume from saved transcript LanguageModelSession(model: .default, tools: [], transcript: savedTranscript) ``` #### `respond()` vs `streamResponse()` | | `respond()` | `streamResponse()` | |--|------------|-------------------| | Returns | `Response` | `ResponseStream` | | Best for | Background processing, pipelines | Live UI with typing effect | | Partial results | No | Yes (via `Snapshot`) | | Rate limit risk | Lower | Higher in background tasks | | Collect to full response | N/A | `.collect()` | #### `@Generable` vs Raw `String` Use `@Generable` when: - You need structured, typed output (multiple fields) - You want compile-time guarantees on output shape - The response must be parsed/processed programmatically - You need constraints (`@Guide`) on values Use raw `String` when: - Output is prose for display to the user - You're summarising or generating a paragraph - Streaming the output for a typing effect #### Token Budget Formula ``` Total = instructions + tool definitions + transcript history + prompt + response ``` All compete for the same fixed window (~4,096 tokens). Response tokens come out of the same pool as input. #### Tool vs Pre-Fetch vs Inject | If you... | Do this | |-----------|---------| | Always need the data | Pre-fetch, inject into instructions | | Sometimes need the data | Define as `Tool` | | Need data only when asked about it | Define as `Tool` | | Have more than 5 tools | Split into multiple focused sessions | --- ### Anti-Patterns **1. Accessing `response` instead of `response.content`** `respond()` returns `Response`, not `T`. Always unwrap `.content`. ```swift let text = try await session.respond(to: prompt) // Response, not String text.uppercased() // ❌ compile error let text = try await session.respond(to: prompt).content // ✅ String ``` **2. Storing `LanguageModelSession` persistently when you don't need history** For stateless tasks (normalisation, extraction, classification), create a new session per call. Persistent sessions accumulate transcript and eventually hit the context limit. **3. Defining too many tools** Each tool definition consumes ~50–100 tokens of context budget, whether used or not. Keep it to 3–5 tools per session. If you have 10 tools, split them across multiple focused sessions. **4. Calling `isAvailable` or `checkAvailability()` per-call** Availability checking has overhead and doesn't change mid-session. Check once at service/view init and cache the result. **5. High temperature for structured/correction tasks** For `@Generable` types that correct or extract, use `nil` or `temperature: 0.0–0.2`. High temperature produces creatively varied — but wrong — corrections. **6. Long, elaborate instructions modelled on frontier model prompts** On a ~3B parameter model, shorter is better. Instructions over ~200 words dilute signal. Explicit rules outperform discursive descriptions. **7. Not testing the fallback path** On most devices today, Apple Intelligence is unavailable. Your non-AI code path is the primary experience for the majority of users. Test it as thoroughly as the AI path. **8. Using FoundationModels where a regex or simple function would do** If the task is a known, fixed pattern (extract a UUID, validate an email, format a date), use a deterministic function. LLM overhead — latency, availability, complexity — is waste for these cases. **9. Propagating `@available(iOS 26, *)` to SwiftUI views** Adding `@available` to a `@State` property forces the whole view to require iOS 26. Use the `AnyObject?` pattern instead and cast inside `#available` guards. **10. Treating `.modelNotReady` as permanent** `.modelNotReady` means the model is downloading. It's transient. Show "not available right now" UI and retry later. Do not show a permanent "unsupported" state for this case. --- ## Part 14: Context Engineering for On-Device AI The context window is the most important constraint in FoundationModels. Everything else — prompt engineering, temperature, tool design — happens within it. Understanding how to engineer what goes into that window is the difference between a feature that works reliably and one that fails silently on complex inputs. ### The Fundamental Constraint The on-device model has a fixed context window of approximately 4,096 tokens shared across: ``` instructions + tool definitions + transcript history + current prompt + response ``` This is roughly **3,000 words** (about 12 pages) of total input and output. That sounds like a lot until you try to inject meaningful app data. A BJJ training app with 116 positions, each with a 200-word description: **~30,000 tokens** — 7x the entire context window. Injecting "all your app data" into instructions is not a strategy; it's a crash waiting to happen. ### What Breaks First When you over-fill the context window you get `GenerationError.exceededContextWindowSize`. But the model also silently degrades *before* it throws — a model given 3,500 tokens of input in a 4,096 window has only 596 tokens for its response. For most tasks that's enough. For others it's not — and the failure mode is truncation, not an error. **Common over-injection mistakes:** | Data | Tokens (approx) | Problem | |------|----------------|---------| | All SwiftData records (100+ items) | 10,000–50,000 | Massively exceeds window | | Full JSON blob of one complex entity | 500–2,000 | May leave little room for response | | Entire app configuration/preferences | 200–800 | Unnecessary; most not relevant | | Complete conversation history (100 turns) | 2,000–5,000 | Pushes out current prompt | ### Pattern 1: Select, Don't Dump The simplest and most impactful change: **fetch only what's relevant to the current request**. ```swift // ❌ Dumps all 116 positions into context — will throw let allPositions = try await queryService.fetchAllPositions() let session = LanguageModelSession { "Here are all BJJ positions: \(allPositions.map(\.description).joined(separator: "\n"))" } // ✅ Fetches only positions relevant to the current question let relevantPositions = try await queryService.fetchPositions( matching: userQuery, limit: 5 // 5 positions × ~200 tokens = ~1,000 tokens — fits comfortably ) let session = LanguageModelSession { "Relevant positions: \(relevantPositions.map(\.summary).joined(separator: "\n"))" } ``` Use SwiftData predicates and `fetchLimit` to constrain what you load before it reaches the context. ### Pattern 2: Layered Injection Inject summaries at the top level, with detail available on-demand via tools. The model sees the overview by default and only loads detail when it actually needs it: ```swift // Layer 1 — always injected: position names only (~50 tokens for 116 positions) let positionNames = positions.map(\.name).joined(separator: ", ") // Layer 2 — injected only when needed via tool struct PositionDetailTool: Tool { let name = "getPositionDetail" let description = "Returns full description and transitions for a named BJJ position." @Generable struct Arguments { var positionName: String } func call(arguments: Arguments) async -> String { // Fetch the full detail only when the model asks for it return await loadPositionDetail(arguments.positionName) } } let session = LanguageModelSession(tools: [PositionDetailTool()]) { "Available positions: \(positionNames)" "Use getPositionDetail to look up full information about any position." } ``` This keeps the base context lean (~50 tokens for names vs 30,000 for all descriptions) while still giving the model access to full detail on demand. ### Pattern 3: The Two-Step Compression Pipeline For tasks that require reasoning over large datasets, compress first, then reason. This only makes sense on-device — with a cloud API you pay per token on both calls and gain nothing. On-device both calls are free and private: ```swift // Step 1: Summarise the large dataset (fresh session, large input is fine) func summariseTrainingHistory(_ sessions: [TrainingSession]) async throws -> String { let session = LanguageModelSession { "Summarise this training history in 150 words, highlighting patterns and progress." } let fullHistory = sessions.map(\.description).joined(separator: "\n\n") return try await session.respond(to: fullHistory).content // fullHistory might be 5,000 tokens — fills most of the window, but that's fine // The output is ~150 tokens } // Step 2: Reason with the summary (fresh context, compact input) func answerWithHistory(question: String, summary: String) async throws -> String { let session = LanguageModelSession { "Training history summary: \(summary)" // ~150 tokens "Answer questions about training progress based on this summary." } return try await session.respond(to: question).content // Plenty of context headroom for question + answer } // Usage let summary = try await summariseTrainingHistory(recentSessions) let answer = try await answerWithHistory(question: userQuestion, summary: summary) ``` The summary call uses most of its window for the raw data and produces a compact output. The reasoning call has clean context with just the summary. Each call is focused on a single task. ### Pattern 4: Pre-Summarise at Write Time For persistent app data (SwiftData entities), generate summaries when the data is *saved* and store them alongside the entity. The summary is computed once and reused for every future AI interaction: ```swift @Model final class TrainingSession { var rawNotes: String = "" var date: Date = Date() var techniques: [String] = [] // Pre-generated — computed at save time, reused in every AI call var aiSummary: String = "" } // When saving a session func saveSession(_ session: TrainingSession) async { // Generate summary once at write time if #available(iOS 26, *) { let model = LanguageModelSession { "Summarise this BJJ training session in 50 words." } let summary = try? await model.respond( to: session.rawNotes + "\nTechniques: \(session.techniques.joined(separator: ", "))" ).content session.aiSummary = summary ?? "" } modelContext.insert(session) try? modelContext.save() } // At query time — inject pre-built summaries, not raw notes func buildSessionContext(recentSessions: [TrainingSession]) -> String { recentSessions .map { "[\($0.date.formatted())]: \($0.aiSummary)" } .joined(separator: "\n") // Each summary: ~50 tokens × 10 sessions = 500 tokens — fits comfortably } ``` Pre-summarisation at write time means: - Zero AI cost at query time — the summary is already there - The context load is predictable and bounded by summary length - The summary can be updated when the entity changes ### Dataset Size Reference | Content | Volume | Approx. Tokens | Fits in Context? | |---------|--------|----------------|-----------------| | Single entity description | 1 | 200–500 | ✅ Yes | | Entity names list | 100 | ~150 | ✅ Yes | | Short entity summaries | 10 | ~500 | ✅ Yes | | Short entity summaries | 50 | ~2,500 | ⚠️ Tight | | Full entity descriptions | 10 | ~2,000 | ⚠️ Tight | | Full entity descriptions | 50+ | 10,000+ | ❌ No | | Full entity descriptions | 100+ | 20,000+ | ❌ No | | Conversation (10 turns) | — | ~1,000 | ✅ Yes | | Conversation (50 turns) | — | ~5,000 | ❌ No | ### Decision Tree ``` Do you need to inject app data into context? │ ├── Yes → How much data? │ │ │ ├── 1–5 entities, full detail │ │ └── Inject directly into instructions │ │ │ ├── 5–20 entities │ │ ├── Always need all of them? → Inject summaries (pre-generated at write time) │ │ └── Only need some? → Names in instructions + detail via Tool │ │ │ └── 20+ entities │ ├── Need to reason across all of them? → Two-step: summarise first, then reason │ └── Need specific ones? → Select with predicate, inject summaries for matched │ └── No → Standard session-per-call, no data injection needed ``` ### On-Device vs Cloud: Why This Pattern Is Different With cloud APIs (OpenAI, Anthropic, Google), the two-step pattern is often not worth it: you pay per token on both calls, and the total cost may be similar to one call with the full data — especially if the summarisation model is also expensive. On-device, the economics flip: - **No per-token cost** — both calls are free - **No network latency** — both calls run locally, typically in under a second each - **No privacy concern** — data never leaves the device regardless of call count - **Shared resource** — each call consumes system resources and may be rate-limited, so compact contexts are still preferred This makes on-device AI uniquely suited to multi-step pipelines where cloud would be prohibitively expensive or slow. --- ## Part 15: Advanced Patterns This section covers patterns that don't fit neatly into any earlier part — actor isolation details, the non-obvious syntax for `@Generable` enums with associated values, reactive availability monitoring in SwiftUI, chaining model output back as prompt input via `PromptRepresentable`, and the bounded domain injection pattern for apps with curated entity datasets. --- ### Actor Isolation and `call(arguments:)` — What Actor Does Your Code Run On? Understanding actor isolation in FoundationModels matters when your tool or service touches `@MainActor`-bound state. #### `Tool.call(arguments:)` Is `@concurrent` The `call(arguments:)` method on the `Tool` protocol is implicitly `@concurrent`, which means it runs **off the main actor** — in a generic concurrent executor, not `@MainActor`. This is deliberate: the model calls your tool during inference, which itself is off the main actor. Calling back to the main actor mid-inference would require a hop, adding latency. ```swift @available(iOS 26, *) struct TrainingHistoryTool: Tool { let name = "getTrainingHistory" let description = "Returns recent training sessions." @Generable struct Arguments { var limit: Int } // This runs @concurrent — NOT on @MainActor func call(arguments: Arguments) async -> String { // ✅ Pure computation or actor-independent async work is fine here let sessions = await fetchSessions(limit: arguments.limit) return sessions.map(\.summary).joined(separator: "\n") // ❌ Accessing @MainActor-bound state directly will cause a data race warning // return self.someMainActorProperty // won't compile } } ``` If your tool genuinely needs main-actor state (e.g., reading from a `@MainActor` service), hop explicitly: ```swift func call(arguments: Arguments) async -> String { // Hop to MainActor to read the value, then hop back let data = await MainActor.run { myMainActorService.currentData } return process(data) } ``` #### What Actor Does `respond()` Run On? `LanguageModelSession.respond()` is `async` but has **no actor isolation requirement** — it is safe to call from any actor context, including `@MainActor`. Internally, the framework dispatches inference to a background executor automatically. ```swift // ✅ Calling respond() from @MainActor is fine — the framework handles the dispatch @MainActor final class NormalisationService { func normalise(_ text: String) async -> String { let session = LanguageModelSession { "Fix BJJ terms." } // respond() is async but not @MainActor — call is fine from here let response = try? await session.respond(to: Prompt { text }) return response?.content ?? text } } ``` You do not need to manually `Task.detach` or use `Task { @concurrent in ... }` before calling `respond()`. The framework does the right thing automatically. #### `@MainActor` Services Calling Tools — The Safe Pattern When a `@MainActor` service needs tools that access non-`@MainActor` data, the cleanest pattern is to make the tool capture any main-actor dependencies at session creation time (before inference begins), rather than accessing them from within `call()`: ```swift @MainActor final class CoachingService { private let userProfile: UserProfile // @MainActor bound func answer(_ question: String) async -> String { // Capture the profile value NOW, on MainActor, before the session runs let profileSummary = userProfile.summary // safe — we're on MainActor // The tool closes over the already-captured value — no actor hop needed in call() struct ProfileContextTool: Tool { let name = "getUserProfile" let description = "Returns the user's training profile." @Generable struct Arguments {} let summary: String // captured at creation time func call(arguments: Arguments) async -> String { summary } } let session = LanguageModelSession(tools: [ProfileContextTool(summary: profileSummary)]) { "Answer BJJ coaching questions using the user's profile." } return (try? await session.respond(to: question).content) ?? "" } } ``` This is simpler than hopping to `MainActor` inside `call()` and avoids any potential race conditions. --- ### `@Generable` Enums With Associated Values The earlier enum examples in Part 4 showed simple case enums (`.positive`, `.neutral`, `.negative`). `@Generable` also supports enums with associated values — but the syntax has a specific constraint: **all associated values must themselves conform to `Generable`** (or be types that `@Generable` already knows how to handle: `String`, `Int`, `Double`, `Bool`, arrays of generable types). #### Basic Associated Value Enum ```swift @available(iOS 26, *) @Generable enum TranscriptCorrection { case termCorrection(original: String, corrected: String) case spellingFix(original: String, corrected: String) case noChange } @Generable struct AnnotatedTranscript { @Guide(description: "The corrected transcript text") var correctedText: String @Guide(description: "Each correction made, with original and corrected forms") var corrections: [TranscriptCorrection] } ``` The model generates each `corrections` element as a tagged union — it chooses the case name and then generates the associated values. This is significantly richer than a flat string array for corrections, because the output is fully typed. #### Nested `@Generable` Structs as Associated Values Associated values can also be `@Generable` structs: ```swift @available(iOS 26, *) @Generable struct DateRange { @Guide(description: "Start date in YYYY-MM-DD format") var start: String @Guide(description: "End date in YYYY-MM-DD format") var end: String } @Generable enum ScheduleIntent { case singleDay(date: String) case dateRange(range: DateRange) case recurring(dayOfWeek: String, startTime: String) case unspecified } @Generable struct ParsedScheduleRequest { @Guide(description: "What the user wants to schedule") var activity: String @Guide(description: "When the user wants to schedule it") var timing: ScheduleIntent } ``` #### When to Use Associated Value Enums vs Flat Structs Use associated value enums when the output shape is fundamentally **discriminated** — the presence of one field makes others meaningless. In the `ScheduleIntent` example above, if the user said "every Monday at 9am", the `.recurring` case makes `date` and `range` meaningless, and a flat struct would leave those fields awkwardly nil. Use flat `@Generable` structs with optional properties when most combinations of values are valid. The associated value enum excels when the cases are truly mutually exclusive and each has distinct associated data. #### The Constraint: All Associated Values Must Be Generable If you include a type that is not `Generable`-conformant as an associated value, the `@Generable` macro will emit a compile-time error. The fix is always one of: 1. Add `@Generable` to the associated type 2. Change the associated type to a primitive (`String`, `Int`, etc.) 3. Represent it as a separate `@Generable` struct with its own properties --- ### `Observable` Availability Monitoring — Reactive SwiftUI Pattern `SystemLanguageModel` is an `Observable` final class. This means SwiftUI views can react to `.availability` changes without any additional wiring — the view re-renders automatically when availability changes. This is useful when you want to show/hide AI features reactively, for example when the model finishes downloading (`.modelNotReady` → `.available`) while the user is already in the app. #### Basic Reactive Availability View ```swift @available(iOS 26, *) struct AIFeatureBadge: View { var body: some View { // SwiftUI observes SystemLanguageModel.default automatically // because it's @Observable — no @StateObject, no manual subscription let model = SystemLanguageModel.default switch model.availability { case .available: Label("AI Ready", systemImage: "sparkles") .foregroundStyle(.green) case .unavailable(.modelNotReady): Label("AI Downloading...", systemImage: "arrow.down.circle") .foregroundStyle(.yellow) case .unavailable(.appleIntelligenceNotEnabled): Label("Enable Apple Intelligence", systemImage: "exclamationmark.circle") .foregroundStyle(.secondary) case .unavailable(.deviceNotEligible): EmptyView() // Don't surface this — it's permanent @unknown default: EmptyView() } } } ``` Because `SystemLanguageModel` is `@Observable`, SwiftUI tracks which properties the `body` reads and re-renders when they change. No `.onReceive`, no `Combine`, no explicit observation setup. #### Watching for the Model Becoming Ready The `.task {}` modifier is the right tool for reacting to an availability change and triggering a one-time action — for example, kicking off an initial data enrichment pass once the model becomes available: ```swift @available(iOS 26, *) struct TrainingDashboardView: View { @State private var hasRunInitialEnrichment = false var body: some View { // ... view content ... .task { // This task runs when the view appears and re-runs if availability changes for await _ in SystemLanguageModel.default.availabilityUpdates { guard !hasRunInitialEnrichment else { break } if SystemLanguageModel.default.isAvailable { await runInitialEnrichment() hasRunInitialEnrichment = true } } } } private func runInitialEnrichment() async { // Generate AI summaries for any entities that don't have them yet } } ``` > **Note**: If `availabilityUpdates` is not available on your OS target, use `.task(id: SystemLanguageModel.default.availability)` as an alternative — the task re-runs when `availability` changes since `Availability` is `Equatable`: ```swift .task(id: SystemLanguageModel.default.availability) { guard SystemLanguageModel.default.isAvailable else { return } guard !hasRunInitialEnrichment else { return } await runInitialEnrichment() hasRunInitialEnrichment = true } ``` #### Avoiding the Per-View `@available` Constraint The reactive pattern works cleanly with the `AnyObject?` wrapping approach from Part 1. Keep the `Observable` observation inside a `#available` check, or confine it to a view that is itself conditionally shown: ```swift // In the parent view (no iOS 26 requirement): var body: some View { VStack { mainContent if #available(iOS 26, *) { AIStatusBadge() // only this view requires iOS 26 } } } ``` This way the availability-reactive logic is isolated to a specific subview, and the containing view has no version constraint. --- ### `PromptRepresentable` — Chaining Model Output Back as Input One of the cleaner architectural patterns enabled by the protocol hierarchy is **output-as-input chaining**: taking a `@Generable` type from one call and passing it directly as prompt input to the next call, without any serialisation step. This works because `@Generable` types conform to `PromptRepresentable` (via `ConvertibleToGeneratedContent`), which means they can appear directly in a `@PromptBuilder` closure. #### Basic Chaining Example ```swift @available(iOS 26, *) @Generable struct NormalisedTranscript { @Guide(description: "Corrected transcript text") var normalisedText: String @Guide(description: "BJJ terms found, in canonical form") var extractedTerms: [String] } @Generable struct SessionSummary { @Guide(description: "One-paragraph summary of the training session") var summary: String @Guide(description: "Techniques practiced, from the corrected terms") var techniquesWorked: [String] } // Two-step pipeline: correct → summarise func processTranscript(_ raw: String) async throws -> SessionSummary { // Step 1: Correct BJJ terminology let correctionSession = LanguageModelSession { "Fix speech-to-text errors in BJJ transcripts. Return corrected text and term list." } let corrected = try await correctionSession.respond( to: Prompt { raw }, generating: NormalisedTranscript.self ) // Step 2: Summarise — pass the @Generable output directly as prompt input // No JSON encoding, no manual string building needed let summarySession = LanguageModelSession { "Summarise a BJJ training session given a corrected transcript." } let summary = try await summarySession.respond( to: Prompt { "Transcript: \(corrected.content)" // NormalisedTranscript directly in @PromptBuilder }, generating: SessionSummary.self ) return summary.content } ``` The `\(corrected.content)` interpolation works because `NormalisedTranscript` (a `@Generable` struct) conforms to `PromptRepresentable`. The framework serialises it appropriately for the model — you never touch the intermediate representation. #### When Chaining Is Worth It The chain pattern is most valuable when: - **Output type 1 contains richer structure than a plain string** — passing the full `NormalisedTranscript` (with both `normalisedText` and `extractedTerms`) to the next session gives the model more signal than a plain corrected string - **Each step is a focused, single-task session** — staying true to the "one task per session" principle (Part 3) while getting compound results - **You want typed output at every step** — rather than a single sprawling `@Generable` struct trying to do everything, each step produces its own clean type Avoid chaining when the first step's output is a plain `String` — in that case, just use string interpolation normally. The `PromptRepresentable` chaining is most valuable for multi-property structured output. --- ### Bounded Domain Injection — The Names-Only Pattern This is a specialised context engineering pattern for apps that have a **fixed, curated, known domain** — a set of entities whose names are meaningful and bounded. The insight is that entity names alone are remarkably compact while still giving the model strong domain grounding. #### The Core Insight In Grapla, there are 116 BJJ positions, 150 techniques, 118 submissions, and 141 movements — 525 total entities. Injecting *all the descriptions* for all 525 entities would require tens of thousands of tokens and overflow the context window many times over. But injecting *just the names* is cheap: ``` Mount, Half Guard, Side Control, Back Mount, Turtle, North-South, Closed Guard, Open Guard, De La Riva, X-Guard, Butterfly Guard, Single Leg X, ... Kimura, Armbar, Triangle, Rear Naked Choke, D'Arce, Anaconda, Omoplata, ... Hip Bump Sweep, Flower Sweep, Scissor Sweep, Pendulum Sweep, ... ``` A full list of ~525 entity names in CSV format uses approximately **700–900 tokens** — well within a 4,096-token window, leaving ample room for instructions, prompt, and response. #### Why Names Alone Are Sufficient for Correction Tasks For a transcript correction service, the model's job is: 1. Recognise that "kimora" is a garbled version of a known entity 2. Replace it with the canonical form "Kimura" The model doesn't need the *description* of a Kimura to know that "kimora" should be "Kimura". The name list acts as a **canonical term index** — the model can fuzzy-match against it and apply corrections. ```swift @available(iOS 26, *) struct BJJEntityNames { // Pre-built at app startup from the SwiftData store — reused for every normalisation call static let positions = [ "Mount", "Half Guard", "Side Control", "Back Mount", "Turtle", "North-South", "Closed Guard", "Open Guard", "De La Riva", "X-Guard", "Butterfly Guard", "Single Leg X", "Full Guard", "Rubber Guard", // ... all 116 positions ] static let techniques = [ /* all 150 */ ] static let submissions = [ /* all 118 */ ] static let movements = [ /* all 141 */ ] static var allAsCSV: String { (positions + techniques + submissions + movements).joined(separator: ", ") } } @available(iOS 26, *) final class TranscriptNormalisationService { func normalise(_ rawTranscript: String) async -> String { let entityNames = BJJEntityNames.allAsCSV // ~700 tokens let session = LanguageModelSession { "Fix speech-to-text errors in BJJ training transcripts." "Canonical entity names: \(entityNames)" "Correct misrecognised terms to their canonical forms. Return only the corrected text." } // Total instructions: ~750 tokens — leaves ~3,300 tokens for prompt + response let response = try? await session.respond(to: Prompt { rawTranscript }) return response?.content ?? rawTranscript } } ``` #### Generalising the Pattern The bounded domain pattern works whenever your app has a finite, knowable set of canonical terms. Some examples: | App | Bounded Domain | Names-Only Size | |-----|----------------|-----------------| | BJJ app | 525 positions/techniques/submissions/movements | ~700 tokens | | Recipe app | 500 common ingredients | ~600 tokens | | Medical notes | 300 ICD-10 conditions (common subset) | ~400 tokens | | Developer tool | 200 API method names | ~250 tokens | | Music app | 400 instruments + musical terms | ~500 tokens | The test for whether this pattern applies: **Can you enumerate all the canonical terms your app cares about?** If yes, inject the names list. The model will use it as a correction index without needing any descriptions. #### Names-Only vs Names + Detail Combine with the Layered Injection pattern (Part 14) when you sometimes need both correction *and* reasoning about entities: ```swift let session = LanguageModelSession(tools: [PositionDetailTool()]) { // Layer 1: names always present (~700 tokens) — enables correction "Canonical BJJ entities: \(BJJEntityNames.allAsCSV)" // Layer 2: detail available on demand via tool — enables reasoning "Use getPositionDetail to look up descriptions, transitions, and techniques for any position." } ``` This gives the model correction capability (names) plus on-demand depth (tool) while keeping the base context compact. --- ### Experimental Directions These patterns are worth exploring but untested at scale. They use only FoundationModels — no additional frameworks required. **Sharded parallel sessions.** When your vocabulary corpus is too large for a single context but you need full coverage, split it across multiple sessions running concurrently. Each session holds a different shard of the names list. After all sessions return, merge results — prefer any correction over "unchanged", break ties by confidence or frequency. The on-device model's free-per-call economics make this viable in a way that would be expensive with a cloud API. ```swift async let positions = normalise(rawText, vocabulary: BJJEntityNames.positions) async let techniques = normalise(rawText, vocabulary: BJJEntityNames.techniques) async let submissions = normalise(rawText, vocabulary: BJJEntityNames.submissions) let (p, t, s) = try await (positions, techniques, submissions) let merged = merge(p, t, s) // your logic for combining corrections ``` **Adaptive context budgeting.** Before injecting data, measure how much headroom you have with `tokenUsage(for:)`, then fill to a target percentage (e.g. 60% of the window, reserving 40% for prompt + response). Rank your entities by relevance and inject greedily until you hit the budget. This turns context injection from a static decision into a runtime one. ```swift let instrTokens = try await model.tokenUsage(for: instructions).tokenCount let window = await model.contextSize let budget = Int(Double(window) * 0.6) - instrTokens // 60% target, minus instructions var injected: [String] = [] var used = 0 for entity in rankedEntities { let cost = estimateTokens(entity.name) // ~1.3 tokens per word guard used + cost <= budget else { break } injected.append(entity.name) used += cost } ``` **Transcript as structured cache.** Rather than rehydrating a conversation, use a saved `Transcript` as a compressed knowledge cache — pre-generate a transcript that contains a curated Q&A exchange about your domain (e.g. "what is a Kimura?" → model's answer), then resume from that transcript for every live session. The model starts with pre-baked domain knowledge already in its context, without spending live call tokens to establish it. All three patterns are speculative — they depend on how the model handles parallel resource contention, whether adaptive sizing materially improves output quality, and whether transcript rehydration preserves semantic coherence. The `#Playground` macro is the fastest way to validate any of them before committing to an implementation. --- ## Resources ### Official Apple Documentation **WWDC 2025 Sessions:** - Session 286: Meet the Foundation Models framework - Session 301: Deep dive into the Foundation Models framework - Session 259: Code-along: Bring on-device AI to your app using the Foundation Models framework **Framework Updates:** - February 2026: Improved instruction-following, `tokenUsage(for:)`, `contextSize`, `#Playground` macro ### Key Types at a Glance | Type | Purpose | |------|---------| | `SystemLanguageModel` | Entry point — access the model, check availability | | `LanguageModelSession` | Manages a single conversation thread with the model | | `Instructions` | System-level behaviour definition for a session | | `Prompt` | User input to the model | | `Response` | Wrapper around typed model output — use `.content` | | `ResponseStream` | Async sequence of partial responses for streaming | | `GenerationOptions` | Controls temperature, sampling, max tokens | | `GenerationGuide` | Constraint on `@Guide` properties (min/max/regex) | | `GeneratedContent` | Untyped structured output — escape hatch | | `Transcript` | Linear history of a multi-turn session | | `Tool` | Protocol for functions the model can call during generation | | `SystemLanguageModel.TokenUsage` | Token count for a prompt, instructions, or transcript | --- # Anatomy of a CSS Phone Mockup Building depth, glass, and physics in layers category: Frontend date: 2026-02-27 reading-time: 13 min read url: https://conor.fyi/writing/anatomy-of-a-css-phone-mockup --- A phone mockup looks like one effect, but it's actually six composited layers — each doing a specific job. Collapse them all and you get a flat coloured rectangle. Stack them in the right order and the eye reads it as glass, metal, and depth. This is a walkthrough of how I built the `PhoneMockup` component above, from a blank `div` to a mouse-reactive 3D frame. We'll add one layer at a time so it's clear what each one contributes. Here's the skeleton we're building toward: ```jsx
{/* Layer 1: metallic stroke */}
{/* Layer 1: dark matte casing */}
{/* Layer 2: clipped content */} {/* Layer 3: notch + camera */}
{/* Layer 2: depth ring */}
{/* Layer 4: glass glint */}
{/* Layer 4: ambient wash */}
``` Layers 5 and 6 are JavaScript: tilt physics and reactive shadows. Let's build up to them. --- ## Layer 1: The Bevel and the Stroke The outermost `div` is just `padding: 1` and a gradient — that single pixel of visible padding is the metallic bevel: ```jsx
``` The gradient runs from `#555` to `#000` at 135° — top-left lighter than bottom-right. This simulates a brushed aluminium edge catching light from above. It's one CSS property doing optical work that would otherwise take a texture. The `borderRadius` is calculated as `width * 0.12`. The iPhone's corner radius scales proportionally to the device width, so we keep it as a ratio rather than a fixed pixel value. Resize the component and the corners stay iPhone-shaped. Nested inside: the dark matte casing: ```jsx
``` `5px` of padding is the visible dark frame around the screen. Notice `borderRadius` here is `outerRadius`, not `outerRadius + 1` — the outer wrapper gets `+1` to avoid a visual gap between the bevel ring and the body where the gradient might bleed through. `innerRadius` is `outerRadius - 5` — matching the 5px padding offset. This keeps the inner corners visually concentric with the outer ones. Without this, the screen corners appear too sharp or too round relative to the frame. ### Ambient shadows A single `box-shadow` looks artificial — the falloff is a crisp edge rather than a natural penumbra. We stack nine layers, each progressively lighter and more diffuse: ```js const ambientShadows = [ "0 1px 2px rgba(0,0,0,0.15)", "0 2px 4px rgba(0,0,0,0.12)", "0 4px 8px rgba(0,0,0,0.10)", "0 6px 12px 2px rgba(0,0,0,0.08)", "0 8px 16px 4px rgba(0,0,0,0.06)", "0 12px 24px 6px rgba(0,0,0,0.05)", "0 16px 32px 10px rgba(0,0,0,0.04)", "0 24px 48px 16px rgba(0,0,0,0.03)", "0 32px 64px 24px rgba(0,0,0,0.03)", ] ``` Each step doubles the blur, adds more spread, and halves the opacity. The result is a soft, real-looking shadow that falls off the way light actually does. This is passed as the `box-shadow` property alongside the edge shadows we'll add in Layer 6. --- ## Layer 2: The Screen The screen wrapper does two things: clips the image to the rounded shape, and adds a depth ring: ```jsx
{/* Screen inset shadow */}
``` `overflow: hidden` does the border-radius clipping on the image — the image itself doesn't need a `borderRadius` because the container clips it. Without an image yet, we can see the screen container clipped to the frame: `lineHeight: 0` is non-obvious but essential. Images are inline elements by default, which means the browser reserves space below them for text descenders — about 4px of empty space at the bottom of the container. Setting `lineHeight: 0` on the wrapper collapses that. Without it, the image floats slightly above the bottom of the frame. ### Height calculation We need to maintain the real iPhone aspect ratio. The iPhone 17 Pro is 2622 × 1206 pixels — a ratio of roughly 2.175:1. We derive height from width: ```js const height = Math.round(width * (2622 / 1206)) ``` Pass a `width` prop and height follows automatically. Hardcoding a height would break the proportions the moment someone changes the width. The inset shadow overlay sits at `zIndex: 2` above the image. It's a dark ring that recesses the screen into the bezel — the difference between a screen that looks flush and one that looks embedded. --- ## Layer 3: The Dynamic Island Three concentric circles faking lens depth: ```jsx // notchW = width * 0.33, notchH = width * 0.09
{/* Camera lens — outer housing */}
{/* Lens inner ring */}
{/* Specular highlight — covered in Layer 6 */}
``` `borderRadius: 999` on the island container is intentional. A value large enough — larger than half the element's height — always produces a perfect pill shape regardless of the element's actual dimensions. No need to recalculate as width changes. The radial gradients are positioned off-center (`35% 35%`, `40% 40%`) to simulate a fixed light source above and to the left. Moving the gradient center away from `50% 50%` shifts the bright spot, making the glass appear to have a real angle relative to the light. The `zIndex: 1` on the island positions it above the image but below the shine overlays (`zIndex: 2`). The Dynamic Island is part of the device, not a reflection. Building it up in three steps — pill, lens housing, inner ring with specular:
--- ## Layer 4: The Glass Layers Two overlays simulate screen glass. Both sit at `zIndex: 2`. ### Sharp diagonal glint ```jsx
``` The trick here is the negative positioning. Setting `top/left/right/bottom` all to `-25%` makes this div 50% larger than its parent in every direction. The parent has `overflow: hidden`, so only the portion that falls within the screen bounds is visible. Why bother making it oversized? So we can rotate and translate it without revealing transparent corners. When the tilt physics move this overlay (Layer 6), it needs room to slide without the edge becoming visible. The gradient has two colour stops at the same percentage: `rgba(255,255,255,0.08) 35%` and `rgba(255,255,255,0) 35%`. Same position, different values — that's how you get a hard edge in a CSS gradient. No transition, just a sharp cut. ### Soft ambient wash ```jsx
``` Gentler falloff, slightly different angle. This adds the ambient diffusion that sits behind the glint — making the top-left corner of the screen look softly lit rather than just adding one bright stripe. --- ## Layer 5: Making it Move State and ref: ```js const containerRef = useRef(null) const [tilt, setTilt] = useState({ rotateX: 0, rotateY: 0 }) ``` The core function normalises pointer position to −1..1: ```js function tiltFromPoint(clientX, clientY) { const rect = containerRef.current.getBoundingClientRect() // Convert absolute viewport coords to element-local, then normalise to -1..1 const x = ((clientX - rect.left) / rect.width) * 2 - 1 const y = ((clientY - rect.top) / rect.height) * 2 - 1 setTilt({ rotateX: -y * MAX_TILT, // pointer at top → tilt top toward viewer rotateY: x * MAX_TILT, // pointer at right → tilt right }) } ``` `getBoundingClientRect()` returns the element's position in the viewport. Subtracting `rect.left` converts from viewport-absolute to element-local coordinates. Dividing by `rect.width` normalises to 0–1. Multiplying by 2 and subtracting 1 shifts to −1..1. `rotateX: -y` is the axis inversion. When the pointer is near the *top* of the element, the top of the phone should tilt *toward* you — that's a positive `rotateX` in CSS 3D space. But `y` is negative at the top (above centre), so we negate it. The transform: ```js transform: `perspective(800px) rotateX(${tilt.rotateX}deg) rotateY(${tilt.rotateY}deg)` ``` `perspective(800px)` is the simulated camera distance. Smaller values increase the foreshortening effect — 400px looks dramatic, 1200px looks nearly flat. 800px hits the sweet spot for a phone-sized element. `transformStyle: "preserve-3d"` propagates the 3D context to child elements. Without it, all the children collapse to the same plane and depth ordering breaks. `willChange: "transform"` is a GPU hint — promotes the element to its own compositing layer before any animation starts, avoiding a repaint on first move. Touch support uses the same function: ```js function handleTouchMove(e) { const touch = e.touches[0] if (touch) tiltFromPoint(touch.clientX, touch.clientY) } ``` `e.touches[0]` is the first touch point. `clientX` and `clientY` are the same coordinate space as mouse events, so `tiltFromPoint` handles both. --- ## Layer 6: Edge Extrusion and Shine Physics When you tilt a physical phone, you see its edges. We fake this with offset `box-shadow`: ```js const edgeX = -(tilt.rotateY / MAX_TILT) * EDGE_DEPTH const edgeY = (tilt.rotateX / MAX_TILT) * EDGE_DEPTH const edgeShadows = Array.from({ length: EDGE_LAYERS }, (_, i) => { const t = (i + 1) / EDGE_LAYERS return `${edgeX * t}px ${edgeY * t}px 0 0 #222` }) ``` When `rotateY > 0` (tilting right), `edgeX` is negative, shifting the shadow left — which makes the left edge appear to protrude. Two stacked layers (`EDGE_LAYERS = 2`) with progressive offsets give soft depth rather than one sharp step. The blur radius is `0` — these are solid-colour shadows, not diffuse. They're edge geometry, not light scatter. The glass shine overlays also react to tilt: ```js const shineX = -(tilt.rotateY / MAX_TILT) * SHINE_MAX_OFFSET const shineY = (tilt.rotateX / MAX_TILT) * SHINE_MAX_OFFSET const lightAlign = (-tilt.rotateY + tilt.rotateX) / (2 * MAX_TILT) // -1 to 1 const shineOpacity = Math.max(0, Math.min(1, 0.5 + lightAlign * 0.5)) const shineAngle = 155 + (tilt.rotateY / MAX_TILT) * 5 // ±5° rotation ``` `lightAlign` measures how much the screen's normal vector aligns with the fixed top-left light source. Tilt the top-left corner toward the viewer and `lightAlign` increases, brightening the shine. Tilt it away and the shine fades. `shineX/Y` slide the oversized shine overlay in the direction opposite to tilt — the reflection appears to hold still relative to the light source while the glass moves beneath it. The specular highlight inside the camera lens follows the same values: ```jsx
``` At rest it's at `top: 20%, left: 25%` — off-center, simulating a fixed light above-left. As the device tilts, it moves, maintaining the illusion of a consistent light source. --- ## Accessibility One `useEffect` respects `prefers-reduced-motion`: ```js useEffect(() => { const mq = window.matchMedia("(prefers-reduced-motion: reduce)") setReducedMotion(mq.matches) const handler = (e) => setReducedMotion(e.matches) mq.addEventListener("change", handler) return () => mq.removeEventListener("change", handler) }, []) ``` We listen for runtime changes, not just the initial value — users can toggle system preferences while the page is open. When `reducedMotion` is true, `tiltFromPoint` returns early. The transition CSS is still present but never fires. --- ## All Together Six layers, each handling one physical phenomenon:
| Layer | What it simulates | |-------|-------------------| | Bevel gradient | Metallic edge catching light | | Dark casing + ambient shadow | Matte body with natural depth | | Screen clip + inset shadow | Glass recessed into frame | | Dynamic Island | Camera hardware | | Sharp + soft shine overlays | Specular and ambient glass reflection | | JS tilt + edge shadows + shine physics | Device orientation and light interaction |
The key insight: physical objects fool the eye by accumulating subtle cues. A single gradient isn't convincing. A single shadow isn't convincing. But six layers, each doing their specific job — bevel, shadow falloff, depth ring, glass glint, edge geometry, reactive shine — combine into something the brain reads as solid. You can see the full component on the [apps page](/apps). --- ## Update: Side Buttons *3 March 2026* The mockup was missing one detail that real phones have — hardware buttons on the sides. Three on the left (action button, volume up, volume down) and a power button on the right. The buttons are absolutely positioned inside the perspective container, sitting just outside the bezel edge. Each one is a thin rectangle with a metallic gradient, rounded on its outward-facing corners: ```jsx const btnW = Math.max(2, Math.round(width * 0.013)) const buttons = [ { side: "left", top: 0.155, h: 0.032 }, // Action button { side: "left", top: 0.215, h: 0.06 }, // Volume up { side: "left", top: 0.29, h: 0.06 }, // Volume down { side: "right", top: 0.22, h: 0.08 }, // Power ] ``` Positions and heights are expressed as fractions of the total phone height, so they scale proportionally with the `width` prop. At the default 218px width, each button is about 3px wide — subtle but visible. The interesting part: the buttons react to tilt. On a real phone, you only see the side buttons when the edge faces you. Here, each button's opacity is tied to the tilt direction that reveals its side: ```jsx // Left buttons brighten when tilting right (left edge faces viewer) const leftOpacity = 0.3 + Math.max(0, tilt.rotateY / MAX_TILT) * 0.4 // Right button brightens when tilting left (right edge faces viewer) const rightOpacity = 0.3 + Math.max(0, -tilt.rotateY / MAX_TILT) * 0.4 ``` Base opacity is 0.3 so they're always faintly visible, rising to 0.7 at full tilt. The transition follows the same 300ms ease-out as the rest of the tilt system, so it feels physically connected. --- # Three years of AI My first record of coding with AI was in March 2023 when I was poking around with ChatGPT. category: Reflection date: 2026-02-22 reading-time: 17 min read url: https://conor.fyi/writing/three-years-of-ai --- *I wanted to do a write up on this stuff to mark one year of using ClaudeCode. This document is just me logging, mostly for myself, an intense few years of working with AI tools as a software maker. If you're reading this - thanks for having a look and I hope it's somewhat interesting. I'm not using any AI to write it, review it, or suggest any ideas for it.* My first record of coding with AI was in March 2023 when I was poking around with ChatGPT and wanted to experiment with their API, where you could send a payload and get a response. I was interested in learning Rust at the time too so I killed two birds with one stone and "paired" with Chippity to hack up [a little web-app](https://github.com/conorluddy/weather-haiku). It took the weather forecast from the Yr.no API and sent it to the GPT API to get converted into a haiku with a little serverless function. I had no idea I'd be heavily using Anthropic's Haiku model a year or two later. I'm glad I have an actual record in a public repo of my first crack at it because it was technically my first time paying for LLM tokens. After that I started yet another portfolio website that never got completed, but I was using ChatGPT to help me build a static web framework with Rust, with the goal being that it would work with web components and do some magic with CSS and bundling. It never really had a clear goal and never got completed. The next big timeline event for me was in April 2024 when I was hit by tech layoffs. At the time when I was laid off I had been in this career for 18 years. It's never fun being laid off, and this was my second time, but that fresh start mentality had me considering career changes. Wedding and real estate photography were up there as serious ventures and I already have more than enough serious photo gear to go down that path without needing to spend more, and I was ready to get away from desk work. At the time I was on a digital detox buzz after reading Digital Minimalism by Cal Newport, and had been using my phone in black and white for months to kill the habit of unconsciously unlocking it. It's a very effective way to do it.

![Black and white phone](/images/3-years-with-ai/black-and-white-phone.jpg)
Luckily, I opted to by myself a new Macbook and start taking side projects a bit more seriously instead. In hindsight that layoff was probably the best thing that happened to me during this AI revolution - the timing was perfect, because I started building things just as OpenAI, [Cursor](https://www.cursor.com) and Anthropic were getting really good. Around the time I was laid off I started following YouTubers like Pieter Levels and Marc Lou, and Marc's [shipfa.st](https://www.shipfa.st) product got me thinking that I should build a boilerplate repo that I'd use as a jump-off for all of these other products I was going to start building. Youtube Premium is one of the things I kept even when unemployed - it's very underrated. I had never built a backend setup with user auth from scratch before, and I suddenly had a lot of free time, so I started building [Residents](https://github.com/conorluddy/Residents). The motive being that most apps and products will need to manage users, so lets build the lowest-common-denominator backend API that I can reuse like a cookie cutter. ![Residents GitHub repo](/images/3-years-with-ai/residents-github.png) I learned a bunch about auth, Express, middleware, JWTs, refresh tokens, security, role based access and API testing. The satisfying part about building this was that I was the only person working on it, so had the freedom to make it fully Typescript typed, and well covered by tests. At that point I would have been discussing the codebase with Chippity (I just searched in my ChatGPT dashboard and I had set up one of those custom GPTs and called it "ResidentOne"). I was zipping up code repositories and uploading them as an asset for the GPT, using it to get feedback on the code and advice on how to do auth securely, and then iterating that way. I'm still maintaining Residents, and it's a special one for me because it has been through every phase of my AI journey so far. Starting with Chippity, then Cursor and Continue, and now being occasionally updated by the latest Claude models. It's likely the last ever repository I'll ever have coded the majority of "by hand", because it's no longer efficient to do that. Despite planning to take a few months off and decide what to do next, I ended up starting a new job with [Nory.ai](https://nory.ai) in May '24. I got busy in there very quickly and the personal side products slowed down to a crawl, but I was gradually building a wedding portal website for a friend and designing and building a NextJS-Wordpress website for a Dental clinic.

![Deansgrange Dental Clinic website](/images/3-years-with-ai/deansgrange-dental.jpg)
Actually while looking at that site again to get this screenshot, I remembered that AI helped me to find some unusual ways to do scroll tracking and responsive visibility with native CSS variables. In trying to piece this timeline together, I dipped into my emails and found a "Making the most of Cursor" email from 4th September 2024, followed by a "Receipt from Anthropic" 14 days later. Cursor is a great product, but it was the Claude/Sonnet API that was doing the AI work, so I never ended up subscribing to Cursor - I went straight to the source and I've been an Anthropic customer since. There was (and still is) a VSCode plugin called [Continue](https://continue.dev), that you could use to get a similar setup to Cursor, with a chat panel in the IDE that you use to specify files or lines of code to pass to Claude, and this became my daily driver at work and at home. Rather than paying a fixed subscription to Cursor I was just paying directly for token usage from Anthropic. Nory.ai are obviously a product company who lean into AI and using these tools in there was encouraged. That's where I'd start to really notice the rift between engineers who were leaning into it and those who had no interest in using it. I used to share things on Slack in work when I found useful or interesting ways of working with AI while coding. I remember writing up at the time about how pairing with AI gets you into the flow-channel quicker. The flow channel is a theoretical graph that you can Google, with Challenge on the Y axis and Skill on the X. When you're working "in the zone" in the sweet spot of skill and challenge, anxiety and boredom are minimised and you get very focused. AI tooling can augment your skills and reduce most challenges, so I always found it got me into that flow super quick. At this point I was still in chatbot territory, with Continue making code changes to files from within VSCode. Agentic coding with ClaudeCode hadn't arrived yet, but there was (and still is) a tool called [Aider](https://aider.chat) that gave AI command line access in a similar way. I'm still on that same Macbook, so I can just ask Claude to check the file system and figure out when I installed that... *"Aider was first installed on October 19, 2024"* -- ClaudeCode At the time when I was trying it out we had a little bit of tech debt in the frontend code in Nory. I recorded a Loom video of me using Aider to decompose a React component into 12 smaller React components. Not complicated work, but definitely repetitive and time consuming, creating prop types for them all and extracting shared code etc. I shared the video thinking it was awesome what could be done with Aider. I think I only had a couple of replies, one being "Command line access for AI - what could go wrong...". At the same time our head designer in there was loving Cursor and giving us a dig out with updating our design system tokens in the codebase. It was interesting to see how some engineers shun away from AI tooling while some designers jump in head-first. Back over in side-project territory I had started building a gym app I was calling [Afterset](https://apps.apple.com/us/app/afterset/id6756236020) (named that because that's when you log your set.). I realised I could also use AI to generate data for muscles and exercises - not just write code. So now it was trivial to create hundreds of exercises and get AI to define what proportion of each exercise would hit each muscle. A recurring theme with working with AI is that the more you use it the more "oh you can do THAT with it too" ideas naturally occur. I started learning about graph data structures and graph databases through building Afterset. Without AI I'd never have had the patience or time. Using Residents as a boilerplate, Claude and I built an Arango database that we'd use as a back-end for a weight training app, where each set of an exercise could be roughly attributed to each muscle involved, so that as you build up training logs you'd be able to see what muscles are being used too much or too little. I got stuck into Miro and started wire-framing. The app/front-end of Afterset had no plan yet and I'd never tried any iOS/Swift development at this point. I started trying out React Native but ended up parking the app for the time being.
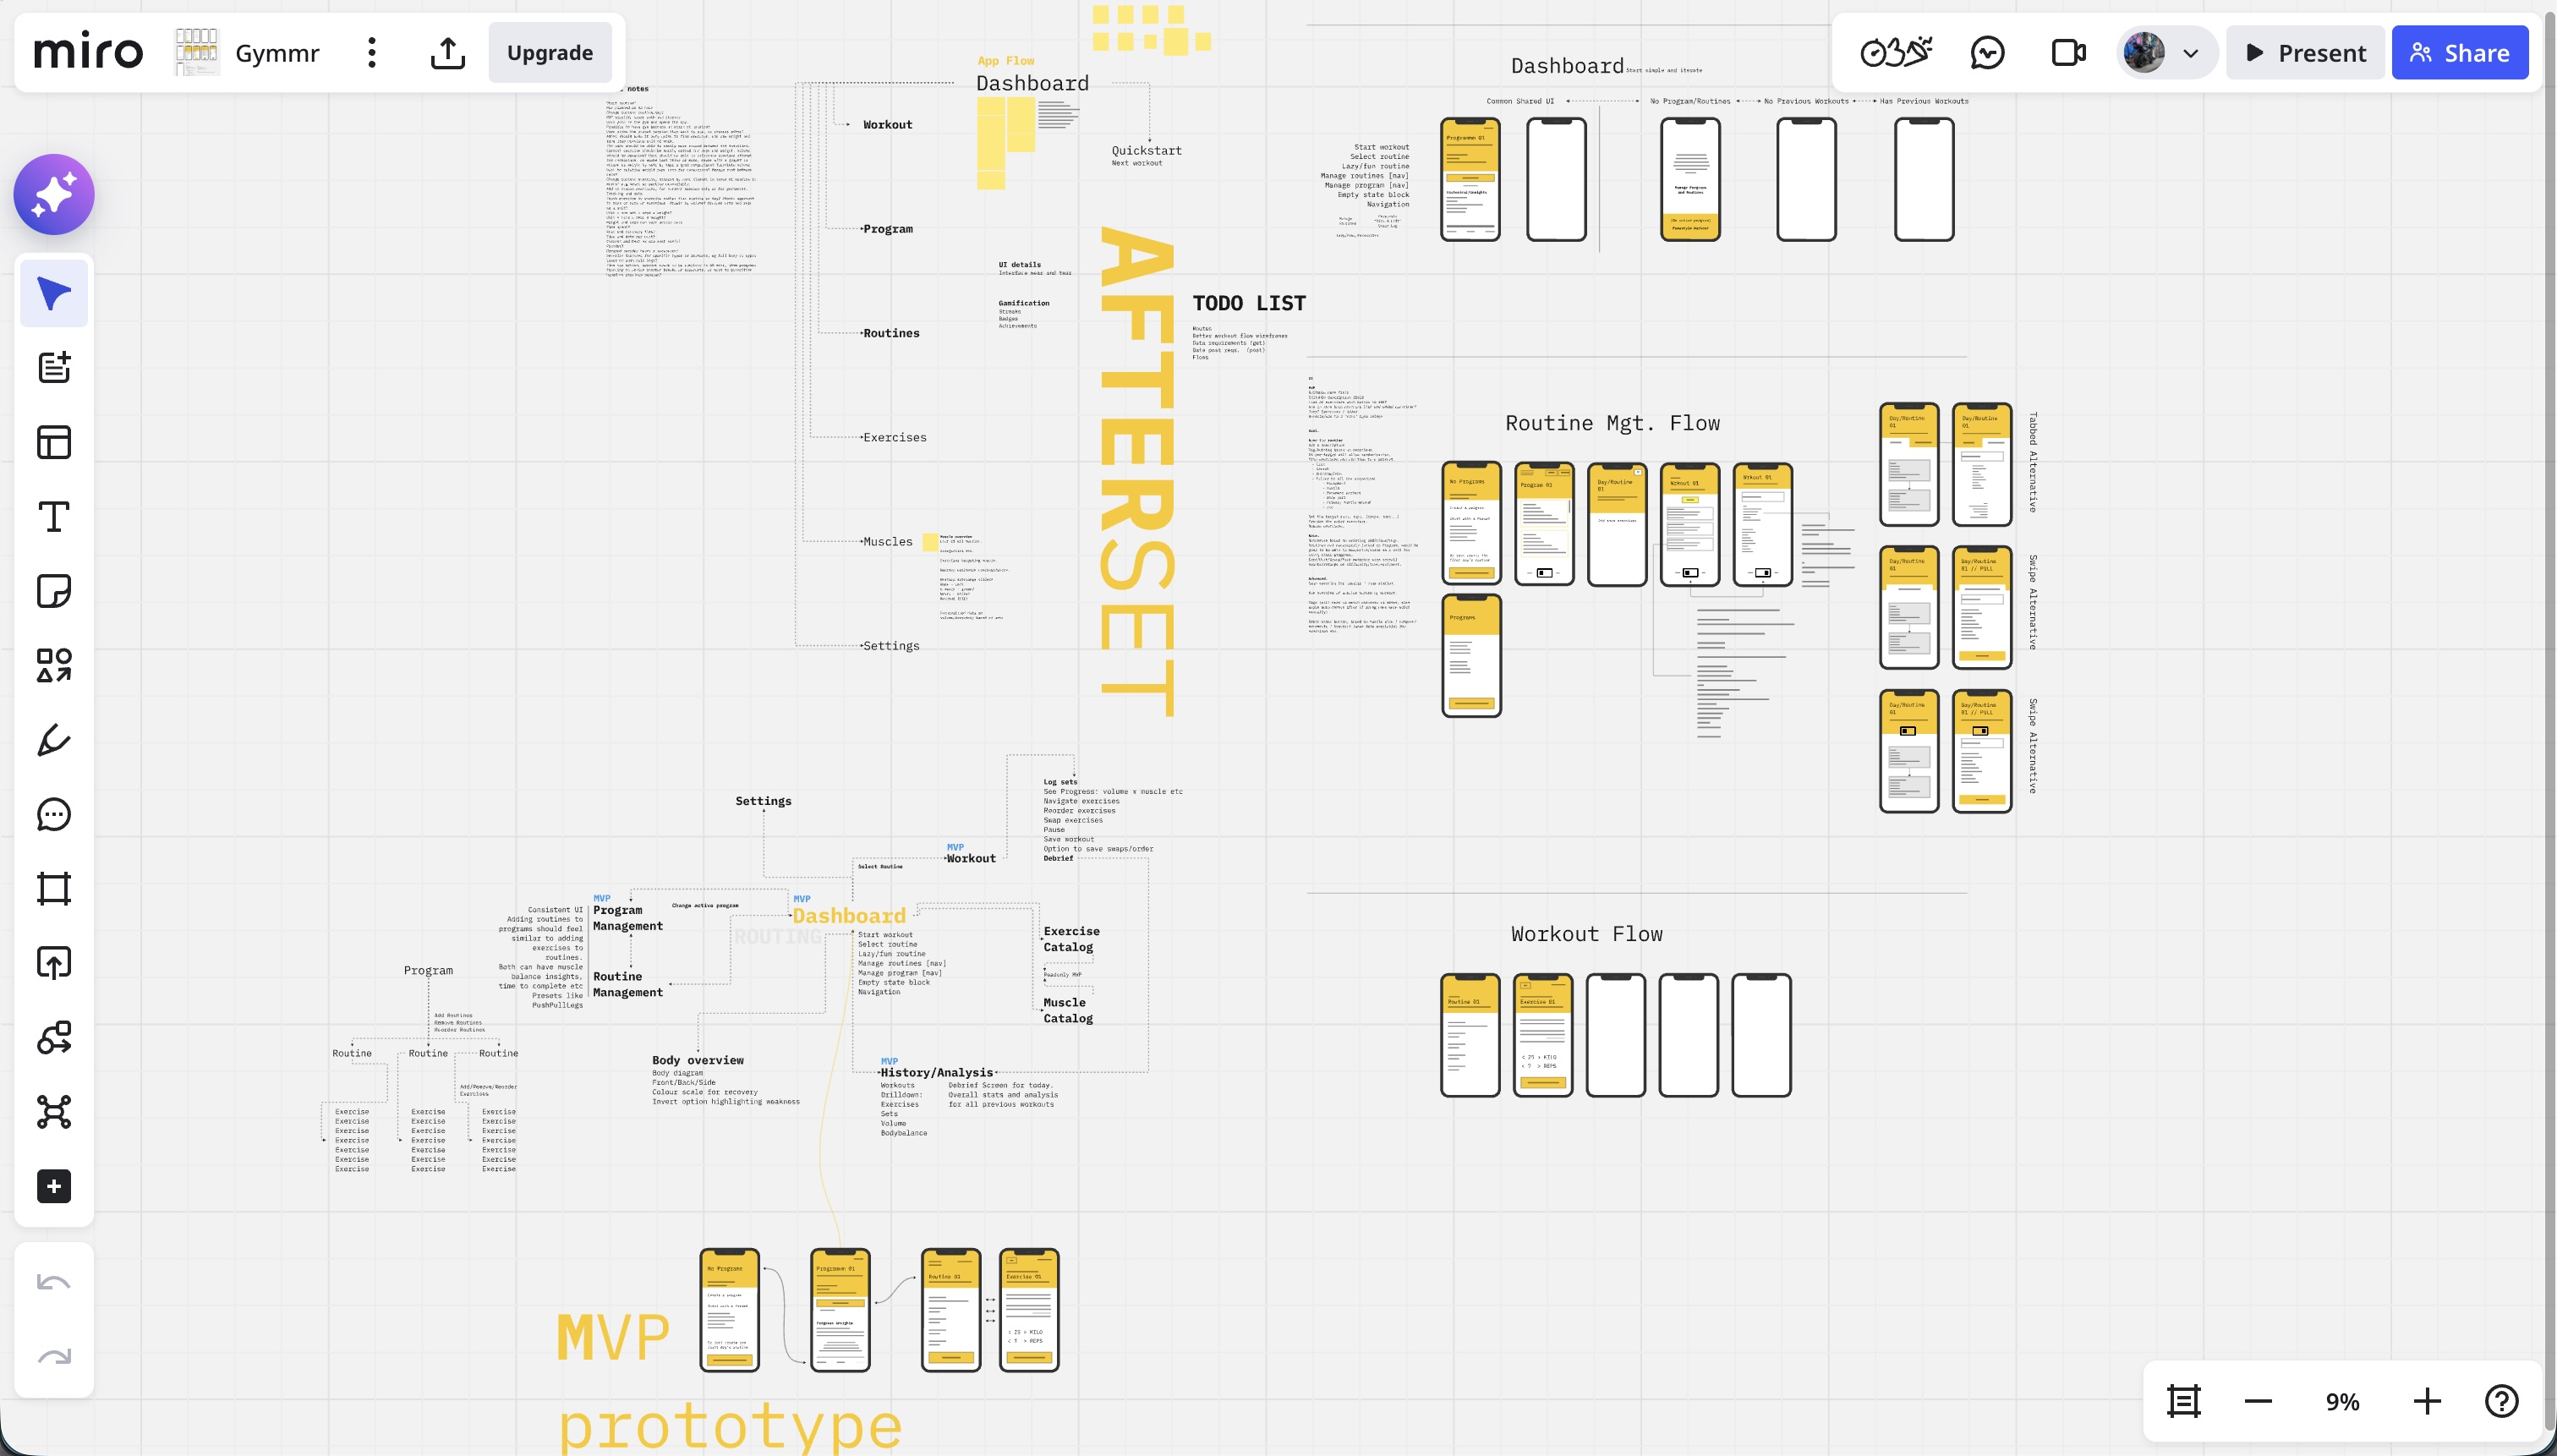
![Afterset Miro wireframes](/images/3-years-with-ai/afterset-miro.jpg)
The next thing on this timeline was ClaudeCode. I was still using Claude via Continue a lot at this stage, at work and at home, still using the pay-as-you-go model via the API. ClaudeCode came out as a developer preview in late February 2025 - I'm writing all of this on its first birthday. I started using it from day one, but at the time it was also paying by the token/API, and it absolutely burned through money. It was way more expensive than using the API, but even then it felt like a completely different beast to Cursor and Continue. I still kept Continue as my primary tool due to the cost of using ClaudeCode, but if I was stuck on something I'd reach for ClaudeCode and it would nearly always nail it. I'd definitely have been using ClaudeCode full-time back then if I'd had a room full of cash to burn. In spring 2025 I left Nory and went back to Toast to work on a React Native product. I had a lot of React experience by then but no significant iOS or Android experience, making it a good move for learning some new tech. It aligned well with me wanting to build my own products and iOS apps. By now most big tech companies had started to push these new AI workflows too - so we had pilot programs for Cursor, followed soon after by ClaudeCode. ClaudeCode has been my main tool in my day-job for about 9 months now too and writes most of my code. I'll write a separate more technical post about how I work with it on the day to day. By now ClaudeCode had the new subscription model, and I was using the basic €20/month subscription on my personal account, but was hitting the usage limits too quickly. Soon I bumped up to a Claude Max account at around €100/month. I think if there's ever an important time to pay this much for a subscription, it's during these formative years of AI. I was hitting the usage limits because I had started building a new iOS app called [Grapla](https://grapla.app) and the flow state with ClaudeCode was getting highly addictive. I ended up committing code to my personal Github account on 360 days of 2025. Grapla turned into a massive rabbit-hole that I'm still building, but it's teaching me a lot.
"The Grapla repo began on April 30, 2025" -- ClaudeCode I won't get into the details of that app here because it'll end up doubling the length of this essay. It'll be a good subject for a series later. But it taught me a massive amount of iOS development, and triple that again in ways of building with Claude. One recurring theme in both work and side projects is the speed that you can build tooling and scripts to support the main project, and these often grow into their own side projects. For iOS projects I ended up building [XC-MCP](https://github.com/conorluddy/xc-mcp) (an MCP that wraps XCodebuild so that Claude can build your app without having to eat 40,000 tokens in output logs), [ios-simulator-skill](https://github.com/conorluddy/ios-simulator-skill) (now with 500+ stars on Github - (but it's just a Claude-Skill port of XCMCP)), and another tool called [Persuader](https://github.com/conorluddy/Persuader) - intended to "persuade" Claude to consistently generate data to match a schema.
Back in the day job I was still sharing ways I was finding useful to work with Claude, and sharing tips and shortcuts and insights. I gave a couple of talks on MCP servers, one virtually and one in a room full of real people in our Boston office - explaining what MCPs are for and why they can be valuable and/or save tokens and money. This boils down to "context engineering" and optimising how context and tokens are used - although since promoting MCPs back then, it's now better to use Skills and not to have any MCPs or plugins active unless you're actively using them. They add unnecessary tokens to every session, costing you money even if you're not using them. At the time though, I was all about the MCPs, and thought I'd try to build an MCP that would spawn other MCPs, like a boilerplate/manager type thing. I called it [ContextPods](https://github.com/conorluddy/ContextPods) because the pods were supposed to be little modular MCPs that would handle context for the agents. Never ended up using it for anything in the end, but all of these were practice and taught me different things. The Grapla app was taking a long time but had also produced a lot of reusable patterns and tooling. One Saturday I had been thinking about the Afterset app that hadn't been touched since I started Grapla. The JSON data that had been generated for it was ripe for revival, and since I'd last looked at the project I'd gone and learned a bunch about iOS development. Now I knew it didn't even really need a back-end - everything could just live on the phone and work offline. I decided to see if we could start an iOS project for Afterset on a weekend and have it submitted to the AppStore by the Sunday evening. Apple reviewed it within 24 hours, and it live and downloadable by Monday evening. It was far from perfect, but it was proof that all the work on my other app had paved the way for getting apps built fast. The problem now was that Afterset was live as a weekend project, but I couldn't just leave it there like that, it needed a bunch of work to make it actually be any good. The POC of getting an app live in a weekend had turned into a time trap. So Grapla got parked for a while and I tried to get Afterset up to a state where it could be used in the gym without having too many missing features. It needs a lot more work, but it's another app that I can do a complete write-up on soon.
I finally parked Afterset (it still needs more work) and got back to Grapla, and while Claude was building me out a separate NextJs marketing website for it we got chatting about ideas. All of the data for the app is JSON, so it can be plucked into other projects too. With the marketing website done we started discussing how we could generate other marketing assets. I often tell Claude to create experiments using prompts like "build us ten variations of X" and we'll cross pollinate ideas and polish up something that comes out of it. In this case it randomly came up with a periodic table of Jiu Jitsu that turned into a super feature for SEO on the website - but that also evolved into something that could render social media images for hundreds of the positions in our app data.
[![Grapla periodic table of Jiu Jitsu positions](/images/3-years-with-ai/grapla-periodic-table.png)](https://grapla.app)
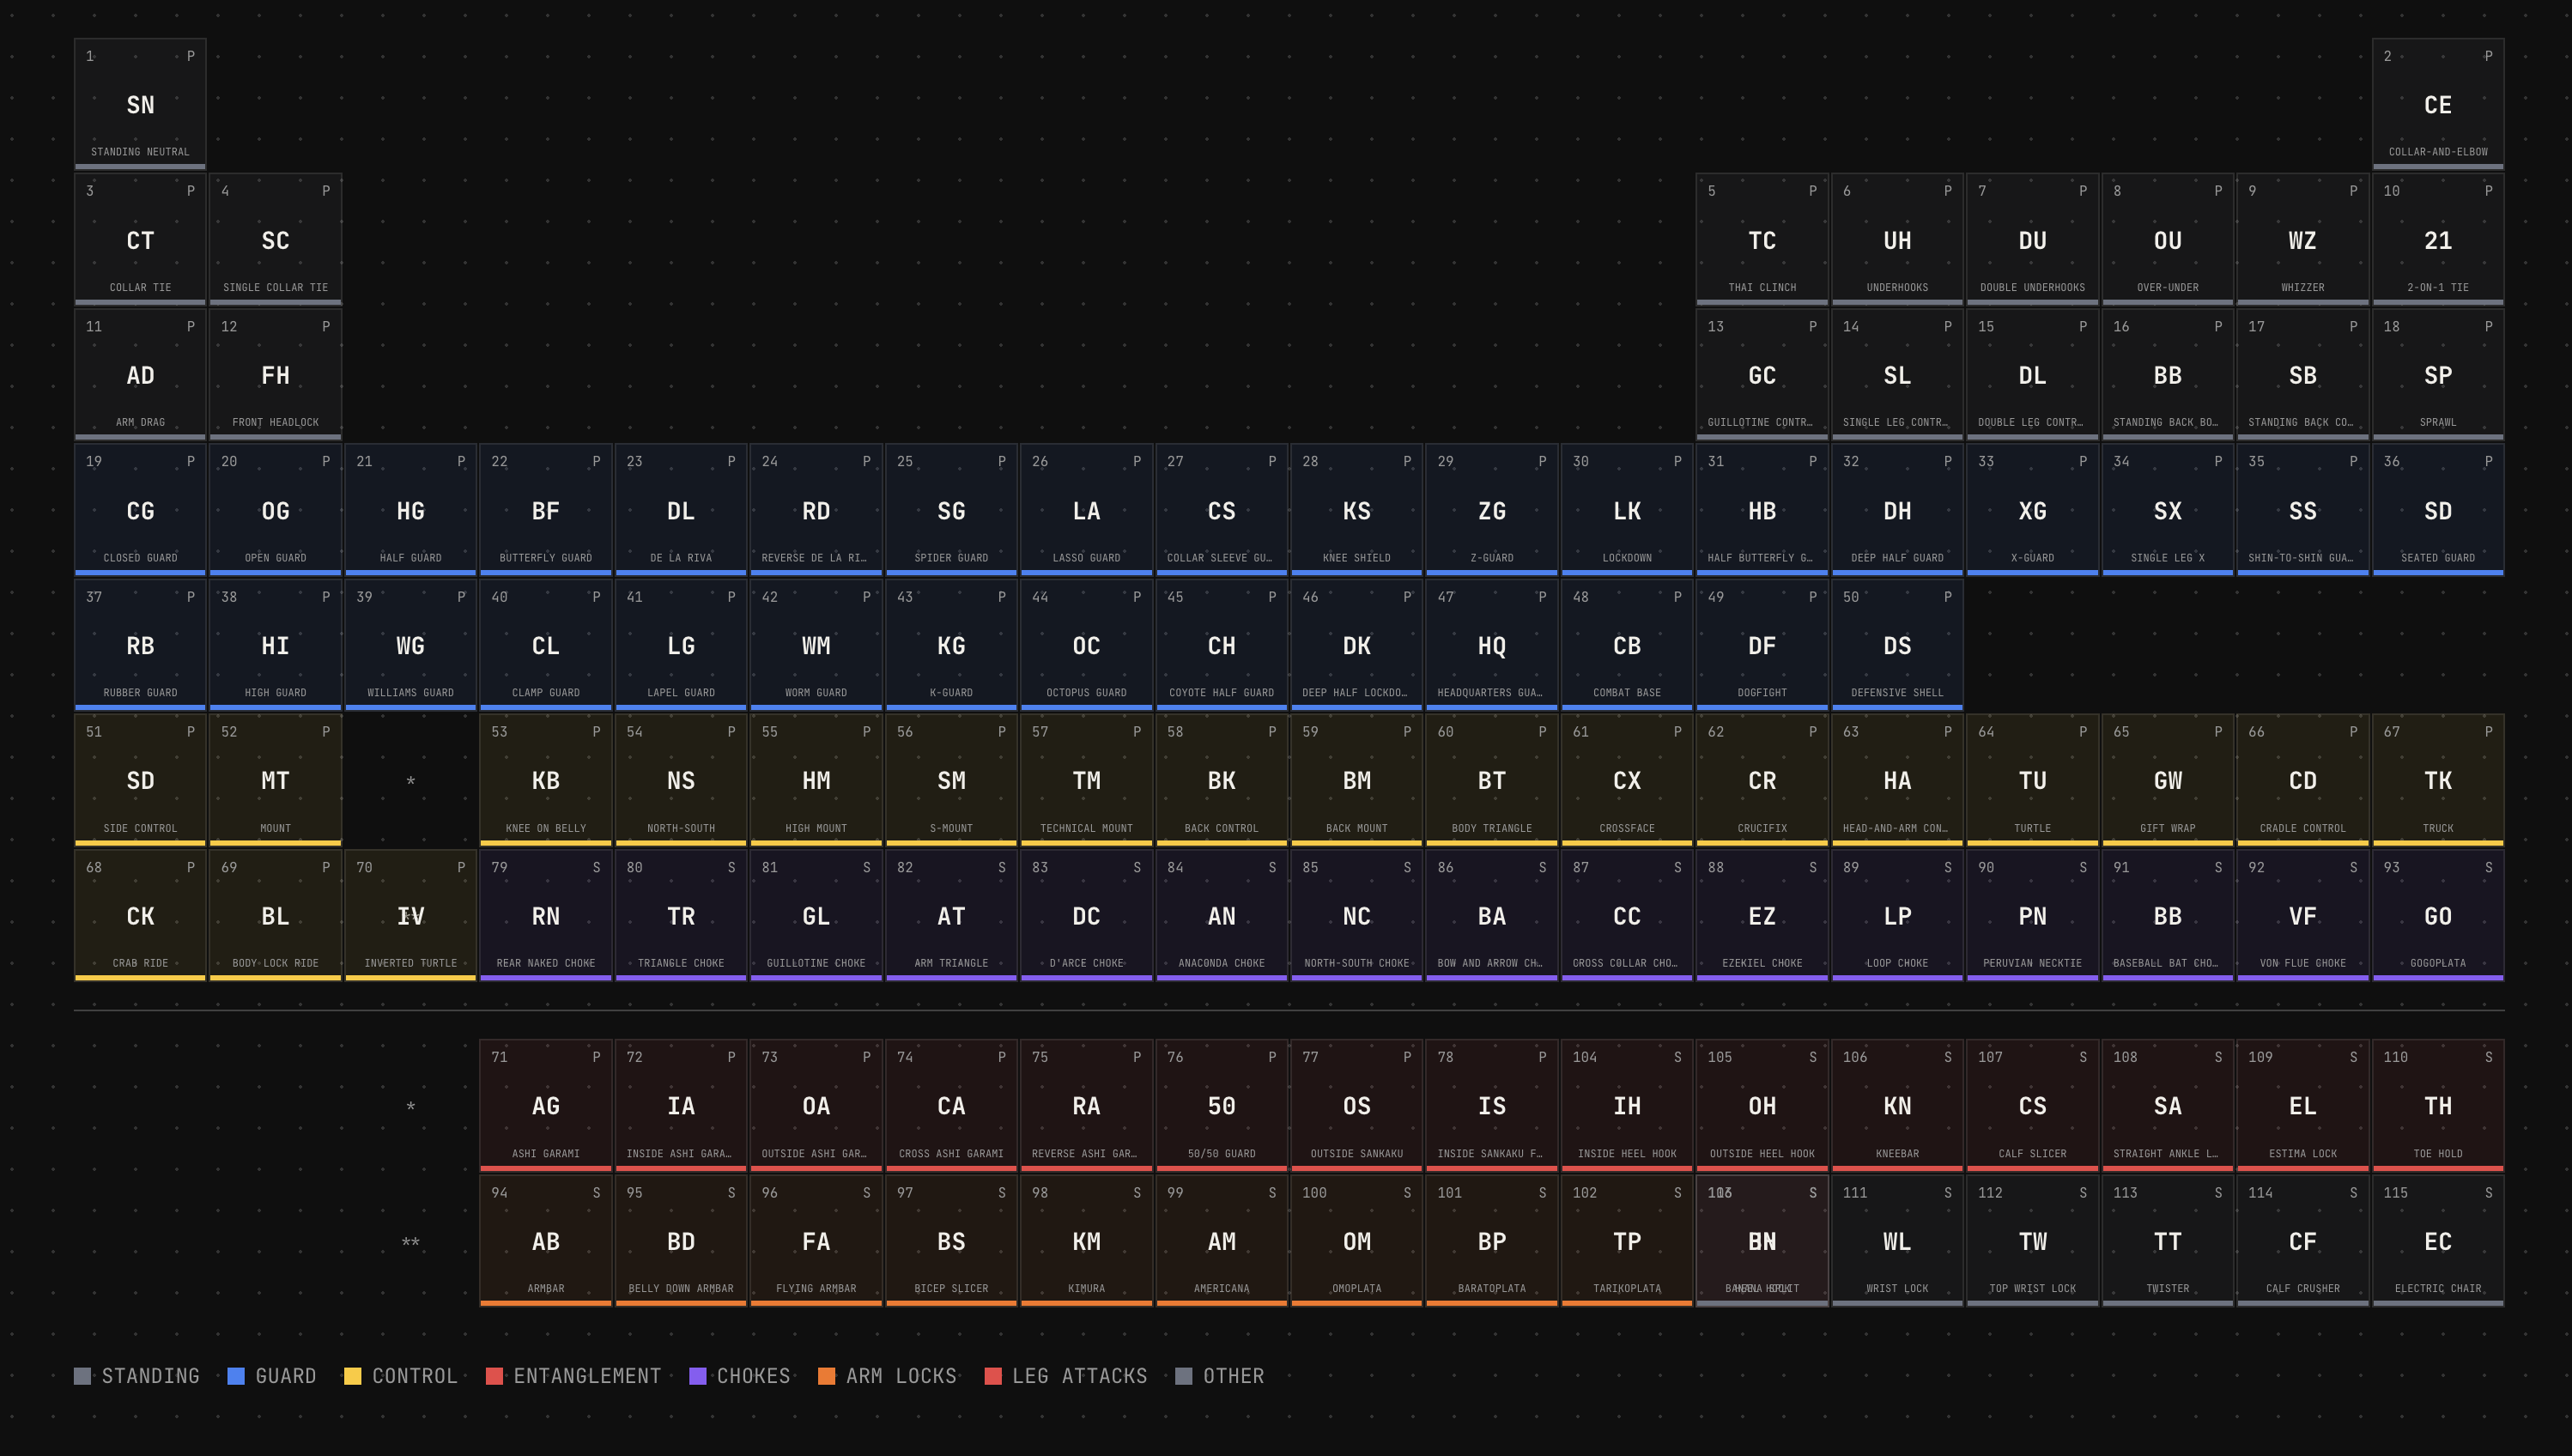
So we had an endpoint that rendered images in social media format, and a script that would hit it for each entity in our data. Hundreds of images generated in under a minute, using nice colour palette generated by ChromaJs. Claude then went a step further and created flow videos with ffmpeg. Grapla is a Jiu Jitsu app, so these videos are all just flow sequences ending in submissions, perfect for the marketing Tiktok/Insta accounts.
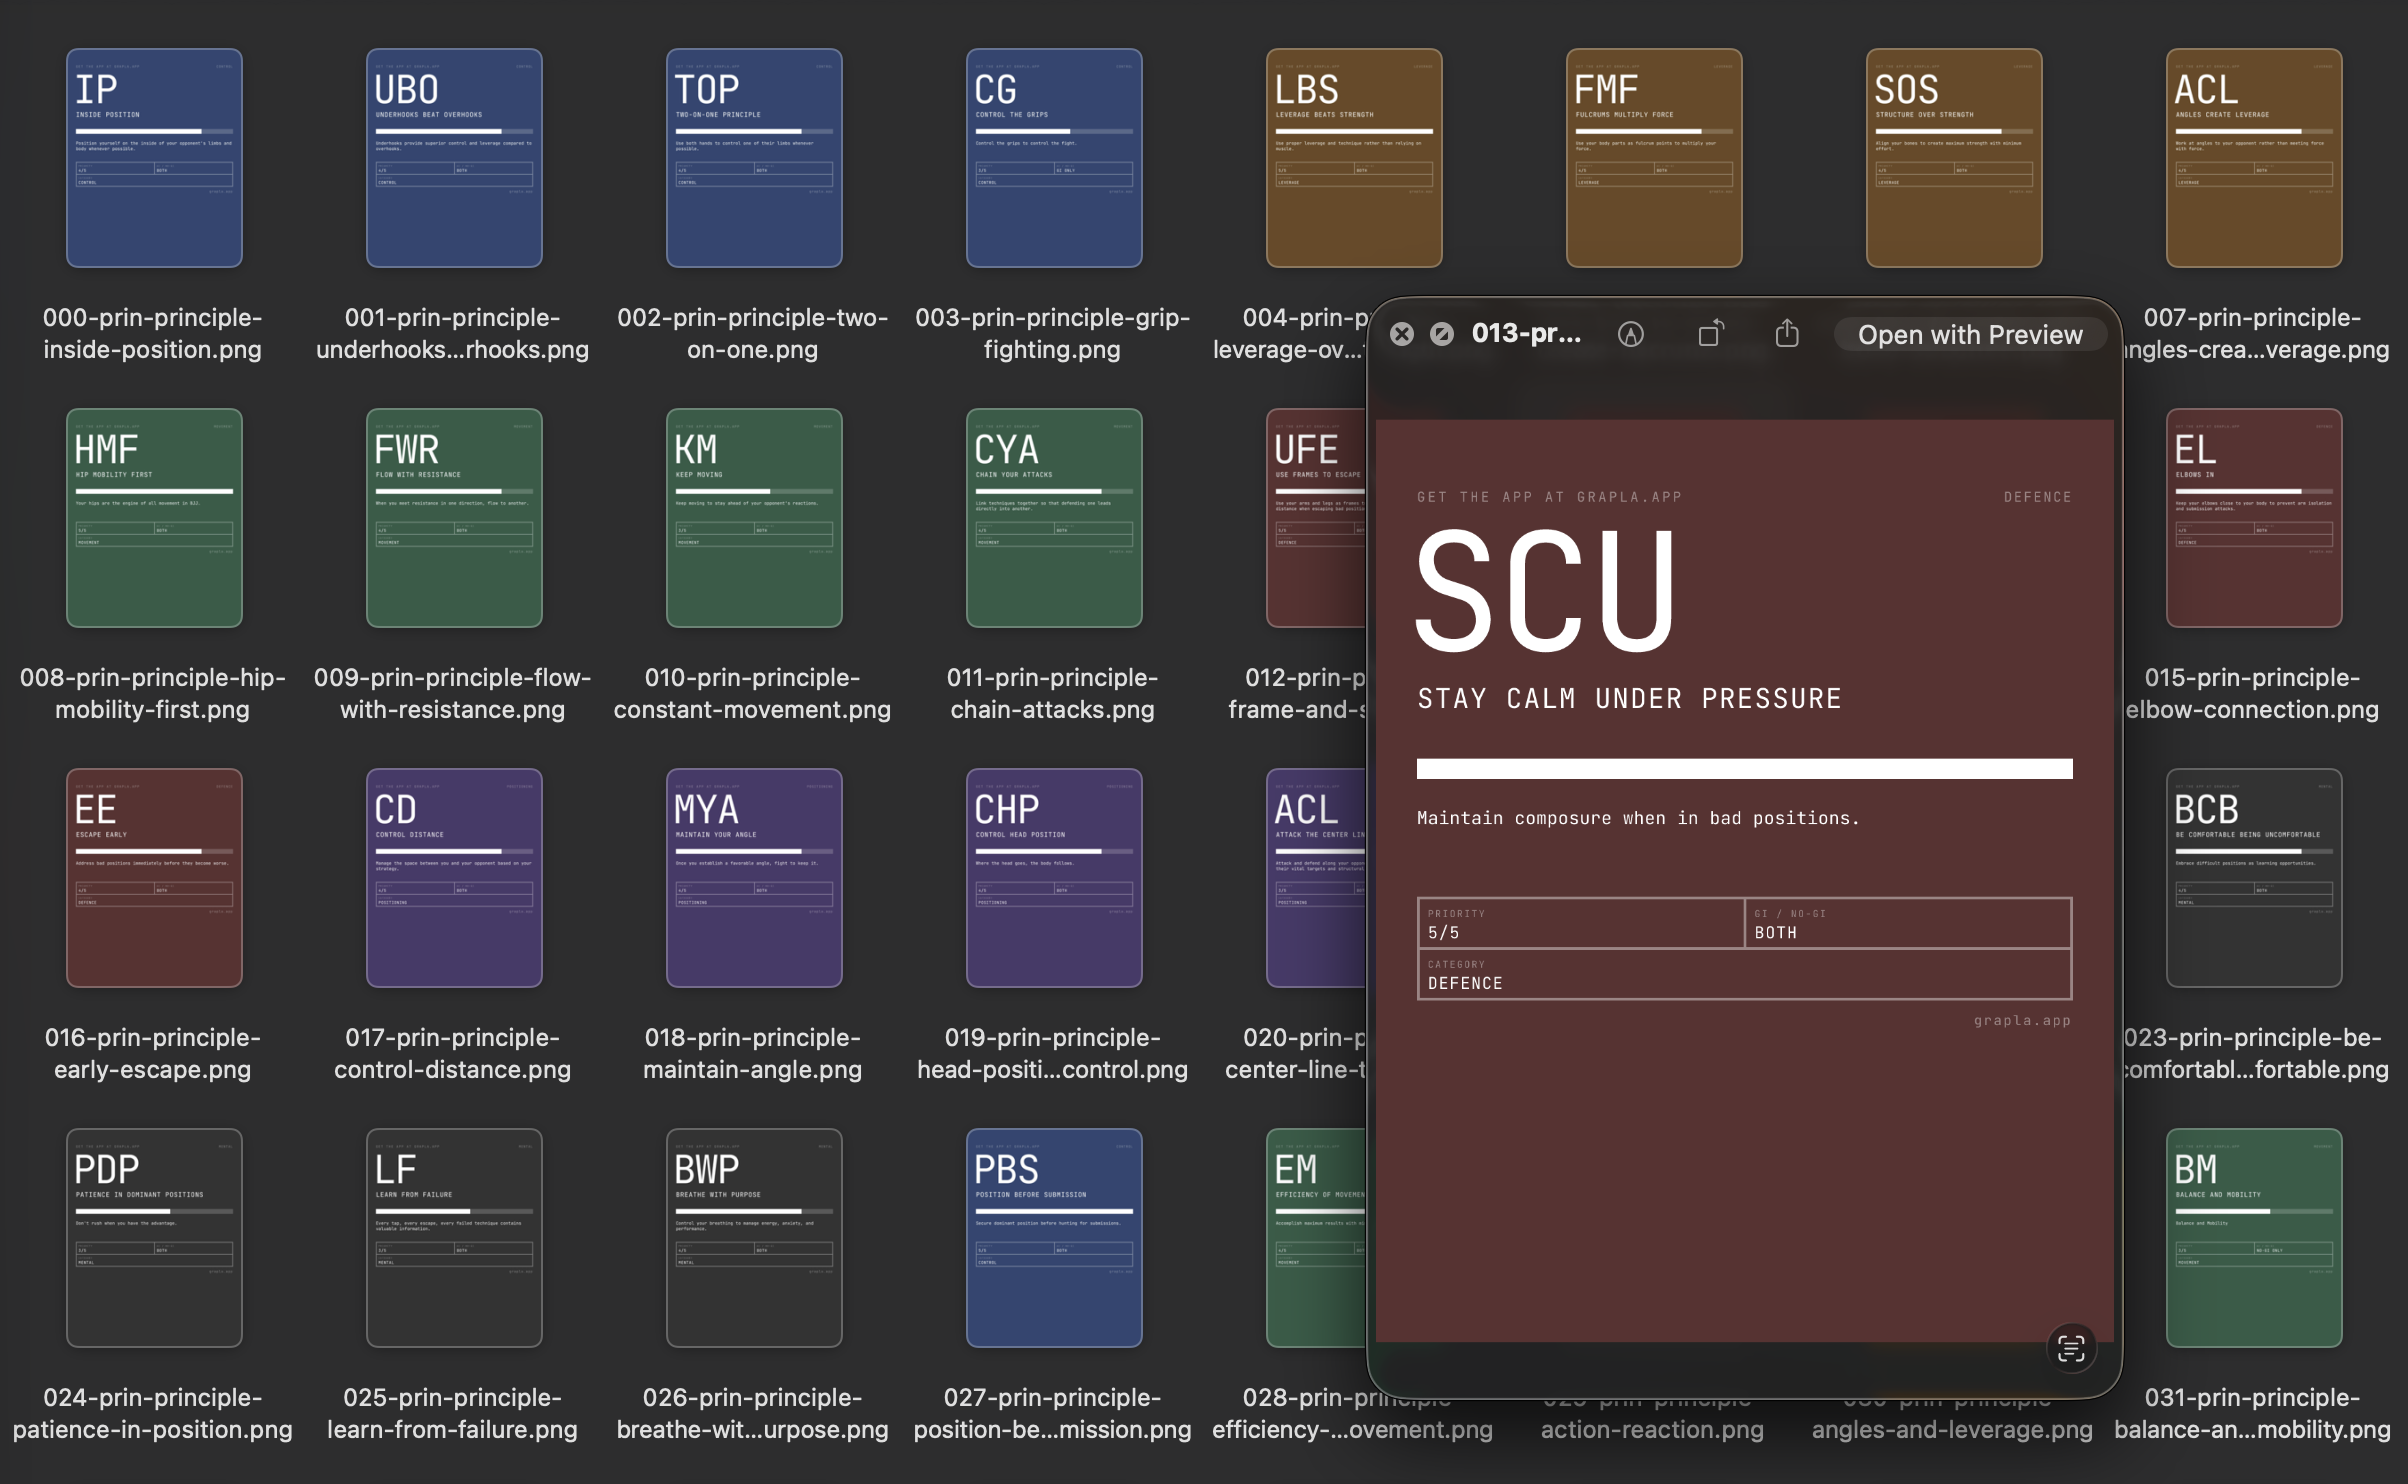
![Grapla social media images generated by Claude](/images/3-years-with-ai/grapla-social-images.png)
If anything can be done on a command line, Claude can do it and automate it. The latest thing I've been exploring is augmenting [Obsidian](https://obsidian.md) with Claude. I'm seeing if I can build a Zod and data graph layer over it that Claude can plug into. Then I'll be using it as a central knowledge base that contains documentation, specs and idea/discovery content for all of my projects. Claude will be able to extract a strongly typed JSON representation of it all and hopefully able to cross-pollinate ideas and resources between everything. Before I go too deep down that rabbit hole though I need to get Grapla launched.

![Grapla marketing website — Kimura submission](/images/3-years-with-ai/grapla-website.png)
Somehow between starting this write-up and finishing it, I ended up building another minimal app called [FrictionList](https://apps.apple.com/us/app/frictionlist/id6759489834) that's ~~currently being reviewed by Apple~~.
These little CSS phone mockups and the timelines at the edges (only on big screen) were also built by Claude, purely for this article - they were fun. I'll never be dogmatic about ways to work with AI - it's a very open-ended and subjective experience and everyone has their own approach. But I'll be sharing what works for me, and what feels like useful details of all of the different things I worked with it on over the past few years. More ramblings coming soon... --- # Code Style Guide Write for understanding, optimize for limited attention. I use some version of this guide in most of my projects, to help keep them LLM and human friendly. category: Reference date: 2026-02-20 reading-time: 20 min read url: https://conor.fyi/writing/codestyle --- > **Core Principle**: Context is finite. Every token — code, comment, structure — competes for limited attention. Maximize signal, minimize noise. Write for two audiences: humans with limited working memory and AI agents with bounded context windows. ## Philosophy The optimal code is the minimum necessary to solve the problem correctly. Every additional line is debt. **Progressive Disclosure**: Structure code layer-by-layer. Readers grasp high-level flow immediately, drilling into details only when needed. File names indicate purpose. Directory structures mirror conceptual hierarchies. Function names describe behavior without reading implementation. **Self-Documenting**: Names eliminate need for comments. Comments explain "why," never "what." If you chose algorithm A over B for subtle reasons, state that. If you're working around a library bug, explain it. **Aggressive Minimalism**: Before adding code, ask: "Is this the simplest solution?" Before adding a comment: "Does this clarify something non-obvious?" Before introducing an abstraction: "Does this reduce complexity, or merely relocate it?" **AHA Over DRY**: Avoid Hasty Abstractions. Wait for the 3rd duplication before extracting. The wrong abstraction is worse than duplication. Three similar lines of code is better than a premature abstraction. ## Progressive Disclosure Structure every layer of your system so readers — human or agent — get the right level of detail at the right time. No one should need to read 2000 lines to understand what a module does. ### The Zoom Principle Code should work like a map: zoom out for the big picture, zoom in for street-level detail. Each zoom level should be self-sufficient. ``` // Level 0: Directory structure tells you what exists src/ ├── authentication/ # "There's an auth system" ├── orders/ # "There's an order system" ├── payments/ # "There's a payment system" └── README.md # How they connect // Level 1: Index file tells you what it can do // authentication/index.ts export { authenticateUser } from './authenticate'; export { refreshSession } from './sessions'; export { revokeAccess } from './revoke'; // No implementation visible — just capabilities // Level 2: Function signature tells you the contract async function authenticateUser( credentials: UserCredentials, db: Database, clock: Clock ): Promise> // Level 3: Implementation tells you how // Only read this when you need to change the behaviour ``` ### File-Level Disclosure Every file should answer "what is this?" in its first 10 lines. Implementation details belong below. ```typescript // ✅ Top of file reveals purpose, contract, and shape /** * Order Processing Pipeline * * Validates → enriches → prices → submits orders. * Entry point: processOrder() * Error strategy: Result types, no throws */ // Types first — the contract type ProcessOrderInput = { /* ... */ }; type ProcessOrderResult = Result; // Public API second export async function processOrder(input: ProcessOrderInput): Promise { const validated = validateOrder(input); if (!validated.ok) return validated; const enriched = await enrichWithInventory(validated.value); if (!enriched.ok) return enriched; return submitOrder(enriched.value); } // Private helpers last — only read if you need to understand a specific step function validateOrder(input: ProcessOrderInput): Result { // ... } ``` ```typescript // ❌ Implementation soup — must read everything to understand anything import { db } from '../globals'; const RETRY_COUNT = 3; const BACKOFF_MS = 100; function helper1() { /* ... */ } function helper2() { /* ... */ } // 200 lines later... export function processOrder() { /* ... */ } ``` ### Documentation Disclosure Match documentation depth to the reader's likely intent. Most readers want "what does this do?" — very few want "why did you choose bcrypt over argon2?" ``` Level 1 — CLAUDE.md (5 seconds) "This is an order processing API. Entry: src/api/server.ts" Level 2 — Module README (30 seconds) "Orders go through validate → enrich → price → submit. Uses Result types. Retries on transient failures." Level 3 — Section comments (2 minutes) // ======================================== // PRICING ENGINE // ======================================== // Applies tiered discounts, tax rules, and currency conversion. // See: docs/pricing-model.md for business rules. Level 4 — Inline "why" comments (as needed) // Using ceiling division here because partial units // must be billed as full units per the SLA. ``` ### API & Type Disclosure Public interfaces should be scannable summaries. Implementation types stay internal. ```typescript // ✅ Public types: minimal, focused, scannable // orders/types.ts — what consumers need to know export type OrderSummary = { id: OrderId; status: OrderStatus; total: Money; itemCount: number; createdAt: DateTime; }; // orders/internal-types.ts — implementation detail // Not exported. Contains pricing breakdowns, audit trails, // intermediate computation states, retry metadata, etc. type OrderPricingContext = { /* ... */ }; type OrderAuditEntry = { /* ... */ }; ``` ### Disclosure Anti-Patterns - **Premature depth**: Putting implementation details in README files - **Flat disclosure**: 500-line files with no visual hierarchy or grouping - **Inverted disclosure**: Helpers at top, public API buried at bottom - **Missing levels**: Jumping from directory listing straight to inline comments with nothing in between ## Naming The #1 impact on readability. Good names eliminate mental translation overhead. ``` // ✅ Descriptive, unambiguous async function validateJsonAgainstSchema( schema: ZodSchema, input: string ): Promise function calculateExponentialBackoff( attemptNumber: number, baseDelayMs: number ): number // ❌ Vague, abbreviated async function valJson(s: any, i: string): Promise function calcBackoff(n: number, d: number): number ``` **Rules**: 1. **Be specific**: `activeUsers` not `users`, `httpTimeoutMs` not `timeout` 2. **Include units**: `delayMs` not `delay`, `maxRetries` not `max` 3. **Avoid abbreviations**: `customer` not `cust`, `configuration` not `cfg` 4. **Use domain language**: Names from business domain, not technical abstractions 5. **Boolean prefixes**: `isValid`, `hasPermission`, `canEdit`, `shouldRetry` 6. **Verbs for functions**: `validateEmailFormat()` not `checkEmail()`, `fetchActiveUsers()` not `getUsers()` ## Function Design ### Single Responsibility with Explicit Contracts ``` // ✅ Self-contained, explicit dependencies, typed contract async function authenticateUser( credentials: UserCredentials, database: Database, currentTime: DateTime ): Promise> { // All dependencies visible in signature // Return type reveals all possible outcomes } // ❌ Hidden dependencies, unclear contract async function auth(data: any): Promise { // Uses global config, modifies global state } ``` ### Guard Clauses Over Nesting Handle edge cases first, keep the happy path unindented and visible. ``` // ✅ Guard clauses — happy path clear function processOrder(order: Order): Result { if (!order) return err('missing_order'); if (order.items.length === 0) return err('empty_order'); if (order.total <= 0) return err('invalid_total'); if (!order.paymentMethod) return err('missing_payment'); return ok(completePayment(order)); } // ❌ Nested conditions — happy path buried function processOrder(order: Order) { if (order) { if (order.items.length > 0) { if (order.total > 0) { // Happy path buried 4 levels deep } } } } ``` ### Design Rules 1. **Single responsibility** — describable in one sentence 2. **Explicit dependencies** — all inputs as parameters, no hidden global state 3. **Type everything** — TypeScript strict mode, Python type hints 4. **Self-contained context units** — comprehensible without reading other files 5. **50-line guideline** — not a hard limit, but a refactoring trigger ## Error Handling ### Result Types — Make Errors Explicit Errors belong in function signatures, not hidden behind `throw`. ``` type Result = | { ok: true; value: T } | { ok: false; error: E }; type UserError = 'not_found' | 'unauthorized' | 'network_failure'; async function fetchUser(id: string): Promise> { // Errors are part of the contract } // Usage forces error handling — compiler catches missing cases const result = await fetchUser(userId); if (!result.ok) { switch (result.error) { case 'not_found': return show404(); case 'unauthorized': return redirectLogin(); case 'network_failure': return showRetry(); } } ``` **When to use Result types**: API calls, file I/O, validation, any complex error path. **When to use exceptions**: Truly exceptional/unrecoverable situations (out of memory, corrupted state). ### Branded Types — Validate at Boundaries ``` type ValidatedEmail = string & { readonly __brand: 'ValidatedEmail' }; type UserId = string & { readonly __brand: 'UserId' }; function validateEmail(input: string): ValidatedEmail | null { return isValidEmail(input) ? (input as ValidatedEmail) : null; } // Type system prevents using unvalidated data function sendEmail(to: ValidatedEmail, subject: string) { // No need to re-validate — type guarantees validity } ``` Once you have a `ValidatedEmail`, downstream functions carry zero validation overhead. The type system encodes the knowledge that validation occurred. ### Error Principles 1. **Never silently swallow errors** — log or propagate, never ignore 2. **Fail fast at boundaries** — validate inputs immediately, not deep in call stack 3. **Provide actionable messages** — what failed, expected vs actual, how to fix ``` // ✅ Actionable error with context throw new ValidationError( `Email validation failed for "user_email": ` + `Expected "name@domain.com", received "${input}". ` + `Use validateEmailFormat() to check before calling.` ); // ❌ Opaque throw new Error("Validation failed"); ``` ## File & Module Organization ### Structure with Clear Boundaries ``` // ======================================== // PUBLIC API // ======================================== export class UserService { constructor(private readonly db: Database) {} async createUser(data: CreateUserData): Promise> { // Public interface } } // ======================================== // VALIDATION // ======================================== function validateUserData(data: unknown): Result { // Grouped validation logic } // ======================================== // PRIVATE HELPERS // ======================================== function hashPassword(password: string): Promise { // Internal implementation } ``` ### Organization Rules 1. **Group by feature/domain**, not file type — `authentication/`, `orders/`, `payments/` 2. **Public API first** — exported functions at top, helpers at bottom 3. **One major export per file** — `UserService.ts` exports `UserService` 4. **Co-locate tests** — `UserService.test.ts` next to `UserService.ts` 5. **300-line guideline** — not a hard limit, but a refactoring trigger 6. **Minimal cross-module dependencies** — each module is a clean context boundary ``` project/ ├── authentication/ # Self-contained context │ ├── index.ts # Public API only │ ├── credentials.ts │ ├── sessions.ts │ └── README.md # Module architecture ├── orders/ # Independent context └── storage/ # Independent context ``` ## Testing ### Testing Trophy — Mostly Integration "Write tests. Not too many. Mostly integration." — Kent C. Dodds 1. **Static Analysis** (foundation): TypeScript strict mode, ESLint 2. **Unit Tests** (narrow): Pure functions, complex algorithms 3. **Integration Tests** (widest — most tests here): How pieces work together, where bugs actually live 4. **E2E Tests** (top): Critical user journeys only ### Tests as Documentation Test names describe scenarios. Docstrings explain "why." Tests demonstrate usage. ``` test('should reject invalid credentials without revealing if username exists', async () => { // Prevents username enumeration attacks const auth = new Authenticator(database); const result = await auth.authenticate({ email: 'nonexistent@example.com', password: 'any-password' }); expect(result.ok).toBe(false); expect(result.error.code).toBe('INVALID_CREDENTIALS'); expect(result.error.message).not.toContain('user not found'); }); ``` ### Testing Rules 1. **Test behavior, not implementation** — focus on inputs/outputs, not internal state 2. **One concept per test** — don't test multiple unrelated things 3. **Integration over unit** — test pieces working together (more confidence per test, more resilient to refactoring) 4. **Clear test names** — describe the scenario: `test('user can add items to cart')` 5. **80% coverage minimum** — focus on critical paths ## Observability ### Structured Logging ``` // ✅ Structured — queryable, correlated logger.info('Request processed', { request_id: requestId, user_id: userId, endpoint: req.path, method: req.method, duration_ms: duration, status_code: res.statusCode, cache_hit: cacheHit }); // ❌ Unstructured — hard to query logger.info(`User ${userId} accessed ${req.path}`); ``` ### What to Log **Always include**: request\_id, user\_id, trace\_id, entity IDs, operation type, duration\_ms, error details. **Log at critical boundaries**: * External API calls (request/response) * Database operations (query, duration) * Authentication/authorization decisions * Error occurrences with full context **One structured event per operation** — derive metrics, logs, or traces from the same data. Don't instrument separately for each observability pillar. ## Agentic Coding Patterns These patterns address the unique demands of code that will be read, modified, and executed by AI agents alongside humans. ### Idempotent Operations Agents retry. Network calls fail. Tasks get re-run. Design every mutation to be safely repeatable. ``` // ✅ Idempotent — safe to retry async function ensureUserExists( email: ValidatedEmail, db: Database ): Promise { const existing = await db.users.findByEmail(email); if (existing) return existing; return db.users.create({ email }); } // ❌ Non-idempotent — duplicates on retry async function createUser(email: string, db: Database): Promise { return db.users.create({ email }); } ``` ### Explicit State Machines Over Implicit Flows When operations have distinct phases, model them explicitly. Agents reason about state machines far better than implicit status flags scattered across objects. ``` type OrderState = | { status: 'draft'; items: Item[] } | { status: 'submitted'; items: Item[]; submittedAt: DateTime } | { status: 'paid'; items: Item[]; submittedAt: DateTime; paymentId: string } | { status: 'shipped'; items: Item[]; trackingNumber: string }; // Each transition is a pure function with clear preconditions function submitOrder(order: OrderState & { status: 'draft' }): OrderState & { status: 'submitted' } { return { ...order, status: 'submitted', submittedAt: DateTime.now() }; } ``` ### Machine-Parseable Errors Agents need structured errors alongside human-readable ones. Return error codes that can be programmatically matched, with messages that explain context. ``` type AppError = { code: 'VALIDATION_FAILED' | 'NOT_FOUND' | 'CONFLICT' | 'UPSTREAM_TIMEOUT'; message: string; // Human-readable explanation field?: string; // Which input caused it retryable: boolean; // Can the caller retry? }; ``` ### Atomic, Independently-Verifiable Changes Structure work so each change can be validated in isolation. This applies to commits, PRs, and function design. An agent (or reviewer) should be able to verify correctness without understanding the entire system. ``` // ✅ Each function is independently testable and verifiable function parseConfig(raw: string): Result { /* ... */ } function validateConfig(config: Config): Result { /* ... */ } function applyConfig(config: ValidConfig, system: System): Result { /* ... */ } // ❌ Monolithic — must understand everything to verify anything function loadAndApplyConfig(path: string): void { /* 200 lines */ } ``` ### Convention Over Configuration Reduce the search space for agents (and humans). Consistent patterns mean less context needed per decision. * Consistent file naming: `UserService.ts`, `UserService.test.ts`, `UserService.types.ts` * Predictable directory structure across features * Standard patterns for CRUD operations, API endpoints, error handling * If your project has a pattern, follow it. If it doesn't, establish one and document it ### Contract-First Design Define types before implementation. Types are the cheapest, most scannable form of documentation. An agent reading your types understands your system's data flow without reading a single function body. ``` // Define the contract first interface OrderService { create(data: CreateOrderInput): Promise>; cancel(id: OrderId, reason: CancelReason): Promise>; findByUser(userId: UserId, pagination: Pagination): Promise>; } // Then implement — the types guide everything ``` ### Observable Side Effects Every mutation should produce structured output describing what changed. This enables agents to verify their actions and enables humans to audit. ``` type MutationResult = { data: T; changes: Change[]; // What was modified warnings: string[]; // Non-fatal issues encountered }; async function updateUserProfile( id: UserId, updates: ProfileUpdates ): Promise, UpdateError>> { // Returns both the result AND a description of what changed } ``` ### Context Optimisation & Token Economics > Every token an agent reads is a token it can't use for reasoning. Treat context like memory in an embedded system — budget it, measure it, and refuse to waste it. #### The Context Budget AI agents operate within fixed context windows. Your code, documentation, error messages, and tool outputs all compete for the same finite space. Code that is token-efficient isn't just neat — it directly improves agent reasoning quality. ``` Context Window (finite) ├── System prompt & instructions ~2-5k tokens (fixed cost) ├── Conversation history ~variable ├── Tool definitions ~1-10k tokens (per tool schema) ├── Retrieved code / docs ~variable ← YOU CONTROL THIS ├── Agent reasoning ~variable ← THIS GETS SQUEEZED └── Output generation ~variable ← AND SO DOES THIS The more tokens your code consumes, the less room the agent has to think. Optimise ruthlessly. ``` #### Semantic Compression Collapse granular interfaces into high-level semantic operations. Instead of exposing every low-level action, expose intent-based APIs. ```typescript // ❌ 15 granular tools = ~15k tokens of schema // An agent must read and reason about ALL of them tools: [ createFile, readFile, deleteFile, moveFile, copyFile, listDirectory, createDirectory, deleteDirectory, getFileMetadata, setFilePermissions, watchFile, compressFile, decompressFile, hashFile, diffFiles ] // ✅ 1 semantic dispatcher = ~1k tokens of schema // Agent reasons about intent, not mechanics tools: [{ name: "filesystem", description: "Manage files and directories", parameters: { operation: "create | read | delete | move | copy | list | ...", path: "string", options: "object (operation-specific)" } }] ``` This is the dispatcher pattern: consolidate related tools behind a single entry point that routes by intent. Token cost drops dramatically while functionality stays the same. #### Layered Context Loading Don't front-load everything. Provide summaries first, with drill-down paths for when the agent actually needs more detail. ```typescript // ✅ Layered: summary first, details on demand function getProjectOverview(): ProjectSummary { return { name: "DataPipeline", modules: ["ingestion", "transform", "export"], entryPoint: "src/main.ts", recentChanges: getRecentChangeSummary(5), // Drill-down references — agent only loads what it needs getModuleDetail: (name: string) => loadModuleContext(name), getFileContent: (path: string) => loadFileContext(path), }; } // ❌ Eager: dumps everything into context upfront function getProjectContext(): FullProjectDump { return { allFiles: readAllFiles(), // 50k tokens allTests: readAllTests(), // 30k tokens allDocs: readAllDocs(), // 20k tokens // Agent's context window is now full before it starts thinking }; } ``` #### Token-Aware Documentation Write documentation that serves both human readers and token budgets. Every word should earn its place. ```markdown # ❌ Token-heavy: narrative style, repetitive, verbose ## Overview of the Authentication Module The authentication module is responsible for handling all aspects of user authentication within our application. This module was designed with security best practices in mind and implements industry-standard protocols. The module handles user login, token generation, session management, and token refresh functionality. It is important to note that this module uses JWT tokens for authentication purposes. (~80 tokens to say what could be said in 15) # ✅ Token-efficient: dense, scannable, no filler ## Authentication JWT-based auth with refresh token rotation. - Entry: `authenticate()` → `Result` - Tokens: 15min access, 7d refresh (HTTP-only cookie) - Storage: PostgreSQL users, Redis token blacklist (~40 tokens, more information conveyed) ``` #### Structured Output for Agent Consumption When building tools or functions that agents will consume, prefer structured, parseable output over human-readable prose. ```typescript // ✅ Agent-friendly: structured, parseable, minimal type BuildResult = { success: boolean; errors: { file: string; line: number; code: string; message: string }[]; warnings: { file: string; line: number; code: string; message: string }[]; stats: { duration_ms: number; filesProcessed: number }; }; // ❌ Human-only: requires parsing natural language function getBuildOutput(): string { return `Build completed with 2 errors and 1 warning. Error in src/auth.ts line 42: Type 'string' is not assignable... Error in src/orders.ts line 18: Property 'id' does not exist... Warning in src/utils.ts line 7: Unused variable 'temp'... Build took 3.2 seconds, processed 47 files.`; } ``` #### Context Boundaries as Architecture Design modules so an agent can work within one module without loading others. Each module should be a self-contained context unit. ```typescript // ✅ Clean context boundary — agent only needs this module // payments/index.ts export interface PaymentService { charge(input: ChargeInput): Promise>; refund(id: PaymentId, reason: RefundReason): Promise>; } // payments/types.ts — all types co-located, no external dependencies export type ChargeInput = { amount: Money; method: PaymentMethod; idempotencyKey: string; // Agent-friendly: built-in retry safety }; // payments/errors.ts — exhaustive, machine-readable export type PaymentError = | { code: 'INSUFFICIENT_FUNDS'; available: Money } | { code: 'CARD_DECLINED'; reason: string; retryable: false } | { code: 'GATEWAY_TIMEOUT'; retryable: true }; ``` ``` // ❌ Leaky context boundary — agent must load 4 modules to understand 1 // payments/index.ts import { User } from '../users/types'; import { Order } from '../orders/types'; import { AuditLogger } from '../audit/logger'; import { ConfigManager } from '../config/manager'; // Agent now needs context from users/, orders/, audit/, config/ ``` #### Compression Strategies Reference | Strategy | Before | After | Savings | |----------|--------|-------|---------| | Semantic dispatchers | N tool schemas (~N × 1k tokens) | 1 dispatcher (~1k tokens) | ~(N-1)k tokens | | Layered loading | Full dump (50k tokens) | Summary + drill-down (2k + on-demand) | ~48k idle tokens | | Dense docs | Narrative prose (~80 tokens/concept) | Structured bullets (~40 tokens/concept) | ~50% | | Co-located types | Scattered across modules | Single `types.ts` per module | Fewer file loads | | Summary-first returns | Full object graphs | Summary + reference IDs | 60-90% per call | | Discriminated unions | Generic error + message string | Typed union with `code` field | Eliminates parsing | ## Project Navigation ### CLAUDE.md at Project Root Every project needs a navigation file. List entry points, patterns, and common tasks. ``` # Project: Data Processing Pipeline ## Entry Points - `src/main.ts`: CLI interface - `src/api/server.ts`: REST API - `src/processors/pipeline.ts`: Core processing ## Key Patterns - All processors implement `Processor` interface (src/processors/base.ts) - Config uses Zod schemas (src/config/schemas.ts) - External APIs via `APIClient` (src/external/client.ts) ## Common Tasks - Add data source → implement `DataSource` in `src/api/sources/` - Add transformation → implement `Transformer` in `src/processors/transformers/` ``` Keep under 200 lines. Update when architecture changes. ### Module-Level READMEs Every major directory gets a README answering: What is this? How does it work? What are the gotchas? ``` # Module: User Authentication ## Purpose JWT-based authentication with refresh token rotation ## Key Decisions - bcrypt cost factor 12 for password hashing - Access tokens expire after 15 minutes - Refresh tokens stored in HTTP-only cookies ## Dependencies - jose library for JWT (not jsonwebtoken — more secure) - PostgreSQL for user storage - Redis for token blacklist ``` ### Progressive Context Hierarchy 1. **CLAUDE.md / README.md at root** — system overview, entry points, setup 2. **README.md per major module** — module purpose, key decisions, patterns 3. **Section comments in files** — group related code with clear headers 4. **Function/class docs** — purpose, examples for non-obvious APIs 5. **Inline comments** — only for "why" decisions ## Anti-Patterns * **Premature optimization** — Measure first, optimize second * **Hasty abstractions** — Wait for 3rd duplication before extracting * **Clever code** — Simple and obvious beats clever and compact * **Silent failures** — Log and propagate, never swallow * **Vague interfaces** — `process(data: any): any` provides zero guidance * **Hidden dependencies** — Global state, singletons, ambient imports * **Nested conditionals** — Use guard clauses instead * **Comments describing "what"** — If you need a comment to explain what code does, rename things * **Premature generalization** — Build for today's requirements, not hypothetical futures * **Token bloat** — Functions returning everything when callers need summaries * **Inverted disclosure** — Helpers at top, public API buried at bottom * **Flat files** — 500-line files with no visual hierarchy, grouping, or section comments * **Leaky context boundaries** — Modules that import heavily from siblings, forcing agents to load the entire codebase * **Eager context loading** — Dumping full project state into agent context when a summary would suffice ## Checklist Before submitting code: * Solves the stated problem with minimal code? * A new developer can understand it without extensive context? * Errors handled with actionable messages? * Names clear, specific, and unambiguous? * Functions have single, clear responsibilities? * Dependencies explicit (no hidden global state)? * Tests cover critical paths? * Operations idempotent where applicable? * Types define contracts before implementation? * Would this work well with ~200 lines of surrounding context? * Can an agent understand this module without loading adjacent modules? * Are public APIs scannable in under 50 lines? * Do tool/function outputs use structured types, not prose? * Is documentation token-dense (no filler words, no repetition)? * Does the file follow progressive disclosure (types → public API → helpers)? --- *"Any fool can write code that a computer can understand. Good programmers write code that humans can understand." — Martin Fowler* --- # Building a Design System on Mathematical Harmony The algebra of beautiful design category: Frontend date: 2026-01-16 reading-time: 8 min read url: https://conor.fyi/writing/golden-ratio-grid --- Most design systems feel arbitrary—a collection of numbers chosen because they seemed reasonable. This one is different. Every spacing value, every font size, every breakpoint follows mathematical sequences that naturally create visual harmony. ## The Philosophy Design systems should be predictable. When you know that spacing follows the Fibonacci sequence and font sizes follow the same pattern, you don't need to guess. You don't need a design spec with 47 different margin values. You need one simple rule: multiply by φ (the golden ratio, ≈1.618). The system is built on two foundational ideas: 1. **The Golden Ratio** - A mathematical constant that appears throughout nature and has been used in art and architecture for centuries 2. **The Fibonacci Sequence** - A series where each number is the sum of the two before it (0, 1, 1, 2, 3, 5, 8, 13, 21, 34, 55, 89...) These aren't decorative. They're the entire foundation. ## The Golden Ratio Grid The layout starts with a single column: **34em** wide. For a reading experience optimized around 65–75 characters per line (the sweet spot for comprehension), this is perfect. But a single column is boring. On larger screens, we need a secondary column. We get it by dividing by φ: ```text 34em ÷ 1.618 ≈ 21em ``` The gutter between them is φ itself: ```text 1.618em ≈ 26px at a 16px base font size ``` Total width: ```text 34em + 1.618em + 21em = 56.618em ``` On mobile, the two-column layout collapses to a single column. The grid reactivates at 900px. ### In CSS: ```css :root { --phi: 1.618; --grid-primary: 34em; --grid-secondary: 21em; --grid-gutter: calc(var(--phi) * 1em); /* 1.618em */ --grid-total: 56.618em; } .grid-golden { display: grid; grid-template-columns: 1fr; gap: var(--space-8); } @media (min-width: 900px) { .grid-golden { grid-template-columns: var(--grid-primary) var(--grid-secondary); gap: var(--grid-gutter); } } ``` ## Typography: Three Fonts, One Purpose The typography system uses **three fonts**, each with a distinct role: ### 1. **Monda** (Body text) - Weights: 400, 500, 600, 700 - Role: Primary reading font for paragraphs, UI labels, lists - Why: Geometric and readable; weights provide hierarchy without changing fonts ### 2. **Kanit 100** (Display) - Weight: 100 (ultra-thin) - Role: h1 only—the page title - Why: Dramatic contrast. Ultra-thin at large size creates visual impact without noise ### 3. **Space Mono** (Structure + Code) - Weights: 400, 700 - Role: Headings (h2–h6), code blocks, labels - Why: Monospace creates a structured, technical feel. Separates hierarchy visually ### In CSS: ```css h1 { font-family: var(--font-display); /* Kanit 100 */ font-size: var(--font-size-2xl); font-weight: 100; } h2, h3, h4, h5, h6 { font-family: var(--font-secondary); /* Space Mono */ font-weight: 700; } body { font-family: var(--font-base); /* Monda */ } code, pre { font-family: var(--font-secondary); /* Space Mono */ } ``` ## Fibonacci Font Sizes Font sizes don't increment by fixed amounts (no +2px, +4px, +6px). Instead, they follow the Fibonacci sequence: ```text 8, 13, 21, 34, 55, 89 (px equivalents at 16px base) ``` Mapped to variables: ```css --font-size-xs: 0.5em /* 8px */ --font-size-sm: 0.8125em /* 13px */ --font-size-base: 1em /* 16px */ --font-size-lg: 1.3125em /* 21px */ --font-size-xl: 2.125em /* 34px */ --font-size-2xl: 3.4375em /* 55px */ --font-size-3xl: 5.5625em /* 89px */ ``` Why Fibonacci? The ratio between consecutive Fibonacci numbers approaches φ. This creates a consistent visual growth where jumping from one size to the next feels natural, not jarring. ### In CSS: ```css p { font-size: var(--font-size-base); } h3 { font-size: var(--font-size-lg); } h2 { font-size: var(--font-size-xl); } small { font-size: var(--font-size-sm); } ``` ## Fibonacci Spacing Spacing is everything in design. Too tight and text feels suffocating. Too loose and it feels disconnected. The solution: **consistent, mathematically justified spacing**. The base unit is `0.25em` (4px at 16px root). Multiples of the Fibonacci sequence: ```css --space-0: 0 --space-1: 0.25em /* 4px */ --space-2: 0.5em /* 8px */ --space-3: 0.75em /* 12px */ --space-5: 1.25em /* 20px */ --space-8: 2em /* 32px */ --space-13: 3.25em /* 52px */ --space-21: 5.25em /* 84px */ --space-34: 8.5em /* 136px */ --space-55: 13.75em /* 220px */ ``` Every spacing decision uses these values. No custom margins. No "15px because it looked right." This means the spacing rhythm propagates throughout the entire interface. ### In CSS: ```css h2 { margin-top: var(--space-21); /* 84px */ margin-bottom: var(--space-5); /* 20px */ } p { margin-bottom: var(--space-5); /* 20px */ } button { padding: var(--space-3) var(--space-5); /* 12px 20px */ } ``` ## Mobile-First Breakpoints Most design systems define breakpoints based on desktop first, then squeeze mobile. This system inverts that: **mobile is the default, desktop is the enhancement**. Six breakpoints, heavily skewed toward mobile: ```css --breakpoint-xs: 320px /* Tiny phones */ --breakpoint-sm: 375px /* Small phones (iPhone SE) */ --breakpoint-md: 428px /* Standard phones (iPhone 14/15) */ --breakpoint-lg: 520px /* Large phones (Pro Max) */ --breakpoint-xl: 680px /* Small tablets */ --breakpoint-2xl: 900px /* Desktop → 2-column grid */ ``` Why 6 breakpoints? Because mobile needs granularity. A 320px phone screen and a 680px tablet screen require different typography and spacing adjustments. But there's only one desktop breakpoint because once you reach 900px, the full two-column layout takes over. ### In CSS: ```css .container { padding-inline: var(--gutter-xs); /* 12px on tiny screens */ } @media (min-width: 375px) { .container { padding-inline: var(--gutter-sm); /* 16px on small phones */ } } @media (min-width: 900px) { .container { padding-inline: 0; /* Grid handles spacing */ } } ``` ## Desktop Offset: Quirky Centering On desktop, instead of centering the layout dead center, we offset it slightly to the right using—you guessed it—a Fibonacci value: ```text var(--space-13) = 52px offset ``` This creates visual breathing room on the left while keeping the layout slightly off-center. It feels intentional and quirky rather than perfectly balanced. The offset is applied using `transform: translateX()` on the desktop breakpoint, which means it doesn't affect the layout's centering calculations—the container still measures and aligns as centered, but appears shifted. ### In CSS: ```css @media (min-width: 900px) { .container { padding-inline: 0; transform: translateX(var(--space-13)); /* 52px right */ } } ``` Why `transform` instead of `margin`? Transform is applied after layout is calculated, so it doesn't break centering logic. Pure elegance. ## Responsive Gutters Side padding isn't fixed—it scales with the breakpoints: ```css --gutter-xs: 0.75em /* 12px */ --gutter-sm: 1em /* 16px */ --gutter-md: 1.25em /* 20px */ --gutter-lg: 1.5em /* 24px */ ``` On desktop, the gutter vanishes because the grid's gap handles spacing. This keeps the system predictable: you're not fighting the container for space. ## Colors & Dark Mode The color system is built on HSL. Instead of having 50 arbitrary hex colors, we define: 1. **Hue** - The color (0-360°) 2. **Saturation** - How colorful (0-100%) 3. **Lightness** - How bright (0-100%) This makes dark mode trivial. A light mode uses lightness 90%. Dark mode uses lightness 10%. No manual color tweaks. ```css :root { --hue-brand: 200; /* Sky blue */ --sat-brand: 100%; } :root { --color-brand-50: hsl(var(--hue-brand), var(--sat-brand), 97%); --color-brand-500: hsl(var(--hue-brand), var(--sat-brand), 50%); --color-brand-900: hsl(var(--hue-brand), var(--sat-brand), 19%); } @media (prefers-color-scheme: dark) { :root { --color-text-primary: var(--color-gray-50); --color-bg-primary: var(--color-gray-900); } } ``` Semantic tokens map to actual use: ```css :root { --color-text-primary: var(--color-gray-900); --color-bg-primary: var(--color-white); --color-border-primary: var(--color-gray-200); } ``` Now you use `var(--color-text-primary)` instead of `#1a1a1a`, and dark mode works automatically. ## Other Primitives The system extends beyond spacing and typography: - **Border radius**: `0.125em` (2px) to `1em` (16px)—all em-based so they scale - **Shadows**: Layered for depth without heaviness - **Transitions**: `150ms`, `200ms`, `300ms`, `500ms`—all Fibonacci-adjacent - **Z-index**: Named layers (`--z-dropdown: 1000`, `--z-modal: 1200`) - **Line heights**: `1.25` (tight) through `2` (loose) ## Putting It Together These primitives don't exist in isolation. A button uses typography (font-size), spacing (padding), colors (background), transitions (hover state), and sizing. The magic is that every element cascades from the same foundation. A simple component: ```css button { font-size: var(--font-size-sm); padding: var(--space-3) var(--space-5); background-color: var(--color-bg-brand); color: var(--color-text-inverse); border-radius: var(--radius-base); transition: background-color var(--duration-fast) var(--ease-out); } button:hover { background-color: var(--color-bg-brand-hover); } ``` Every value traces back to a mathematical sequence or semantic choice. There's no guesswork. ## The Result A design system built on mathematical principles isn't just aesthetic—it's practical: - **Predictability**: You know how spacing works. You know how sizes scale. - **Maintainability**: Change one variable (`--phi`) and the entire system follows. - **Scalability**: Add a new feature, use the existing tokens, and it automatically feels cohesive. - **Dark mode**: Automatic, no manual tweaking. - **Accessibility**: Proper line heights, contrast ratios, and motion preferences built in. The site you're reading now is built entirely on this system. Every margin, every font size, every color has a mathematical justification. That's not decoration—that's discipline. And discipline is what makes design systems work. --- # iOS 26 Liquid Glass: Comprehensive Swift/SwiftUI Reference A complete guide to Apple's most significant design evolution since iOS 7 category: Reference date: 2025-11-16 updated: 2026-05-20 reading-time: 30 min read url: https://conor.fyi/writing/liquid-glass-reference --- ## Overview > **Updated · 20 May 2026 · This is a living reference.** > Originally published 16 Nov 2025 against iOS 26.0. Refreshed in May 2026 with a second research pass covering iOS 26.1–26.4 point releases (Tinted mode, Lock Screen Glass/Solid, Reduce Bright Effects), expanded sheet-morph guidance, the UIKit+SwiftUI hybrid recipe, a Web & Cross-Platform appendix, a Community Reception section, and forward-looking notes on WWDC 2026 (8 June 2026). See *Part 7: Point-Release Changelog* for the full diff. iOS 26 Liquid Glass represents Apple's most significant design evolution since iOS 7, introduced at WWDC 2025 (June 9, 2025). **Liquid Glass is a translucent, dynamic material that reflects and refracts surrounding content while transforming to bring focus to user tasks**. This unified design language spans iOS 26, iPadOS 26, macOS Tahoe 26, watchOS 26, tvOS 26, and visionOS 26. Liquid Glass features real-time light bending (lensing), specular highlights responding to device motion, adaptive shadows, and interactive behaviors. The material continuously adapts to background content, light conditions, and user interactions, creating depth and hierarchy between foreground controls and background content. **Key Characteristics:** - **Lensing**: Bends and concentrates light in real-time (vs. traditional blur that scatters light) - **Materialization**: Elements appear by gradually modulating light bending - **Fluidity**: Gel-like flexibility with instant touch responsiveness - **Morphing**: Dynamic transformation between control states - **Adaptivity**: Multi-layer composition adjusting to content, color scheme, and size --- ## Part 1: Foundation & Basics ### 1.1 Core Concepts **Design Philosophy** Liquid Glass is exclusively for the **navigation layer** that floats above app content. Never apply to content itself (lists, tables, media). This maintains clear visual hierarchy: content remains primary while controls provide functional overlay. **Material Variants** | Variant | Use Case | Transparency | Adaptivity | |---------|----------|--------------|------------| | `.regular` | Default for most UI | Medium | Full - adapts to any content | | `.clear` | Media-rich backgrounds | High | Limited - requires dimming layer | | `.identity` | Conditional disable | None | N/A - no effect applied | **When to Use Each Variant:** - **Regular**: Toolbars, buttons, navigation bars, tab bars, standard controls - **Clear**: Small floating controls over photos/maps with bold foreground content - **Identity**: Conditional toggling (e.g., `glassEffect(isEnabled ? .regular : .identity)`) **Design Requirements for Clear Variant** (all must be met): 1. Element sits over media-rich content 2. Content won't be negatively affected by dimming layer 3. Content above glass is bold and bright ### 1.2 Basic Implementation **Simple Glass Effect** ```swift import SwiftUI struct BasicGlassView: View { var body: some View { Text("Hello, Liquid Glass!") .padding() .glassEffect() // Default: .regular variant, .capsule shape } } ``` **With Explicit Parameters** ```swift Text("Custom Glass") .padding() .glassEffect(.regular, in: .capsule, isEnabled: true) ``` **API Signature** ```swift func glassEffect( _ glass: Glass = .regular, in shape: S = DefaultGlassEffectShape, isEnabled: Bool = true ) -> some View ``` ### 1.3 Glass Type Modifiers **Core Structure** ```swift struct Glass { static var regular: Glass static var clear: Glass static var identity: Glass func tint(_ color: Color) -> Glass func interactive() -> Glass } ``` **Tinting** ```swift // Basic tint Text("Tinted") .padding() .glassEffect(.regular.tint(.blue)) // With opacity Text("Subtle Tint") .padding() .glassEffect(.regular.tint(.purple.opacity(0.6))) ``` **Purpose**: Convey semantic meaning (primary action, state), NOT decoration. Use selectively for call-to-action only. **Interactive Modifier** (iOS only) ```swift Button("Tap Me") { // action } .glassEffect(.regular.interactive()) ``` **Behaviors Enabled:** - Scaling on press - Bouncing animation - Shimmering effect - Touch-point illumination that radiates to nearby glass - Response to tap and drag gestures **Method Chaining** ```swift .glassEffect(.regular.tint(.orange).interactive()) .glassEffect(.clear.interactive().tint(.blue)) // Order doesn't matter ``` ### 1.4 Custom Shapes **Available Shapes** ```swift // Capsule (default) .glassEffect(.regular, in: .capsule) // Circle .glassEffect(.regular, in: .circle) // Rounded Rectangle .glassEffect(.regular, in: RoundedRectangle(cornerRadius: 16)) // Container-concentric (aligns with container corners) .glassEffect(.regular, in: .rect(cornerRadius: .containerConcentric)) // Ellipse .glassEffect(.regular, in: .ellipse) // Custom shape conforming to Shape protocol struct CustomShape: Shape { func path(in rect: CGRect) -> Path { // Custom path logic } } .glassEffect(.regular, in: CustomShape()) ``` **Corner Concentricity** Maintains perfect alignment between elements and containers across devices: ```swift // Automatically matches container/window corners RoundedRectangle(cornerRadius: .containerConcentric, style: .continuous) ``` ### 1.5 Text & Icons with Glass **Text Rendering** ```swift Text("Glass Text") .font(.title) .bold() .foregroundStyle(.white) // High contrast for legibility .padding() .glassEffect() ``` Text on glass automatically receives vibrant treatment - adjusts color, brightness, saturation based on background. **Icon Rendering** ```swift Image(systemName: "heart.fill") .font(.largeTitle) .foregroundStyle(.white) .frame(width: 60, height: 60) .glassEffect(.regular.interactive()) ``` **Labels** ```swift Label("Settings", systemImage: "gear") .labelStyle(.iconOnly) .padding() .glassEffect() ``` ### 1.6 Accessibility Support **Automatic Adaptation** - No code changes required: - **Reduced Transparency**: Increases frosting for clarity - **Increased Contrast**: Stark colors and borders - **Reduced Motion** (improved in 26.4): Tones down animations and elastic effects; the 26.4 release made this "more reliably" dampen Liquid Glass-specific animations - **iOS 26.1+ Tinted Mode**: User-controlled opacity increase (Settings → Display & Brightness → Liquid Glass). Choices are **Clear** (default) and **Tinted** (more opaque) - **iOS 26.2+ Lock Screen clock**: Long-press the Lock Screen → Customize → tap the clock for **Glass** or **Solid** rendering; 26.4 added an opacity slider - **iOS 26.4+ Reduce Bright Effects**: Settings → Accessibility → Display & Text Size — "minimizes highlighting and flashing when interacting with onscreen elements, such as buttons or the keyboard" > **Gotcha**: The Display & Brightness → Liquid Glass menu only unlocks when **Reduce Transparency** is OFF — the two settings are mutually exclusive in the UI. **Environment Values** ```swift @Environment(\.accessibilityReduceTransparency) var reduceTransparency @Environment(\.accessibilityReduceMotion) var reduceMotion var body: some View { Text("Accessible") .padding() .glassEffect(reduceTransparency ? .identity : .regular) } ``` **Best Practice**: Let system handle accessibility automatically. Don't override unless absolutely necessary. --- ## Part 2: Intermediate Techniques ### 2.1 GlassEffectContainer **Purpose** - Combines multiple Liquid Glass shapes into unified composition - Improves rendering performance by sharing sampling region - Enables morphing transitions between glass elements - **Critical Rule**: Glass cannot sample other glass; container provides shared sampling region **Basic Usage** ```swift GlassEffectContainer { HStack(spacing: 20) { Image(systemName: "pencil") .frame(width: 44, height: 44) .glassEffect(.regular.interactive()) Image(systemName: "eraser") .frame(width: 44, height: 44) .glassEffect(.regular.interactive()) } } ``` **With Spacing Control** ```swift GlassEffectContainer(spacing: 40.0) { // Glass elements within 40 points will morph together ForEach(icons) { icon in IconView(icon) .glassEffect() } } ``` **Spacing Parameter**: Controls morphing threshold - elements within this distance visually blend and morph together during transitions. **API Signature** ```swift struct GlassEffectContainer: View { init(spacing: CGFloat? = nil, @ViewBuilder content: () -> Content) init(@ViewBuilder content: () -> Content) } ``` ### 2.2 Morphing Transitions with glassEffectID **Requirements for Morphing:** 1. Elements in same `GlassEffectContainer` 2. Each view has `glassEffectID` with shared namespace 3. Views conditionally shown/hidden trigger morphing 4. Animation applied to state changes **Basic Morphing Setup** ```swift struct MorphingExample: View { @State private var isExpanded = false @Namespace private var namespace var body: some View { GlassEffectContainer(spacing: 30) { Button(isExpanded ? "Collapse" : "Expand") { withAnimation(.bouncy) { isExpanded.toggle() } } .glassEffect() .glassEffectID("toggle", in: namespace) if isExpanded { Button("Action 1") { } .glassEffect() .glassEffectID("action1", in: namespace) Button("Action 2") { } .glassEffect() .glassEffectID("action2", in: namespace) } } } } ``` **API Signature** ```swift func glassEffectID( _ id: ID, in namespace: Namespace.ID ) -> some View ``` **Advanced Morphing Pattern - Expandable Action Menu** ```swift struct ActionButtonsView: View { @State private var showActions = false @Namespace private var namespace var body: some View { ZStack { Image("background") .resizable() .ignoresSafeArea() GlassEffectContainer(spacing: 30) { VStack(spacing: 30) { if showActions { actionButton("rotate.right") .glassEffectID("rotate", in: namespace) } HStack(spacing: 30) { if showActions { actionButton("circle.lefthalf.filled") .glassEffectID("contrast", in: namespace) } actionButton(showActions ? "xmark" : "slider.horizontal.3") { withAnimation(.bouncy) { showActions.toggle() } } .glassEffectID("toggle", in: namespace) if showActions { actionButton("flip.horizontal") .glassEffectID("flip", in: namespace) } } if showActions { actionButton("crop") .glassEffectID("crop", in: namespace) } } } } } @ViewBuilder func actionButton(_ systemImage: String, action: (() -> Void)? = nil) -> some View { Button { action?() } label: { Image(systemName: systemImage) .frame(width: 44, height: 44) } .buttonStyle(.glass) .buttonBorderShape(.circle) } } ``` ### 2.3 Glass Button Styles **Button Style Types** | Style | Appearance | Use Case | |-------|------------|----------| | `.glass` | Translucent, see-through | Secondary actions | | `.glassProminent` | Opaque, no background show-through | Primary actions | **Basic Implementation** ```swift // Secondary action Button("Cancel") { } .buttonStyle(.glass) // Primary action Button("Save") { } .buttonStyle(.glassProminent) .tint(.blue) ``` **With Customization** ```swift Button("Action") { } .buttonStyle(.glass) .tint(.purple) .controlSize(.large) .buttonBorderShape(.circle) ``` **Available Control Sizes** ```swift .controlSize(.mini) .controlSize(.small) .controlSize(.regular) // Default .controlSize(.large) .controlSize(.extraLarge) // New in iOS 26 ``` **Border Shapes** ```swift .buttonBorderShape(.capsule) // Default .buttonBorderShape(.roundedRectangle(radius: 8)) .buttonBorderShape(.circle) ``` ### 2.4 Toolbar Integration **Automatic Glass Styling** Toolbars automatically receive Liquid Glass treatment in iOS 26: ```swift NavigationStack { ContentView() .toolbar { ToolbarItem(placement: .cancellationAction) { Button("Cancel", systemImage: "xmark") { } } ToolbarItem(placement: .confirmationAction) { Button("Done", systemImage: "checkmark") { } } } } ``` **Automatic Behaviors:** - Prioritizes symbols over text - `.confirmationAction` automatically gets `.glassProminent` style - Floating glass appearance - Grouped layouts with visual separation **Toolbar Grouping with Spacing** ```swift .toolbar { ToolbarItemGroup(placement: .topBarTrailing) { Button("Draw", systemImage: "pencil") { } Button("Erase", systemImage: "eraser") { } } ToolbarSpacer(.fixed, spacing: 20) // New in iOS 26 ToolbarItem(placement: .topBarTrailing) { Button("Save", systemImage: "checkmark") { } .buttonStyle(.glassProminent) } } ``` **ToolbarSpacer Types** ```swift ToolbarSpacer(.fixed, spacing: 20) // Fixed space ToolbarSpacer(.flexible) // Flexible space (pushes items apart) ``` ### 2.5 TabView with Liquid Glass **Basic TabView** Automatically adopts Liquid Glass when compiled with Xcode 26: ```swift TabView { Tab("Home", systemImage: "house") { HomeView() } Tab("Settings", systemImage: "gear") { SettingsView() } } ``` **Search Tab Role** Creates floating search button at bottom-right (reachability optimization): ```swift struct ContentView: View { @State private var searchText = "" var body: some View { TabView { Tab("Home", systemImage: "house") { HomeView() } Tab("Search", systemImage: "magnifyingglass", role: .search) { NavigationStack { SearchView() } } } .searchable(text: $searchText) } } ``` **Tab Bar Minimize Behavior** ```swift TabView { // tabs... } .tabBarMinimizeBehavior(.onScrollDown) // Collapses during scroll ``` **Options:** - `.automatic` - System determines - `.onScrollDown` - Minimizes when scrolling - `.never` - Always full size **Tab View Bottom Accessory** Adds persistent glass view above tab bar: ```swift TabView { // tabs... } .tabViewBottomAccessory { HStack { Image(systemName: "play.fill") Text("Now Playing") Spacer() } .padding() } ``` ### 2.6 Sheet Presentations **Automatic Glass Background** Sheets in iOS 26 automatically receive inset Liquid Glass background: ```swift .sheet(isPresented: $showSheet) { SheetContent() .presentationDetents([.medium, .large]) } ``` **Sheet Morphing from Toolbar** ```swift struct ContentView: View { @Namespace private var transition @State private var showInfo = false var body: some View { NavigationStack { ContentView() .toolbar { ToolbarItem(placement: .bottomBar) { Button("Info", systemImage: "info") { showInfo = true } .matchedTransitionSource(id: "info", in: transition) } } .sheet(isPresented: $showInfo) { InfoSheet() .navigationTransition(.zoom(sourceID: "info", in: transition)) } } } } ``` **Gotchas worth knowing:** - **`NavigationStack` (or `NavigationSplitView`) is required** even when the source button lives in a bottom bar — the zoom transition is wired through the navigation context (Nil Coalescing). - **The source doesn't have to be in the bottom bar.** Any `.matchedTransitionSource` view works as the morph origin — toolbar buttons, custom floating buttons, even cells (SerialCoder). - **Declare `@Namespace` once at the parent**, then reuse it across child views — per-screen namespaces fight each other and break the zoom continuity (Sagar Unagar). - **The transition can still be glitchy in early betas.** As of iOS 26 beta 3, Apple was still ironing out edge cases on rotation and quick re-presentation. ### 2.7 NavigationSplitView Integration **Automatic Floating Sidebar** ```swift NavigationSplitView { List(items) { item in NavigationLink(item.name, value: item) } .navigationTitle("Items") } detail: { DetailView() } ``` Sidebar automatically receives floating Liquid Glass with ambient reflection. --- ## Part 3: Advanced Implementation ### 3.1 glassEffectUnion **Purpose**: Manually combine glass effects that are too distant to merge via spacing alone. **API Signature** ```swift func glassEffectUnion( id: ID, namespace: Namespace.ID ) -> some View ``` **Example** ```swift struct UnionExample: View { @Namespace var controls var body: some View { GlassEffectContainer { VStack(spacing: 0) { Button("Edit") { } .buttonStyle(.glass) .glassEffectUnion(id: "tools", namespace: controls) Spacer().frame(height: 100) // Large gap Button("Delete") { } .buttonStyle(.glass) .glassEffectUnion(id: "tools", namespace: controls) } } } } ``` **Apple Maps Pattern** (vertically stacked dual-button control) The most-cited reference implementation is Donny Wals' Apple Maps clone — a single glass shape containing two action buttons (zoom in / zoom out). The trick is overriding the default tint to keep the shape looking like a single piece of frosted hardware: ```swift GlassEffectContainer { VStack(spacing: 1) { Button { } label: { Image(systemName: "plus") } .glassEffectUnion(id: "zoom", namespace: ns) Divider().frame(width: 24) Button { } label: { Image(systemName: "minus") } .glassEffectUnion(id: "zoom", namespace: ns) } .tint(Color.white.opacity(0.8)) // Override default tint } ``` **Rules of thumb:** - `glassEffectUnion` is for **distance-spanning grouping** — when two glass surfaces are too far apart for the container's `spacing` to merge them automatically. - Set the **same `id`** on every view that should share a shape; different `id`s in the same namespace render as separate shapes. - Apple's own documentation on `glassEffectUnion` is thin — community writeups (Donny Wals, artemnovichkov's recovered Xcode docs) are currently the most complete references. ### 3.2 glassEffectTransition **API Signature** ```swift func glassEffectTransition( _ transition: GlassEffectTransition, isEnabled: Bool = true ) -> some View enum GlassEffectTransition { case identity // No changes case matchedGeometry // Matched geometry transition (default) case materialize // Material appearance transition } ``` ### 3.3 Complex Multi-Element Compositions **Floating Action Cluster** ```swift struct FloatingActionCluster: View { @State private var isExpanded = false @Namespace private var namespace let actions = [ ("home", Color.purple), ("pencil", Color.blue), ("message", Color.green), ("envelope", Color.orange) ] var body: some View { ZStack { ContentView() VStack { Spacer() HStack { Spacer() cluster .padding() } } } } var cluster: some View { GlassEffectContainer(spacing: 20) { VStack(spacing: 12) { if isExpanded { ForEach(actions, id: \.0) { action in actionButton(action.0, color: action.1) .glassEffectID(action.0, in: namespace) } } Button { withAnimation(.bouncy(duration: 0.4)) { isExpanded.toggle() } } label: { Image(systemName: isExpanded ? "xmark" : "plus") .font(.title2.bold()) .frame(width: 56, height: 56) } .buttonStyle(.glassProminent) .buttonBorderShape(.circle) .tint(.blue) .glassEffectID("toggle", in: namespace) } } } func actionButton(_ icon: String, color: Color) -> some View { Button { // action } label: { Image(systemName: icon) .font(.title3) .frame(width: 48, height: 48) } .buttonStyle(.glass) .buttonBorderShape(.circle) .tint(color) } } ``` ### 3.4 Symbol Effects Integration **Smooth Icon Transitions** ```swift struct SymbolGlassButton: View { @State private var isLiked = false var body: some View { Button { isLiked.toggle() } label: { Image(systemName: isLiked ? "heart.fill" : "heart") .font(.title) .frame(width: 60, height: 60) } .glassEffect(.regular.interactive()) .contentTransition(.symbolEffect(.replace)) .tint(isLiked ? .red : .primary) } } ``` ### 3.5 Performance Optimization **Best Practices:** 1. **Always Use GlassEffectContainer for Multiple Elements** ```swift // ✅ GOOD - Efficient rendering GlassEffectContainer { HStack { Button("Edit") { }.glassEffect() Button("Delete") { }.glassEffect() } } // ❌ BAD - Inefficient, inconsistent sampling HStack { Button("Edit") { }.glassEffect() Button("Delete") { }.glassEffect() } ``` 2. **Conditional Glass with .identity** ```swift .glassEffect(shouldShowGlass ? .regular : .identity) ``` No layout recalculation when toggling. 3. **Limit Continuous Animations** Let glass rest in steady states. 4. **Test on Older Devices** - iPhone 11-13: May show lag - Profile with Instruments for GPU usage - Monitor thermal performance ### 3.6 Dynamic Glass Adaptation **Automatic Color Scheme Switching** Glass automatically adapts between light/dark based on background: ```swift ScrollView { Color.black.frame(height: 400) // Glass becomes light Color.white.frame(height: 400) // Glass becomes dark } .safeAreaInset(edge: .bottom) { ControlPanel() .glassEffect() // Automatically adapts } ``` **Adaptive Behaviors:** - **Small elements** (nav bars, tab bars): Flip between light/dark - **Large elements** (sidebars, menus): Adapt but don't flip (would be jarring) - **Shadows**: Opacity increases over text, decreases over white backgrounds - **Tint**: Adjusts hue, brightness, saturation for legibility ### 3.7 Gesture Integration **Drag Gesture with Glass** ```swift struct DraggableGlassButton: View { @State private var offset = CGSize.zero @State private var isDragging = false var body: some View { Button("Drag Me") { } .glassEffect(.regular.interactive()) .offset(offset) .scaleEffect(isDragging ? 1.1 : 1.0) .gesture( DragGesture() .onChanged { value in isDragging = true offset = value.translation } .onEnded { _ in withAnimation(.spring(response: 0.3, dampingFraction: 0.6)) { isDragging = false offset = .zero } } ) } } ``` --- ## Part 4: Edge Cases & Advanced Topics ### 4.1 Handling Complex Background Content **The Readability Problem** Liquid Glass over busy, colorful, or animated content causes readability issues. **Solution 1: Gradient Fade** ```swift struct TabBarFadeModifier: ViewModifier { let fadeLocation: CGFloat = 0.4 let opacity: CGFloat = 0.85 let backgroundColor: Color = Color(.systemBackground) func body(content: Content) -> some View { GeometryReader { geometry in ZStack { content if geometry.safeAreaInsets.bottom > 10 { let dynamicHeight = geometry.safeAreaInsets.bottom VStack { Spacer() LinearGradient( gradient: Gradient(stops: [ .init(color: .clear, location: 0.0), .init(color: backgroundColor.opacity(opacity), location: fadeLocation) ]), startPoint: .top, endPoint: .bottom ) .frame(height: dynamicHeight) .allowsHitTesting(false) .offset(y: geometry.safeAreaInsets.bottom) } } } } } } extension View { func deliquify() -> some View { self.modifier(TabBarFadeModifier()) } } ``` **Solution 2: Strategic Tinting** ```swift .glassEffect(.regular.tint(.purple.opacity(0.8))) ``` **Solution 3: Background Dimming** ```swift ZStack { BackgroundImage() .overlay(Color.black.opacity(0.3)) // Subtle dimming GlassControls() .glassEffect(.clear) } ``` ### 4.2 Glass Layering Guidelines **Avoid Glass-on-Glass** ```swift // ❌ BAD - Confusing visual hierarchy VStack { HeaderView().glassEffect() ContentView().glassEffect() FooterView().glassEffect() } // ✅ GOOD - Clear separation ZStack { ContentView() // No glass HeaderView().glassEffect() // Single floating layer } ``` **Proper Layering Philosophy:** 1. **Content layer** (bottom) - No glass 2. **Navigation layer** (middle) - Liquid Glass 3. **Overlay layer** (top) - Vibrancy and fills on glass ### 4.3 Platform Differences | Platform | Adaptations | |----------|-------------| | **iOS** | Floating tab bars, bottom search placement | | **iPadOS** | Floating sidebars, ambient reflection, larger shadows | | **macOS** | Concentric window corners, adaptive search bars, taller controls | | **watchOS** | Location-aware widgets, fluid navigation | | **tvOS** | Focused glass effects, directional highlights | **Minimum Requirements:** - iOS 26.0+, iPadOS 26.0+, macOS Tahoe (26.0)+, watchOS 26.0+, tvOS 26.0+, visionOS 26.0+ - Xcode 26.0+ **Device Support:** - iOS 26: iPhone 11 or iPhone SE (2nd gen) or later - Older devices: Receive frosted glass fallback with reduced effects ### 4.4 Backward Compatibility **Automatic Adoption** Simply recompile with Xcode 26 - no code changes required for basic adoption. **Temporary Opt-Out** (expires iOS 27) ```xml UIDesignRequiresCompatibility ``` **Custom Compatibility Extension** ```swift extension View { @ViewBuilder func glassedEffect( in shape: some Shape = Capsule(), interactive: Bool = false ) -> some View { if #available(iOS 26.0, *) { let glass = interactive ? Glass.regular.interactive() : .regular self.glassEffect(glass, in: shape) } else { self .background( shape .fill(.ultraThinMaterial) .overlay( LinearGradient( colors: [.white.opacity(0.3), .clear], startPoint: .topLeading, endPoint: .bottomTrailing ) ) .overlay(shape.stroke(.white.opacity(0.2), lineWidth: 1)) ) } } } ``` ### 4.5 UIKit Integration **UIGlassEffect** ```swift import UIKit let glassEffect = UIGlassEffect( glass: .regular, isInteractive: true ) let effectView = UIVisualEffectView(effect: glassEffect) effectView.frame = CGRect(x: 0, y: 0, width: 200, height: 50) view.addSubview(effectView) ``` **UIKit + SwiftUI Hybrid Adoption** Most production iOS apps aren't pure SwiftUI — they're UIKit shells hosting SwiftUI screens (or vice versa). The Grow team's writeup with Fatbobman is the deepest public reference on the precise traps that bite hybrid apps porting to Liquid Glass: ```swift // 1. Stop UIBarButtonItem from drawing its own background // when the SwiftUI content inside already has .glassEffect() let item = UIBarButtonItem(customView: hostingController.view) item.hidesSharedBackground = true // 2. Let the UIHostingController size itself from its SwiftUI content // — otherwise the toolbar item collapses to zero width hostingController.sizingOptions = .intrinsicContentSize // 3. Defend dynamic-width nav items against truncation // when the title or label changes length at runtime hostingController.view.setContentCompressionResistancePriority( .required, for: .horizontal ) ``` **Why each step matters:** - **`hidesSharedBackground = true`** — without it, you get *two* glass surfaces stacked: the system bar background and your inner SwiftUI glass. This produces the visual "glass-on-glass" artifact Apple's HIG warns against. - **`sizingOptions = .intrinsicContentSize`** — `UIHostingController` defaults to filling the available bounds. Bar items need to size to their content, not their container. - **Content compression resistance** — bar buttons whose width changes (e.g., switching between "Edit" and "Cancel") will be truncated by the system layout pass unless you raise their priority. **`CABackdropLayer` caveats** — Apple's underlying glass effect uses `CABackdropLayer` under the hood. Side effects worth knowing: it samples the layer tree behind it, so layers parented above your glass (overlays, snapshot views) will *not* appear in the refraction; and toggling `isHidden` on a backdrop layer mid-animation can cause a one-frame flash. **Core Text "glass text" trick** — for marketing/headline surfaces where you want the type itself to be glass, the Grow team uses Core Text to extract glyph paths, then applies `.glassEffect(.clear, in: glyphPath)`: ```swift let line = CTLineCreateWithAttributedString(attributedString) let glyphPath = /* extract via CTRunGetGlyphs + CTFontCreatePathForGlyph */ SomeView().glassEffect(.clear, in: Path(glyphPath)) ``` This is expensive — cache the resulting path; don't recompute per frame. ### 4.6 Known Issues & Workarounds **Issue 1: Interactive Shape Mismatch** **Problem**: `.glassEffect(.regular.interactive(), in: RoundedRectangle())` responds with Capsule shape **Workaround**: Use `.buttonStyle(.glass)` for buttons instead **Issue 2: glassProminent Circle Artifacts** **Workaround**: ```swift Button("Action") { } .buttonStyle(.glassProminent) .buttonBorderShape(.circle) .clipShape(Circle()) // Fixes artifacts ``` ### 4.7 Performance Implications **Battery Impact** - iOS 26: 13% battery drain vs. 1% in iOS 18 (iPhone 16 Pro Max testing) - Increased heat generation - Higher CPU/GPU load on older devices **Optimization Strategies:** 1. Use `GlassEffectContainer` for multiple elements 2. Limit continuous animations 3. Let glass rest in steady states 4. Test on 3-year-old devices 5. Profile with Instruments --- ## Part 5: Best Practices & Design Patterns ### 5.1 When to Use Glass vs Traditional UI **Use Liquid Glass for:** - Navigation bars and toolbars - Tab bars and bottom accessories - Floating action buttons - Sheets, popovers, and menus - Context-sensitive controls - System-level alerts **Avoid Liquid Glass for:** - Content layer (lists, tables, media) - Full-screen backgrounds - Scrollable content - Stacked glass layers - Every UI element **Apple's Guidance**: "Liquid Glass is best reserved for the navigation layer that floats above the content of your app." ### 5.2 Design Principles **Hierarchy** - Content = Primary - Glass controls = Secondary functional layer - Overlay fills/vibrancy = Tertiary **Contrast Management** - Maintain 4.5:1 minimum contrast ratio - Test legibility across backgrounds - Use vibrant text on glass - Add subtle borders for definition **Tinting Philosophy** - Use selectively for primary actions - Avoid tinting everything - Tint conveys meaning, not decoration ### 5.3 Anti-Patterns **Visual Anti-Patterns:** 1. Overuse - glass everywhere 2. Glass-on-glass stacking 3. Content layer glass 4. Tinting everything 5. Breaking concentricity **Technical Anti-Patterns:** 1. Custom opacity bypassing accessibility 2. Ignoring safe areas 3. Hard-coded color schemes 4. Mixing Regular and Clear variants 5. Multiple separate glass effects without container **Usability Anti-Patterns:** 1. Busy backgrounds without dimming 2. Insufficient contrast 3. Excessive animations 4. Breaking iOS conventions 5. Prioritizing aesthetics over usability --- ## Part 6: API Quick Reference ### Core Modifiers ```swift // Basic glass effect .glassEffect() -> some View .glassEffect(_ glass: Glass, in shape: some Shape, isEnabled: Bool) -> some View // Glass effect ID for morphing .glassEffectID(_ id: ID, in namespace: Namespace.ID) -> some View // Glass effect union .glassEffectUnion(id: ID, namespace: Namespace.ID) -> some View // Glass effect transition .glassEffectTransition(_ transition: GlassEffectTransition, isEnabled: Bool) -> some View ``` ### Glass Types ```swift Glass.regular // Default adaptive variant Glass.clear // High transparency variant Glass.identity // No effect // Modifiers .tint(_ color: Color) // Add color tint .interactive() // Enable interactive behaviors (iOS only) ``` ### Button Styles ```swift .buttonStyle(.glass) // Translucent glass button .buttonStyle(.glassProminent) // Opaque prominent button ``` ### Container ```swift GlassEffectContainer { // Content with .glassEffect() views } GlassEffectContainer(spacing: CGFloat) { // Content with controlled morphing distance } ``` ### Toolbar & Navigation ```swift .toolbar { } // Automatic glass styling ToolbarSpacer(.fixed, spacing: CGFloat) ToolbarSpacer(.flexible) .badge(Int) // Badge count .sharedBackgroundVisibility(.hidden) // Hide glass background ``` ### TabView ```swift .tabBarMinimizeBehavior(.onScrollDown) .tabBarMinimizeBehavior(.automatic) .tabBarMinimizeBehavior(.never) .tabViewBottomAccessory { } ``` --- ## Part 7: Point-Release Changelog A version-by-version log of every Liquid Glass-relevant change between WWDC 2025 and May 2026. Useful when you need to know "what's the minimum iOS that supports X?" without grepping release notes. ### iOS 26.0 — September 2025 Initial release. The full Liquid Glass API surface as shipped at WWDC 2025: - `glassEffect()`, `glassEffectID`, `glassEffectUnion`, `glassEffectTransition` - `GlassEffectContainer` - `.buttonStyle(.glass)`, `.buttonStyle(.glassProminent)` - `Glass.regular`, `Glass.clear`, `Glass.identity` - TabView accessory, `tabBarMinimizeBehavior` - `matchedTransitionSource` + `.navigationTransition(.zoom)` (technically iOS 18, but received the Liquid Glass coat of paint here) - UIKit `UIGlassEffect`, `UIBarButtonItem.hidesSharedBackground` - AppKit `NSGlassEffectView`, `NSGlassEffectContainerView` ### iOS 26.1 — November 2025 - **Settings → Display & Brightness → Liquid Glass** added with two options: **Clear** (default) and **Tinted** (more opaque/contrasty). - Mutually exclusive with **Reduce Transparency** — the menu only appears when Reduce Transparency is OFF. ### iOS 26.2 — 15 December 2025 Three Liquid Glass-relevant changes: - **Popup menu / control animations** updated to match the original WWDC25 demo (more bounce, more fluidity than 26.0–26.1 shipped with). - **Lock Screen clock customization** gained **Glass** and **Solid** options (long-press → Customize → tap clock). Directly addresses the most-cited Lock Screen legibility complaint. - **Measure app's Level tool** refreshed with Liquid Glass — numbers interact with the grid. Context: Bloomberg's Mark Gurman reported on 3 Dec 2025 that **Alan Dye** — VP of Human Interface Design since 2015, the design VP most identified with Liquid Glass — left Apple to become Chief Design Officer at Meta on 31 Dec 2025. He was succeeded by **Stephen Lemay**, a 26-year Apple design veteran. Tim Cook described Lemay as having "played a key role in the design of every major Apple interface since 1999." ### iOS 26.3 — 11 February 2026 **No Liquid Glass-specific changes.** This was the EU DMA-driven release: Transfer to Android, Limit Precise Location, NFC for third-party accessory pairing, and 29 security patches. **iOS 26.3.1** (4 March 2026) added Studio Display XDR support and bug fixes — also no Liquid Glass changes. ### iOS 26.4 — April 2026 - **New Accessibility toggle: Reduce Bright Effects** (Settings → Accessibility → Display & Text Size). Apple's description: "Minimize highlighting and flashing when interacting with onscreen elements, such as buttons or the keyboard." Specifically targets the bright "flash" response on tap. - **Improved Reduce Motion** — now "more reliably reduces the animations of Liquid Glass for users sensitive to screen motion" (Apple release notes). - **Lock Screen clock opacity slider** added for finer time-customization control. - Apple's updated Liquid Glass **design gallery** published on 6 April 2026 with 19 new third-party reference apps (AllTrails, CARROT Weather, Fantastical, Trello, Monzo, Le Monde, Channel 4, GoodLinks, etc.). ### iOS 26.5 — May 2026 (public beta) Minor; **no announced Liquid Glass changes**. Apple is reportedly already focused on iOS 27. ### Looking forward — WWDC 2026 (8 June 2026) Per Bloomberg/Mark Gurman's _Power On_ newsletter (10 May 2026), confirmed via MacRumors, Macworld, MacDailyNews, and 9to5Mac: - **macOS 27 will receive a "slight redesign"** — tuned shadows, opacity, and transparency behavior. Gurman's framing: _"the changes to macOS are meant to make Liquid Glass look the way Apple's design team intended it to from the start. Last year's operating systems didn't necessarily suffer from design problems, I'm told, but rather a not-completely-baked implementation from Apple's software engineering team."_ - **Liquid Glass is not going away.** AppleInsider's one-year review and the macOS 27 leak both confirm the strategy: per-surface dials (Tinted, Reduce Bright Effects, Lock Screen opacity slider) rather than a system-wide opt-out. - **iOS 27 / iPadOS 27** are expected to receive interface tweaks of similar scope. - Apple may add a **system-wide Liquid Glass intensity slider** (currently controls are per-surface). Treat all of the above as forward-looking until the WWDC keynote. --- ## Part 8: Web & Cross-Platform Approximations Liquid Glass has triggered an ecosystem of CSS+SVG and shader-based reproductions for the web, Flutter, Vue, and Android. **These are visual approximations only** — not Apple APIs, not subject to Apple's HIG, and they don't run real Metal shaders against the composited framebuffer the way the native effect does. If you're building a marketing site or cross-platform app and want the *look*, this section is for you. If you're an iOS engineer building a real app, skip it — use the native APIs. ### The Three Reference Web Implementations | Resource | Approach | Notes | |----------|----------|-------| | **kube.io** — "Liquid Glass in the Browser: Refraction with CSS and SVG" | Physics-based 127-sample radial displacement maps derived from Snell's Law | The most rigorous. Pre-computes the displacement map; Chromium-only because it uses SVG filters as `backdrop-filter`. | | **ekino-france** — "Liquid Glass in CSS (and SVG)" | Linear-gradient displacement map + blurred mask + chromatic aberration | Honest about limitations. Good middle-ground complexity. | | **LogRocket** — "How to create Liquid Glass effects with CSS and SVG" | React + Tailwind tutorial with Figma asset workflow | GSAP-driven animated demo on CodePen. Easiest to adapt. | ### Open-Source Libraries - **`nikdelvin/liquid-glass`** — Production-style web components. Safari fallback to glassmorphism. - **`archisvaze/liquid-glass`** — Interactive demo with adjustable IOR, bezel width, thickness; WebGL fallback for non-Chromium. - **`shuding/liquid-glass`** — Pure JS+SVG. - **`mks2508/liquid-svg-glass`** — React library with chromatic aberration. - **Flutter**: `colbymaloy/flutter_liquid_glass`, `liquid_glass_renderer` (shader-based). - **Android**: `AndroidLiquidGlassView` — actual refraction + dispersion via custom shader. ### Things to internalize before shipping a web "Liquid Glass" effect 1. **These are approximations only.** Apple's implementation runs Metal shaders against the actual composited framebuffer with real-time adaptive shadow + specular highlights driven by device motion. The web versions are stylized displacement maps. 2. **Browser support is Chromium-dominated.** SVG filters as `backdrop-filter` are not reliable in Safari or Firefox — ironic given the effect's origin. 3. **Per-element displacement maps don't scale to dynamic content sizes** without rebuild cost. This is a known performance ceiling for the SVG approach. 4. **Don't call it "Liquid Glass" in a way that implies Apple endorsement** if your app ships outside Apple's platforms. The name has trademark sensitivity and the gallery placement matters to Apple. ### Sources that invent APIs Watch out for low-trust content. A few SEO-driven posts (e.g. some swiftprogramming.com tutorials) reference modifiers like `.background(.liquidGlassUltra)` that **do not exist in real SwiftUI**. Verify any API claim against Apple's official docs before adopting it. --- ## Part 9: Community Reception Liquid Glass has had a genuinely bimodal reception. Both poles are worth knowing about — partly so you can make informed design choices, partly because users will arrive at your app with strong priors in either direction. ### The praise - **ADC 2026 wins**. Liquid Glass took home four awards at the 105th ADC Annual Awards (announced 14 May 2026): a **Gold Cube** in "Interactive / UX / UI," a **Silver Cube** in "Experiential Design / Digital Experiences," and two **Bronze Cubes** in "Experiential Design / Consumer Experience" and "Innovation." Apple won six Gold Cubes total at the ceremony. - **"Makes the iPhone feel faster"** — the most-repeated positive sentiment in MacRumors threads and Apple Community discussions. The fluid morphing and touch-point illumination create a sense of responsiveness even when underlying performance is unchanged. - **Macworld**: "Sorry haters, Liquid Glass on the Mac isn't going anywhere." Confirms macOS 27 will refine, not roll back. - **Apple's design gallery has grown** from 16 apps at launch to 35+ across the original and 2026 refresh galleries — meaningful third-party adoption, not just Apple's own apps. ### The critique - **Legibility on dark mode**. PiunikaWeb's "The Liquid Glass glow in iOS 26" and the MacRumors forum thread "Apple need to tweak the Liquid Glass Design badly" both single out dark-mode glare on the Lock Screen and Control Center as the strongest legibility complaint. Apple's response was the 26.2 Lock Screen clock Glass/Solid options. - **Animation lag on older devices**. iPhone 11–13 users report visible frame drops during heavy Liquid Glass animations. The Reduce Motion improvements in 26.4 help, but the underlying compute cost is real. - **Battery impact**. Early third-party testing (iPhone 16 Pro Max) suggested ~13% battery drain attributable to Liquid Glass rendering vs. ~1% baseline on iOS 18. Apple has not published official numbers; treat third-party measurements as directional. - **"Barbie phone" aesthetics**. A subset of users find the bright, candy-like refraction tonally inappropriate for a productivity device. This is taste, but it's a real signal. - **Mandatory adoption**. AppleInsider's one-year review argues Apple has signaled it will not provide a system-wide opt-out switch — the per-surface dials (Tinted, Reduce Bright Effects) are the strategy. Users who want flat UI will not get one. - **Gallery aspirationalism**. Rahul Roy's critique — "Apple's Liquid Glass Gallery Is a Showcase of 12 Apps in a Store of Millions" — argues the gallery functions as implicit pressure on developers, particularly cross-platform/Flutter/React Native teams who can't easily replicate the native effect. ### What this means for your app - **Design for both ends of the accessibility spectrum.** Users with Reduce Transparency, Increased Contrast, Reduce Motion, or Reduce Bright Effects enabled are not edge cases — they're a meaningful slice of your install base. - **Don't over-tint.** The "Barbie phone" complaint is downstream of decorative tint use. Reserve `.tint()` for primary action and state, never for branding alone. - **Performance-test on a 3-year-old device.** If your app drops frames on iPhone 13, you're contributing to the negative narrative, not the positive one. - **Honour the user's chosen dial.** Read `accessibilityReduceTransparency` and `accessibilityReduceMotion` and respect them — Apple's own apps now do so more aggressively after 26.4. --- ## Resources ### Official Apple Documentation **WWDC 2025 Sessions:** - Session 219: Meet Liquid Glass - Session 323: Build a SwiftUI app with the new design - Session 356: Get to know the new design system **Sample Code:** - Landmarks: Building an app with Liquid Glass - Refining toolbar glass effects ### Community Resources **GitHub Repositories:** - mertozseven/LiquidGlassSwiftUI - GonzaloFuentes28/LiquidGlassCheatsheet - GetStream/awesome-liquid-glass - artemnovichkov/iOS-26-by-Examples - artemnovichkov/xcode-26-system-prompts — recovered Xcode 26 internal docs for SwiftUI/UIKit/AppKit/WidgetKit Liquid Glass - carolhsiaoo/awesome-liquid-glass — cross-platform curated list (native + Figma + web + Flutter + Vue) - jaikrishnavj/LiquidGlass-Handbook — 12+ interactive demo chapters - sanjaynela/liquid-glass-ios-system — best `#available` fallback pattern **Developer Blogs — Foundational:** - Donny Wals: ["Designing custom UI with Liquid Glass on iOS 26"](https://www.donnywals.com/designing-custom-ui-with-liquid-glass-on-ios-26/) — layer-not-base philosophy - Donny Wals: ["Grouping Liquid Glass components using glassEffectUnion"](https://www.donnywals.com/grouping-liquid-glass-components-using-glasseffectunion-on-ios-26/) — best `glassEffectUnion` reference - Donny Wals: ["Exploring tab bars on iOS 26 with Liquid Glass"](https://www.donnywals.com/exploring-tab-bars-on-ios-26-with-liquid-glass/) - Swift with Majid: Glassifying tabs / toolbars / custom views series - Create with Swift: ["Exploring a new visual language: Liquid Glass"](https://www.createwithswift.com/exploring-a-new-visual-language-liquid-glass/) **Developer Blogs — Pattern-focused:** - Natalia Panferova (Nil Coalescing): ["Presenting Liquid Glass sheets in SwiftUI on iOS 26"](https://nilcoalescing.com/blog/PresentingLiquidGlassSheetsInSwiftUI/) — canonical sheet-morph recipe - Gabriel Theodoropoulos (SerialCoder): morphing glassEffectID + sheets-out-of-buttons walkthroughs - Itsuki (Level Up Coding): ["SwiftUI: Liquid Glass. From Basic to (A Little) Advance"](https://levelup.gitconnected.com/swiftui-liquid-glass-from-basic-to-a-little-advance-cdef4e4c5b90) — best intuition pump for container spacing - Fatbobman + Grow team: ["Grow on iOS 26 — Liquid Glass Adaptation in UIKit + SwiftUI Hybrid Architecture"](https://fatbobman.com/en/posts/grow-on-ios26/) — deepest hybrid writeup - Khoa Pham (onmyway133): ["How to morph liquid glass view transition"](https://onmyway133.com/posts/how-to-morph-liquid-glass-view-transition/) - Douglas Hill: ["Zoom transitions"](https://douglashill.co/zoom-transitions/) — UIKit-side caveats - Sagar Unagar: ["Zoom Navigation Transitions in SwiftUI"](https://www.sagarunagar.com/blog/swiftui-zoom-navigation-transitions/) — production app pattern **Web / Cross-Platform References** (approximations only — not Apple APIs): - [kube.io — Liquid Glass in the Browser: Refraction with CSS and SVG](https://kube.io/blog/liquid-glass-css-svg/) - [ekino-france — Liquid Glass in CSS (and SVG)](https://medium.com/ekino-france/liquid-glass-in-css-and-svg-839985fcb88d) - [LogRocket — How to create Liquid Glass effects with CSS and SVG](https://blog.logrocket.com/how-create-liquid-glass-effects-css-and-svg/) **Critique & Sentiment:** - AppleInsider: "iOS 26 review one year later" (May 2026) — definitive one-year retrospective - AppleInsider: "Liquid Glass is controversial, but it just won a prestigious design award" (14 May 2026) — ADC 2026 wins - MacRumors editorial: "iOS 26's Liquid Glass Design Draws Criticism From Users" (Sept 2025) — best summary of initial backlash - PiunikaWeb: "The Liquid Glass glow in iOS 26 is here and so is the backlash" — strongest dark-mode legibility critique - Macworld: "Sorry haters, Liquid Glass on the Mac isn't going anywhere" — macOS 27 direction --- **Key Takeaways:** 1. Reserve Liquid Glass for navigation layer only 2. Always use GlassEffectContainer for multiple glass elements 3. Test extensively with accessibility settings enabled 4. Monitor performance on older devices 5. Respect user preferences and system settings 6. Prioritize content legibility over visual effects 7. Use morphing transitions for smooth state changes 8. Follow Apple's design guidelines and HIG ---